
6.Spring Cloud初相識-------Zool路由
阿新 • • 發佈:2018-12-17
前言:
在生產環境中,我們不可能將每個服務的真實資訊暴漏出去,因為這樣太不安全。
我們會選擇使用路由代理真實的服務資訊,由它負責轉發給真實的服務。
新建一個Zool:
1.新增依賴
<?xml version="1.0" encoding="UTF-8"?>
<project xmlns="http://maven.apache.org/POM/4.0.0" xmlns:xsi="http://www.w3.org/2001/XMLSchema-instance"
    xsi:schemaLocation="http://maven.apache.org/POM/4.0.0 http://maven.apache.org/xsd/maven-4.0.0.xsd">
    <modelVersion>4.0.0</modelVersion>

    <groupId>com.xm.cloud</groupId>
    <artifactId>cl_zool</artifactId>
    <version>0.0.1-SNAPSHOT</version>
    <packaging>jar</packaging>

    <name>cl_zool</name>
    <description>This is a Web about springcloud</description>

    <parent>
        <groupId>org.springframework.boot</groupId>
        <artifactId>spring-boot-starter-parent</artifactId>
        <version>2.0.6.RELEASE</version>
        <relativePath/> <!-- lookup parent from repository -->
    </parent>

    <properties>
        <project.build.sourceEncoding>UTF-8</project.build.sourceEncoding>
        <project.reporting.outputEncoding>UTF-8</project.reporting.outputEncoding>
        <java.version>1.8</java.version>
        <spring-cloud.version>Finchley.SR2</spring-cloud.version>
    </properties>

    <dependencies>
        <dependency>
            <groupId>org.springframework.cloud</groupId>
            <artifactId>spring-cloud-starter-netflix-eureka-client</artifactId>
        </dependency>
        <dependency>
            <groupId>org.springframework.cloud</groupId>
            <artifactId>spring-cloud-starter-netflix-zuul</artifactId>
        </dependency>

        <dependency>
            <groupId>org.springframework.boot</groupId>
            <artifactId>spring-boot-starter-test</artifactId>
            <scope>test</scope>
        </dependency>
    </dependencies>

    <dependencyManagement>
        <dependencies>
            <dependency>
                <groupId>org.springframework.cloud</groupId>
                <artifactId>spring-cloud-dependencies</artifactId>
                <version>${spring-cloud.version}</version>
                <type>pom</type>
                <scope>import</scope>
            </dependency>
        </dependencies>
    </dependencyManagement>

    <build>
        <plugins>
            <plugin>
                <groupId>org.springframework.boot</groupId>
                <artifactId>spring-boot-maven-plugin</artifactId>
            </plugin>
        </plugins>
    </build>


</project>
2.修改配置
server.port=9090
spring.application.name=cl-zool-gateway

eureka.client.service-url.defaultZone=http://127.0.0.1:7001/eureka/
#服務名統一字首
zuul.prefix=/xm
#所有服務真實名稱隱藏
zuul.ignored-services="*"
zuul.routes.myHello.service-id=CL-HELLO-PRODUCER
zuul.routes.myHello.path=/myHello/**
3.開啟註解
package com.xm.cloud;

import org.springframework.boot.SpringApplication;
import org.springframework.boot.autoconfigure.SpringBootApplication;
import org.springframework.cloud.client.discovery.EnableDiscoveryClient;
import org.springframework.cloud.netflix.zuul.EnableZuulProxy;

@EnableDiscoveryClient
@EnableZuulProxy
@SpringBootApplication
public class ClZoolApplication {

    public static void main(String[] args) {
        SpringApplication.run(ClZoolApplication.class, args);
    }
}
測試:
開啟eureka7001、服務生產者8001、路由zool9090
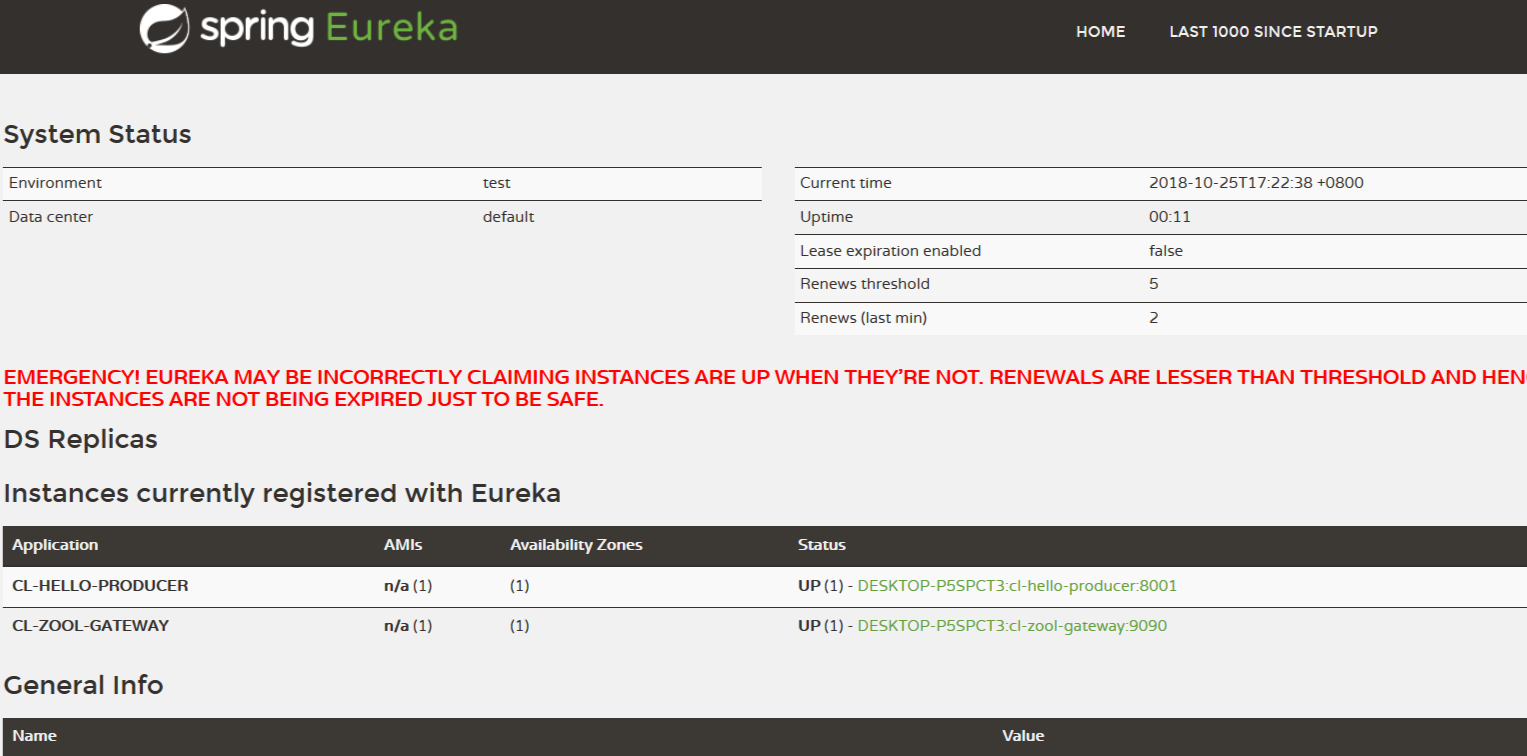
1.訪問Eureka客戶端:
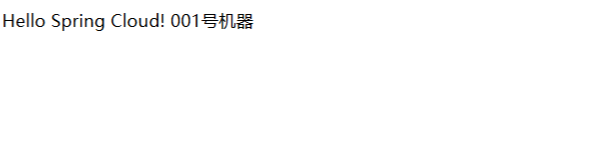
2.訪問服務生產者localhost:8001/hello
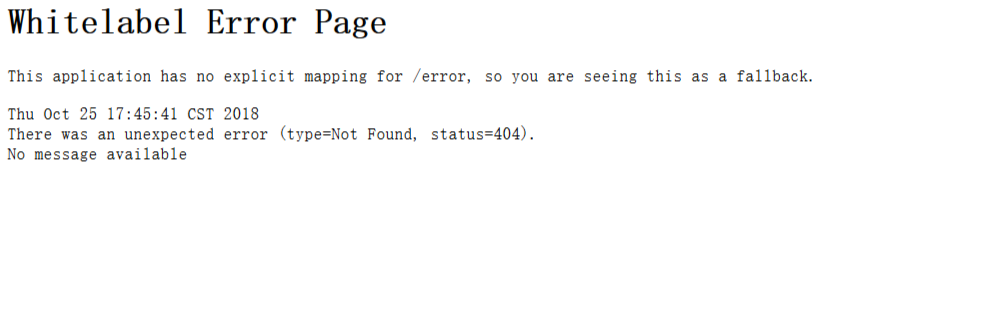
3.訪問不加字首真實服務名稱http://localhost:9090/CL-HELLO-PRODUCER/hello:
4.訪問加字首真實服務名稱http://localhost:9090/xm/CL-HELLO-PRODUCER/hello:
5.訪問不加字首路由服務名稱http://localhost:9090/myHello/hello:
6.訪問加字首路由服務名稱http://localhost:9090/xm/myHello/hello: