
Bundle 資原始檔包
原文:https://www.cnblogs.com/QianChia/p/6280435.html
1、Bundle 檔案
-
Bundle 檔案,簡單理解,就是資原始檔包。我們將許多圖片、XIB、文字檔案組織在一起,打包成一個 Bundle 檔案。方便在其他專案中引用包內的資源。
-
Bundle 檔案是靜態的,也就是說,我們包含到包中的資原始檔作為一個資源包是不參加專案編譯的。也就意味著,bundle 包中不能包含可執行的檔案。它僅僅是作為資源,被解析成為特定的 2 進位制資料。
2、製作 Bundle 檔案
-
1、新建 Bundle 專案
-
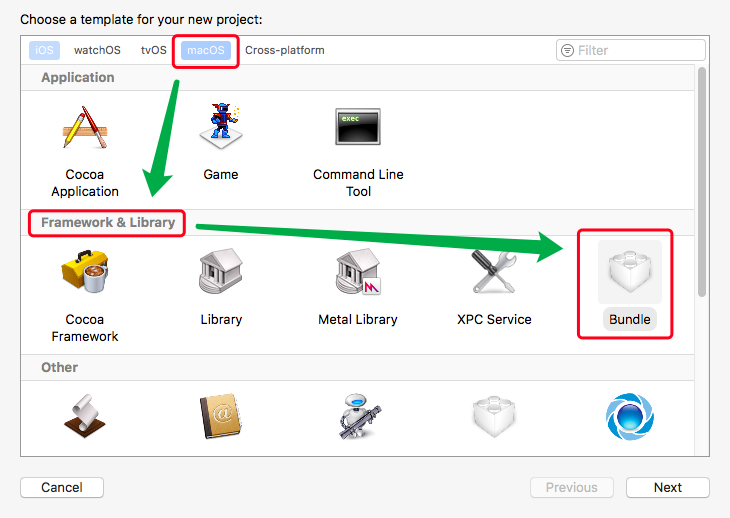
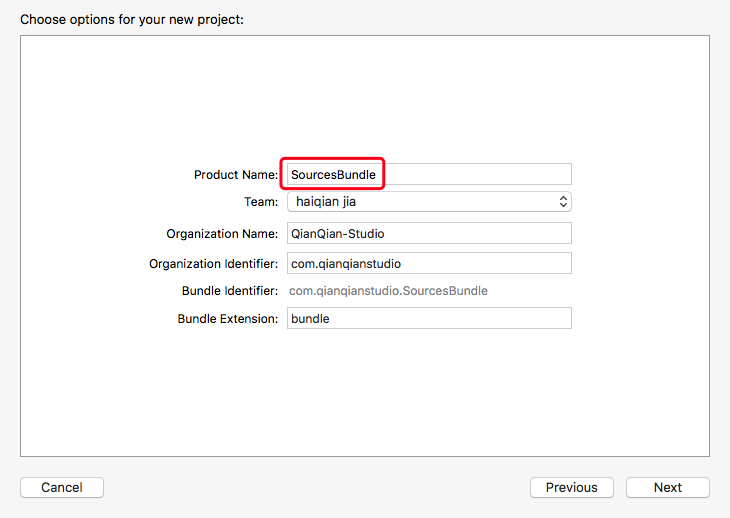
建立名為 SourcesBundle(最後要生成的 Bundle 檔名稱)的工程,注意 Bundle 預設是 macOS 系統的,Xcode 高版本中需要在 macOS => Framework & Library 選項下找到。

-
-
2、修改 Bundle 配置資訊
-
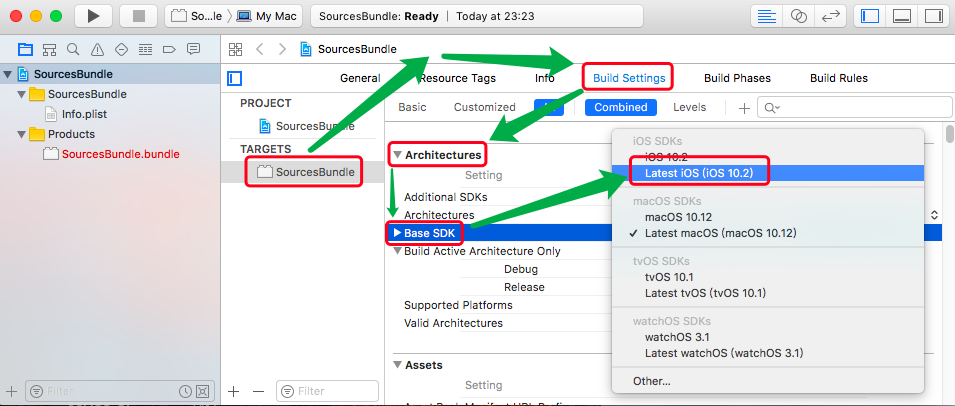
因為 Bundle 預設是 macOS 系統的,所有需要修改他的資訊,修改成 iOS 系統。
-
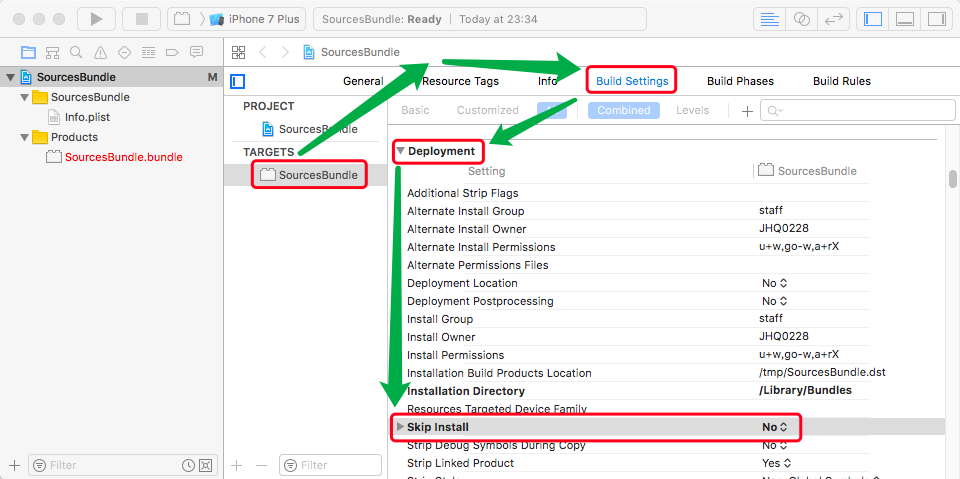
設定 Build Setting 中的
COMBINE_HIDPI_IMAGES為 NO,否則 Bundle 中的圖片就是 tiff 格式了。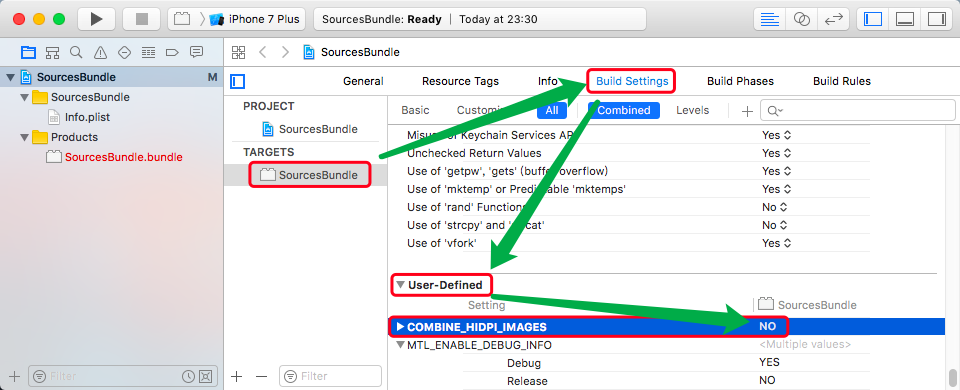
-
-
3、可選配置
-
作為資源包,僅僅需要編譯就好,無需安裝相關的配置,設定 Skip Install 為 YES。同樣要刪除安裝路徑 Installation Directory 的值。

-
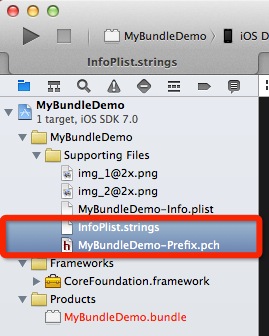
該資源包的 pch 檔案和 strings 檔案是可以刪除的。
-
-
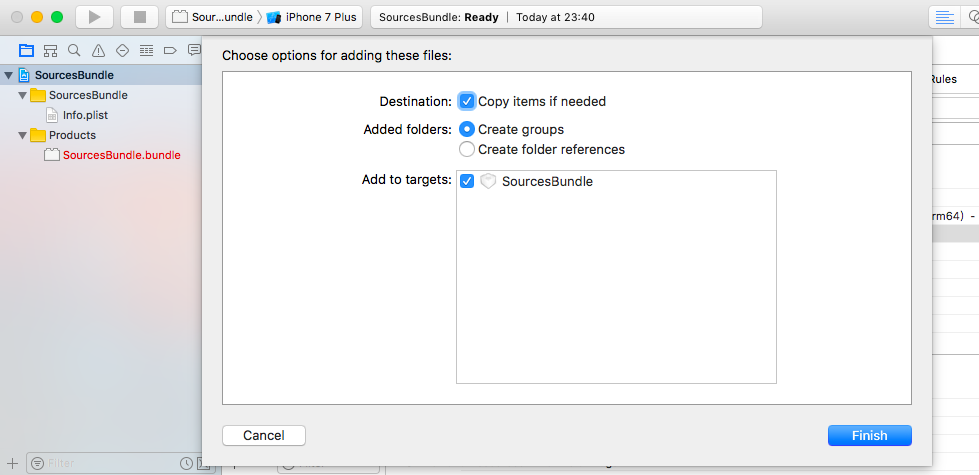
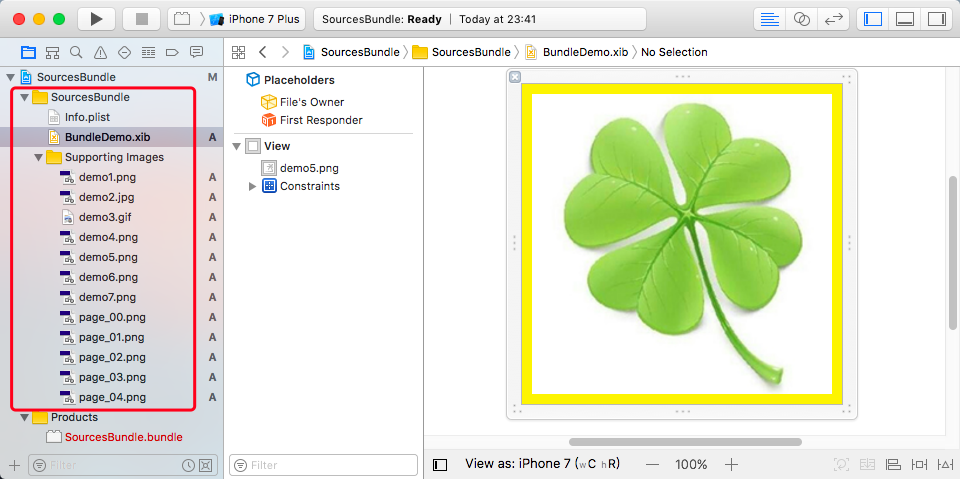
4、新增檔案
-
將資原始檔或資料夾拖動到工程中的 SourcesBundle 資料夾下面。
-
-
5、編譯生成 Bundle 檔案
-
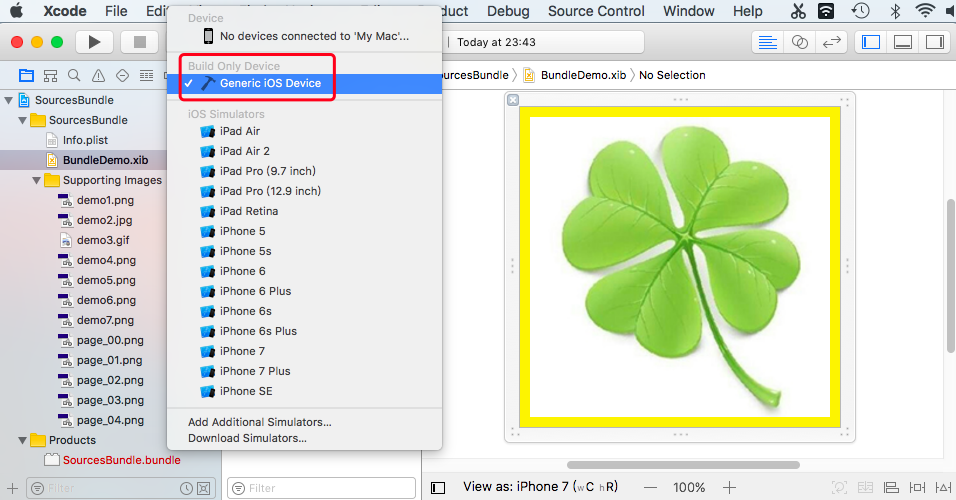
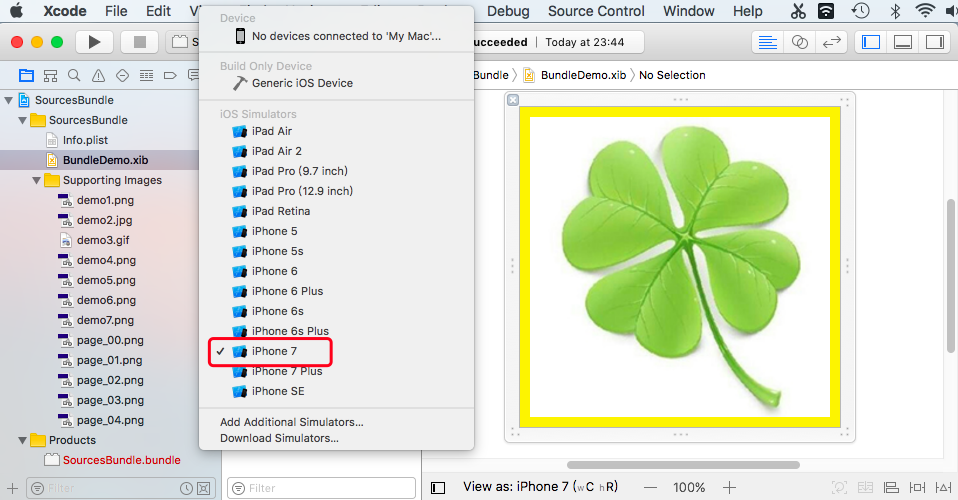
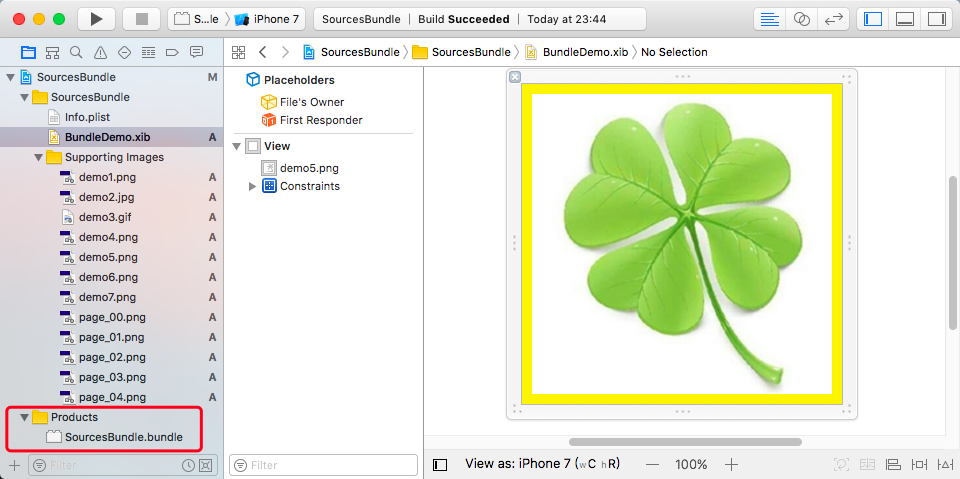
我們分別選擇 Generic iOS Device 和任意一個模擬器各編譯一次,編譯完後,我們會看到工程中 Products 資料夾下的 SourcesBundle.bundle 由紅色變成了黑色。
-
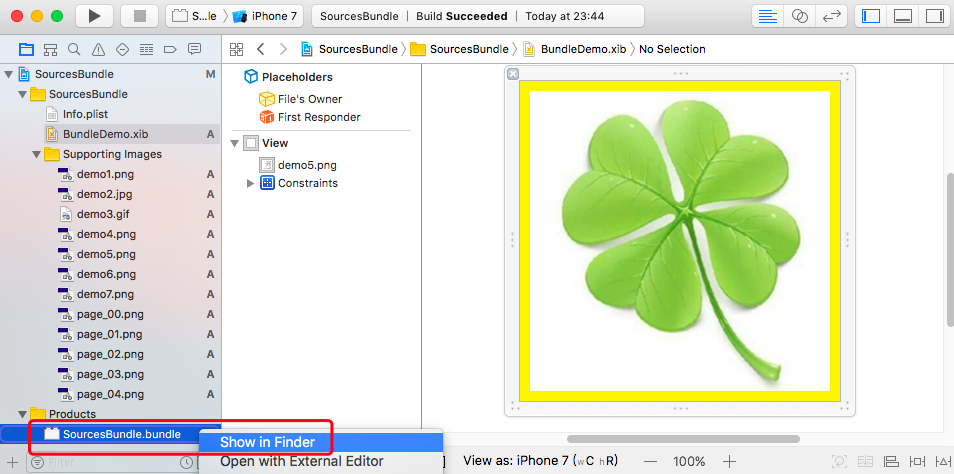
然後 show in finder,看看生成的檔案。我們看到它為真機和模擬器都生成了 .bundle 資原始檔。
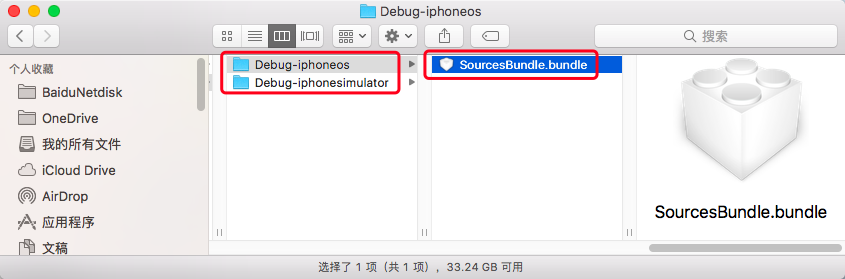
-
選中 .bundle 檔案右鍵 顯示包內容,我們可以看到之前拖拽到工程中的資原始檔都在其中。
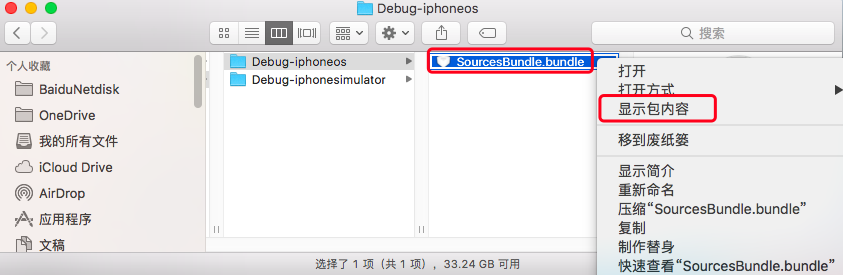
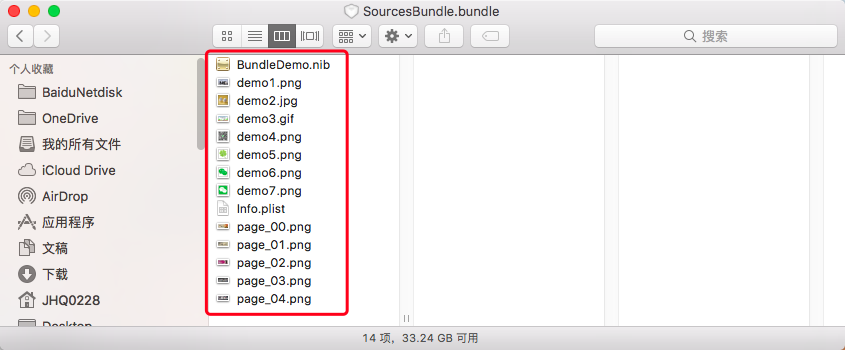
-
3、使用 Bundle 檔案
-
將生成的真機(Debug-iphoneos)Bundle 資原始檔拖拽到需要使用的工程中。
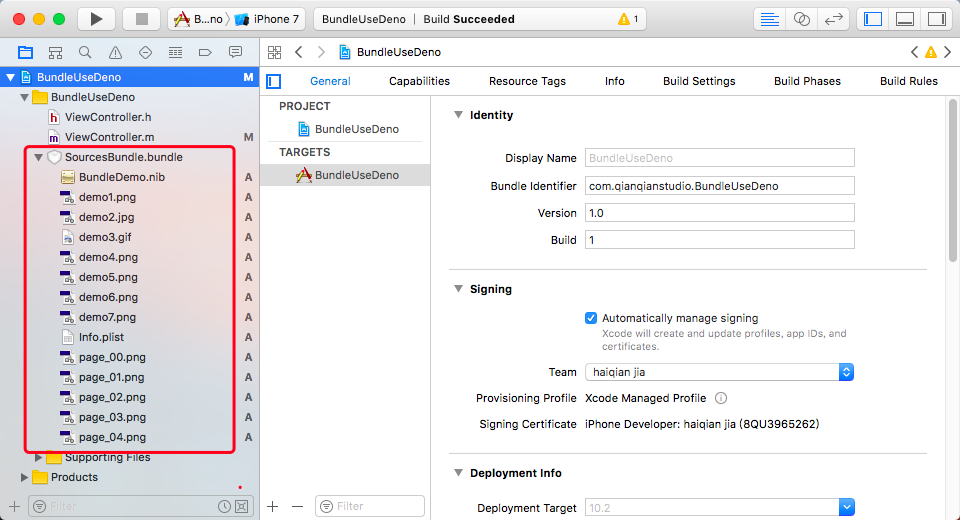
-
1、載入 Bundle 中的 xib 資原始檔
// 設定檔案路徑 NSString *bundlePath = [[NSBundle mainBundle] pathForResource:@"SourcesBundle" ofType:@"bundle"]; NSBundle *resourceBundle = [NSBundle bundleWithPath:bundlePath]; // 載入 nib 檔案 UINib *nib = [UINib nibWithNibName:@"BundleDemo" bundle:resourceBundle]; NSArray *viewObjs = [nib instantiateWithOwner:nil options:nil]; // 獲取 xib 檔案 UIView *view = viewObjs.lastObject; view.frame = CGRectMake(20, 50, self.view.bounds.size.width - 40, self.view.bounds.size.width - 40); [self.view addSubview:view];-
效果

-
-
2、載入 Bundle 中的圖片資原始檔
-
指定絕對路徑的形式
UIImage *image = [UIImage imageNamed:@"SourcesBundle.bundle/demo2.jpg"]; -
拼接路徑的形式
NSString *bundlePath = [[NSBundle mainBundle] pathForResource:@"SourcesBundle" ofType:@"bundle"]; NSString *imgPath= [bundlePath stringByAppendingPathComponent:@"demo4"]; UIImage *image = [UIImage imageWithContentsOfFile:imgPath]; -
巨集定義的形式
#define MYBUNDLE_NAME @"SourcesBundle.bundle" #define MYBUNDLE_PATH [[[NSBundle mainBundle] resourcePath] stringByAppendingPathComponent:MYBUNDLE_NAME] #define MYBUNDLE [NSBundle bundleWithPath:MYBUNDLE_PATH] NSString *imgPath= [MYBUNDLE_PATH stringByAppendingPathComponent:@"demo4"]; UIImage *image = [UIImage imageWithContentsOfFile:imgPath]; -
效果

-