css巧妙利用盒子---畫圖(二)
接著上一次的css的圖畫,這次畫一些,稍微麻煩一點點的圖形~
一、 畫圖
(1)繪製五角星
這個五角星是畫的是真的好醜 還需要微調一下。繪製五角星,主要是思想。有可能會想到好幾個盒子,也就是中間一個五邊形,其餘都是三角形。但是其實可以超簡單的!!! 主要是量化圖形
具體程式碼:
 .star{
            position:relative;
            width:0px;
            margin:100px auto;
            border-right:160px solid transparent;
            border-top:80px solid red;
            border-left: 160px solid transparent;
            transform: rotate(-155deg);
        }
        .star::before{
            content:'';
            position:absolute;
            top:-87px;
            left:-145px;
            border-right:160px solid transparent;
            border-top:80px solid red;
            border-left: 160px solid transparent;
            transform: rotate(-53deg);
        }
        .star::after {
            content:'';
            position:absolute;
            top:-16px;
            left:0px;
            border-right:40px solid transparent;
            border-bottom:80px solid red;
            border-left: 40px solid transparent;
            transform: rotate(-206deg);
        }
程式碼結果:
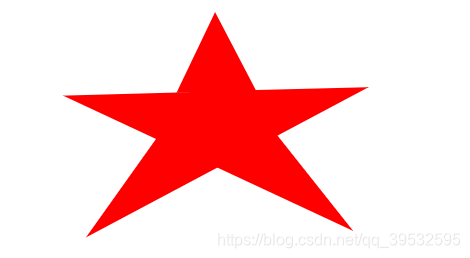
五角星只用了一個盒子以及偽元素。接下來換個顏色就知道啦。

其實就是簡單的,三個三角形,~
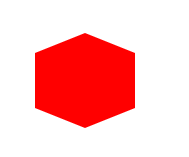
(2)繪製六邊形
六邊形是一個長方形和兩個三角形的拼接啊~
具體程式碼:
.six {
            position:relative;
            width: 100px;
            height: 55px;
            background-color:red;
            margin:100px auto;
        }
        .six::before,.six::after {
            content:'';
            position:absolute;
            border-bottom: 20px solid red;
            border-left:50px solid transparent;
            border-right:50px solid transparent;
        }
        .six::before {
            top:-20px;
        }
        .six::after{
          transform: rotate(180deg);
            top:55px;
        }
程式碼實現:
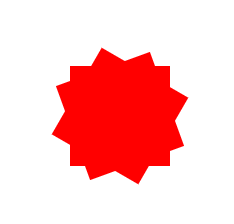
(3)十二邊形
這個就是簡單的,三個正方形的疊加,注意角度就好~
具體程式碼:
 .burst {
            position:relative;
            width: 100px;
            height: 100px;
            margin:100px auto;
            background-color: red;
        }
        .burst::before {
            content:'';
            width: 100px;
            height: 100px;
            margin:100px auto;
            background-color: red;
            position:absolute;
            top:-100px;
            left:0;
            transform: rotate(30deg);
        }
        .burst::after {
            content:'';
            width: 100px;
            height: 100px;
            margin:100px auto;
            background-color: red;
            position:absolute;
            top:-100px;
            left:0;
            transform: rotate(70deg);
        }
程式碼實現:
(4)繪製箭頭
這個箭頭,有一些複雜,主要是在位置。是一個三角形,與一個長方形的拼接。長方形需要尾端相連,並且進行彎曲,利用border-radius屬性就好。
具體程式碼:
  #curvedarrow {
             position: relative;
             width: 0;
             height: 0;
             border-top: 9px solid transparent;
             border-right: 9px solid red;
             transform: rotate(10deg);
        }
        #curvedarrow:after {
             content: "";
             position: absolute;
             border: 0 solid transparent;
             border-top: 3px solid red;
             border-radius: 20px 0 0 0;
             top: -12px;
             left: -9px;
             width: 12px;
             height: 12px;
             transform: rotate(45deg);
        }
程式碼實現:

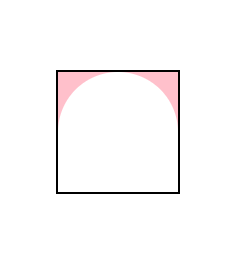
(5)不知道叫什麼
這是舍友叫我畫的~ 就是正方形裡面有一個圓形,但是隻顯示邊上的角。其實就是畫一個圓,再顯示兩個角,其餘兩個角,進行遮蓋。親測可以在上面加元素。只不過要注意元素的層級關係~
具體程式碼:
 .box {
            width: 120px;
            height: 120px;
            border:2px solid black;
            background-color:pink;
            margin:100px auto;
            /*border-right: 40px solid red;*/
            position:relative;
            transform: rotate(-90deg);
            z-index:999;
        }
        .box::after {
            content:'';
            width: 60px;
            height: 120px;
            background-color: white;
            position:absolute;
            top:0;
            left:0;

        }
        .box::before {
            content:"";
            width: 120px;
            height: 120px;
            border-radius: 50%;
            background-color:white;
            position:absolute;
            top:0px;
            left:0px;
            z-index: 1;
        }
程式碼實現:
(6)繪製桃心
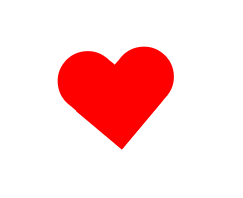
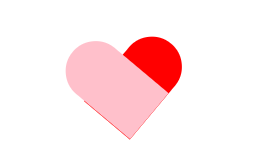
桃心啊,就是一邊圓角一邊直角,看圖就知道啦~
具體程式碼:
  #heart {
            width: 300px;
            height: 300px;
            /*background-color:black;*/
            position:relative;
            margin:100px auto;
        }
       #heart::before {
           content:'';
           width: 60px;
           height: 100px;
           background-color: red;
           position:absolute;
           top:0;
           left:0;
           border-radius:40px 40px 0 0;
           transform:rotate(40deg);
       }
        #heart::after {
            content:'';
            width: 60px;
            height: 100px;
            background-color: red;
            position:absolute;
            top:2px;
            left:-28px;
            border-radius:40px 40px 0 0;
            transform:rotate(-50deg);
        }
程式碼實現:
(7)繪製 繩子結
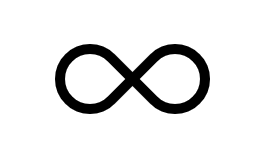
設定一邊的圓角為0 ,然後進行旋轉拼接就好啦.需要設定邊框~
具體程式碼:
 .box{
            width: 200px;
            height: 200px;
            /*background-color:red;*/
            margin: 100px auto;
            position:relative;

        }
        .box::after {
            width: 50px;
            height: 50px;
            /*設定寬高之後 才會有邊框 凹陷*/
            content:'';
            border:10px solid black;
            border-radius:38px 0 38px 38px;
            position:absolute;
            top:0;
            left:0;
            transform:rotate(45deg);
        }  .box::before {
               width: 50px;
               height: 50px;
               /*設定寬高之後 才會有邊框 凹陷*/
               content:'';
               border:10px solid black;
               border-radius:40px 0 40px 40px;
               position:absolute;
               top:0;
               left:85px;
               transform:rotate(225deg);
           }
程式碼實現:
(9)繪製鑽石
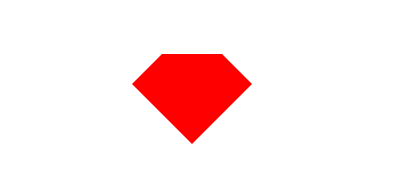
是一個梯形和三角形的拼接哦~
具體程式碼:
.diamond {
            width: 0px;
            /*height: 0;  設定寬度是為了不與瀏覽器同寬*/
            border-top:60px solid red;
            border-bottom:60px solid transparent;
            border-left:60px solid transparent;
            border-right:60px solid transparent;
            margin:100px auto;
            position:relative;
            /*三角形*/
        }
        .diamond::after {
            content:'';
            width: 60px;
            border-top:30px solid red;
            border-bottom:30px solid transparent;
            border-left:30px solid transparent;
            border-right:30px solid transparent;
            position:absolute;
            top:-120px;
            left:-60px;
            transform:rotate(180deg);

        }
程式碼實現:
(9)繪製吃豆人
一個吃豆人,有兩種方法。可以一個盒子與一個偽元素的合作,也就是偽元素遮蓋住一個邊。但是反方向想。那不是可以給四個邊框設定圓角,然後其中一個是transparent屬性啊~
具體程式碼:
 .eat{
            width: 0px;
            position:relative;
            margin:100px auto;
            /*height: 100px;*/
        }
        .eat::before {
            content:'';
            border-left:40px solid red;
            border-right:40px solid transparent;
            border-top:40px solid red;
            border-bottom:40px solid red;
            position:absolute;
            border-radius:50%;
        }
程式碼實現:

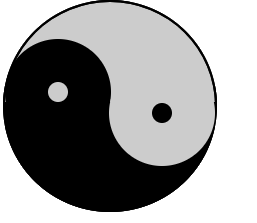
(10)繪製太極圖
emm,就是用邊框先畫一個圓,然後設定背景顏色。中間的校園就是邊框畫的哦。空心是因為寬高哦~,然後注意配色和定位就好啦
具體程式碼:
   .box{
            width: 210px;
            height: 100px;
            background-color:#ccc;
            border:2px solid black;
            border-radius:50%;
            /*此時浮上去半個圓  半圓的底色*/
            border-bottom-width:110px;
            position:relative;
        }

        /*偽類畫圓環 並且定位*/
        .box::before {
            content:'';
            position:absolute;
            top:37px;
            left:0px;
            width: 20px;
            height: 20px;
            /*background-color:red;*/
            border-radius: 50%;
            border:43px solid black;
        }
        .box::after {
            content:'';
            position:absolute;
            top:58px;
            left:104px;
            width: 20px;
            height: 20px;
            /*background-color:red;*/
            border-radius: 50%;
            border:43px solid #ccc;
        }
程式碼實現:
(11)一個鎖
很簡單的拼接~ 不說了,猜吧~

下次再來更新~~~ 還是css~~ 再畫幾個,我就去挖掘canvas了。最近還要多看看ES6!!emm~
