
Authorization In GraphQL Using Custom Schema Directives
Let’s start to explore some options for adding authentication and authorization to our GraphQL API.
Auth Check In Resolvers
An initial approach might be to inject an authorization token into the context object and then in our resolver verify the token and check the users' permissions. Or even better if we use some authorization middleware like passport.js that will inject a user object into the request. So an implementation of “is this request authenticated

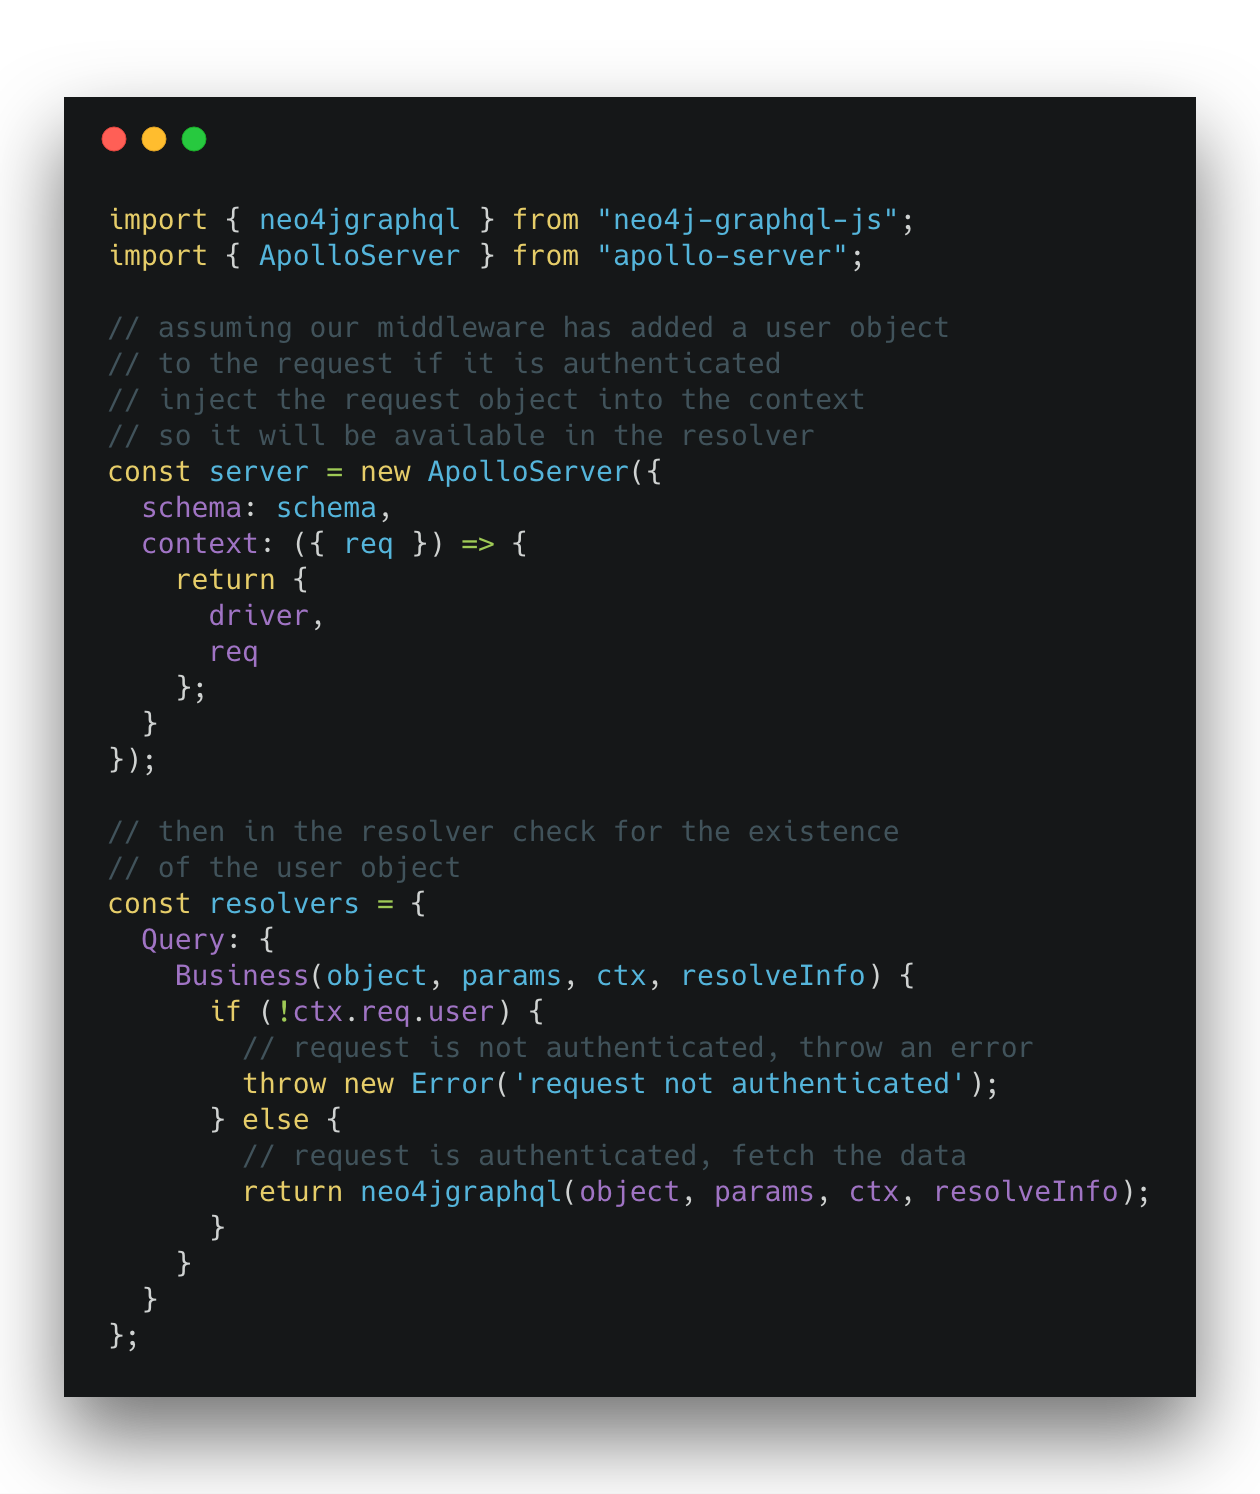
This approach works OK for prototyping, but has a few flaws. One flaw is that it forces us to bring authorization into our resolver implementations, rather than having a single source of truth for authorization. The other problem is that with many GraphQL engines (like neo4j-graphql.js) our resolvers are auto-generated for us and we don’t want to have to re-implement them just so we can handle authentication.
One way to solve that problem is with the use of middleware. Most of these GraphQL engines will support middleware so that any user-defined middleware can either return an error if an auth check fails, or inject an error object into the request for the GraphQL engine to handle. You can see an example of this approach in
A downside of this middleware approach is that it is all-or-nothing — we can error out an entire GraphQL request, but not individual fields. If a user has access to some fields, but not others we should still return the fields they are authorized to access. So there must be a better approach…
Before we explore the “better approach” for implementing authorization in our GraphQL API (spoiler alert: it involves schema directives!), let’s add our authentication service, Auth0 to our app.
Adding Auth0 And JWT Support
With Auth0 we can easily implement login flow in our app using OAuth identity providers or create email/password based accounts for our users. Once Auth0 handles sign-up and login, our application is passed a JSON Web Token (JWT) that contains cryptographically signed “claims” about the user, such as their user id and any scopes or roles that we want to assign to the user.
JSON Web Token (JWT)

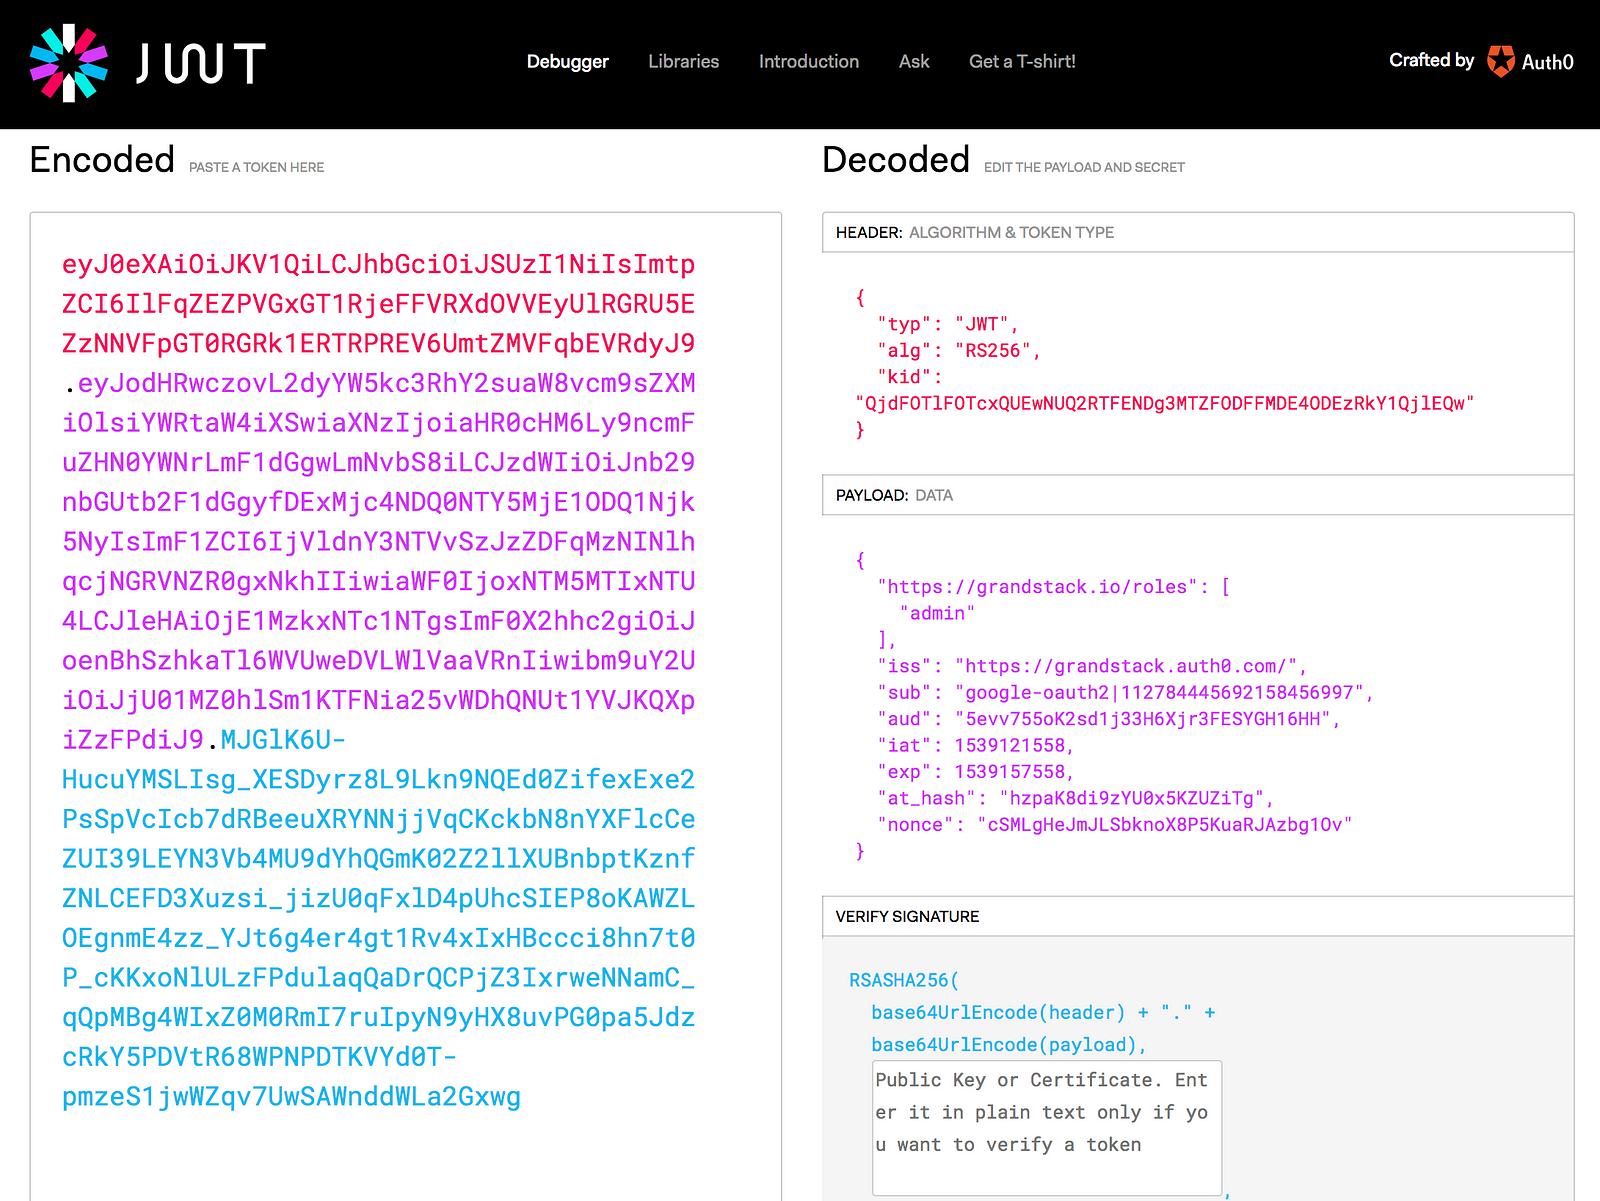
Here’s an example of a JWT provided by Auth0 after a user has gone through the login flow for our application. Note the “PAYLOAD: DATA” section in purple — these are the verified claims contained in the JWT. We’re specifically interested in the sub claim (the user id) and the roles assigned to the user, which are namespaced by our application domain:
"https://grandstack.io/roles": ["admin"]
Roles
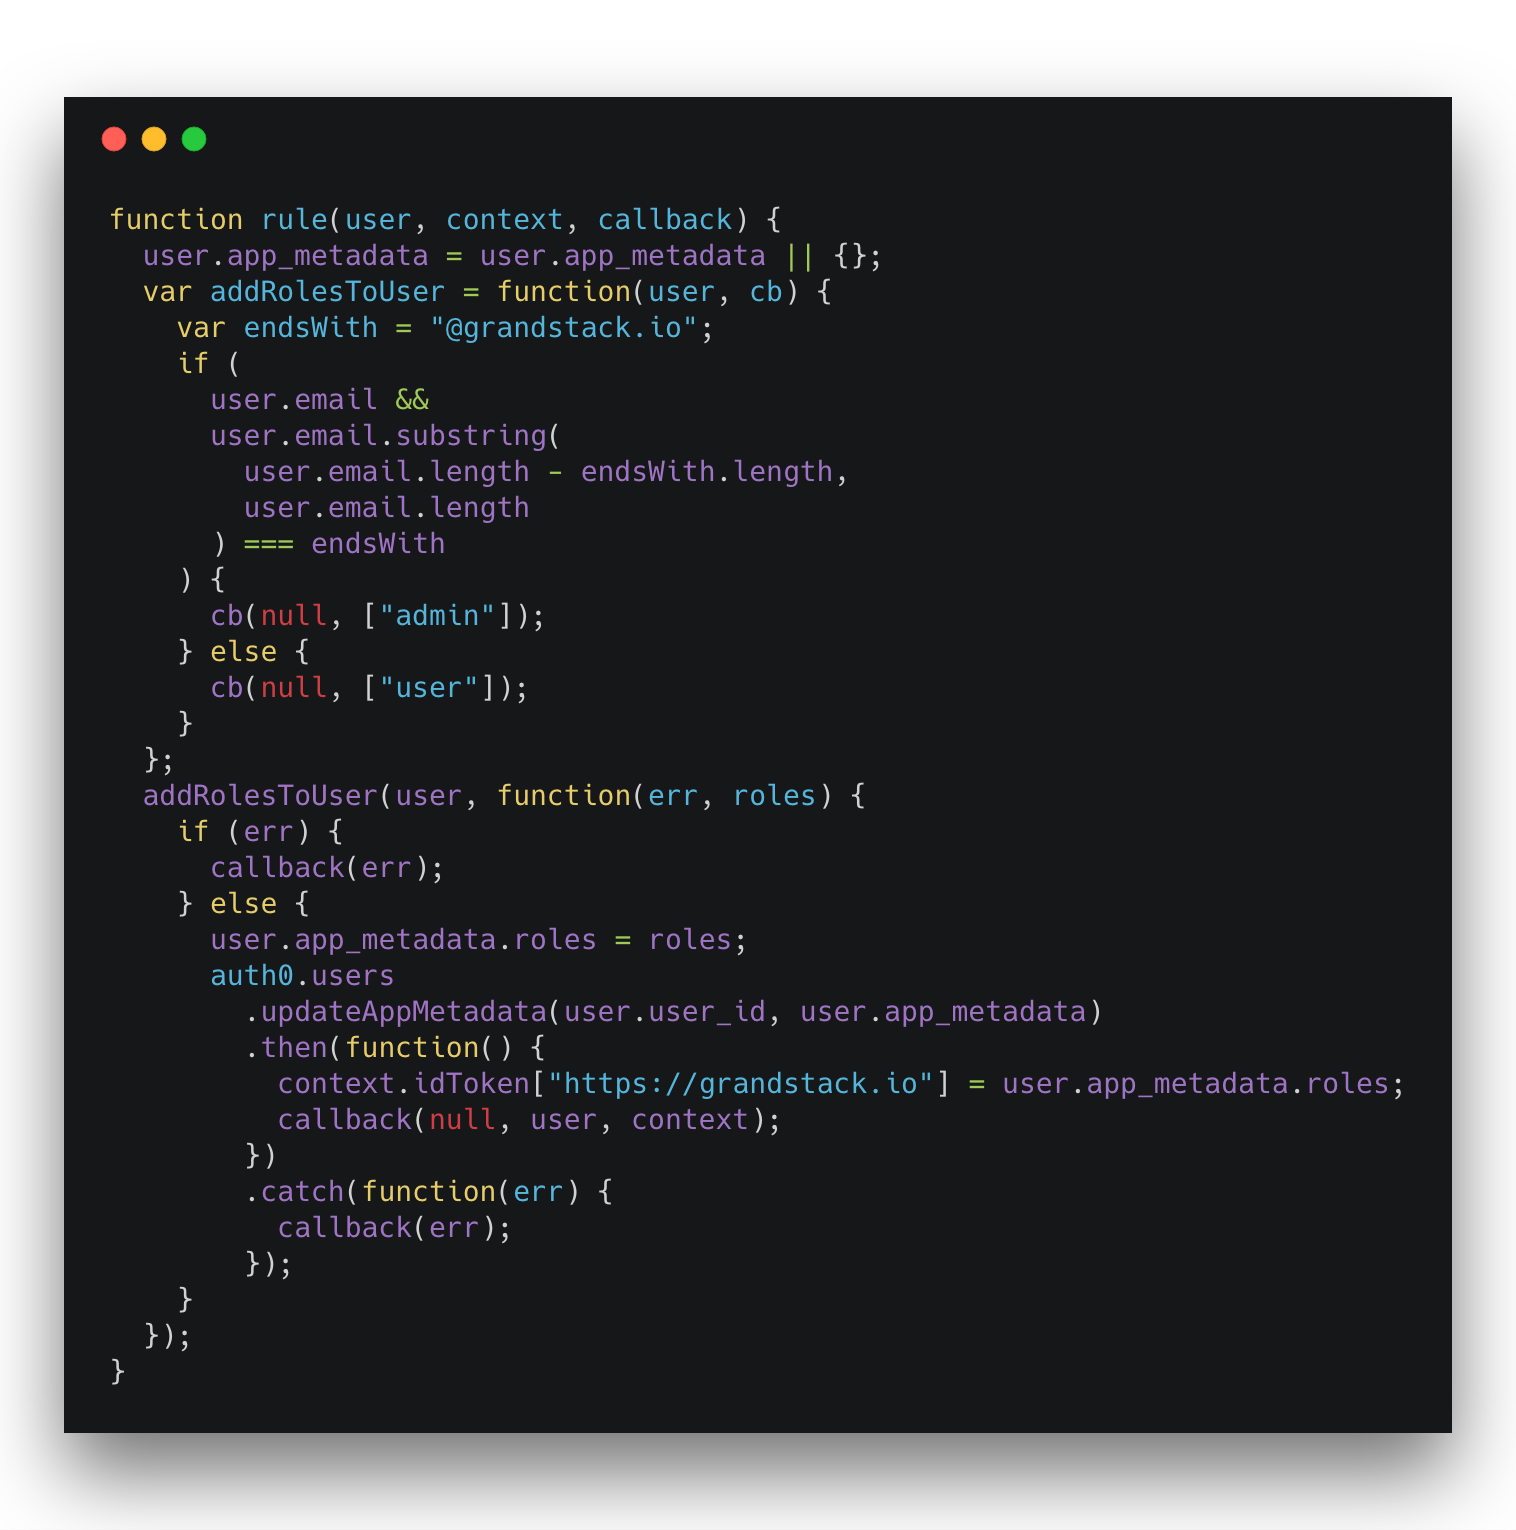
We can assign roles to our user by implementing a Rule in Auth0. A Rule can be a function that is passed some metadata about the currently authenticating user and then can attach additional claims to the JWT based on this metadata. We could look up user permissions in a database or call out to a third party Identity and Access Management service to identify the appropriate roles and scopes to assign. Here we’ll just inspect the domain of the email address the user is using to authenticate. If they have a grandstack.io email address we assign them “admin” role otherwise, they get the “user” role.

Client Side Auth0 Integration
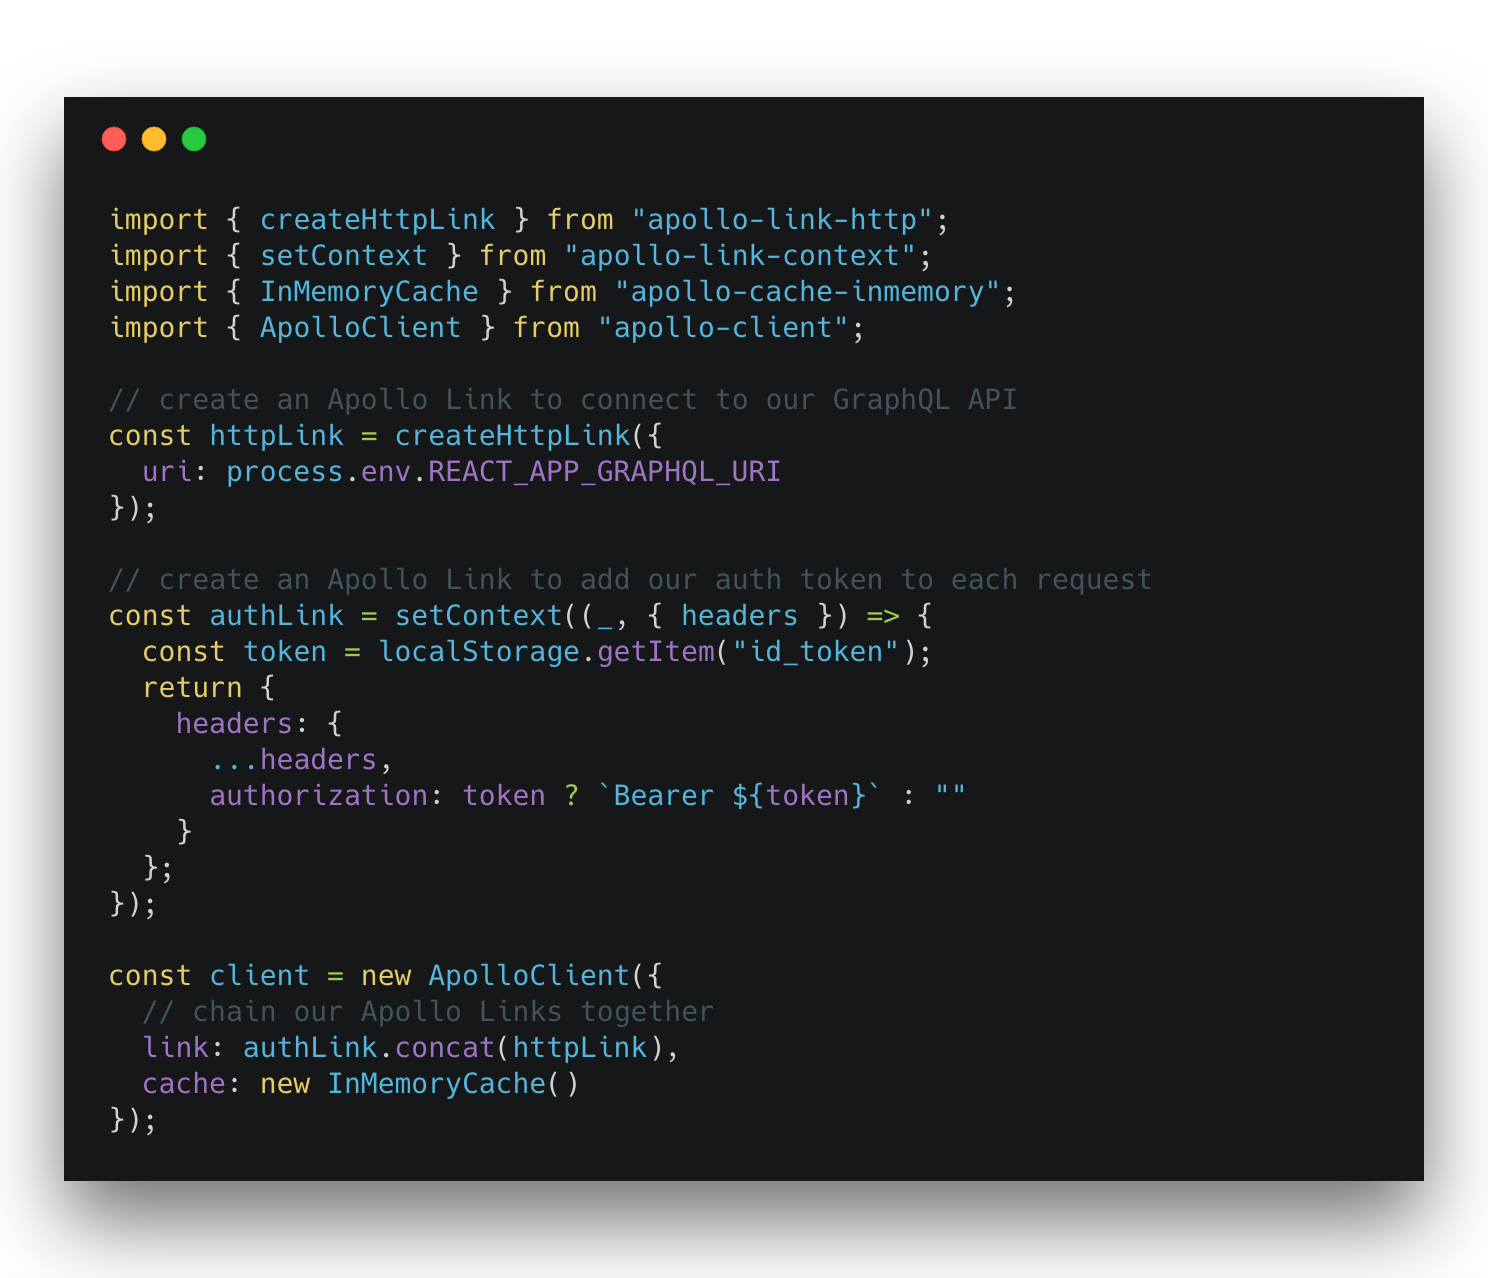
Auth0 has lots of great guides for integrating into your client application across many languages and frameworks. I followed their React example, which involved adding a route to handle /callback and pulling in auth0.js. Once the user authenticates a JWT is sent to our application via a request to /callbackOur client application takes that token and saves it in the browser’s localStorage.
We then need to make sure we grab this token from localStorage and add it to the headers sent in every GraphQL request that is sent from our client application. Fortunately, with Apollo Link this is straightforward. Apollo Links can be chained together, so we will implement one Link to handle the standard http requests to our GraphQL service, and another Link to add the auth token as an Authorization header:

Remember in our GraphQL server at this point we’re grabbing this token from the request header and passing it through to either our middleware or resolver to inspect for authorization claims, but that we wanted to try a different approach for authorization in our GraphQL service.
OK, back to our GraphQL server implementation. We had identified some approaches for authorization (token check in resolver and middleware based) and identified a few problems with each approach. How do we solve these problems?
Schema directives to the rescue!
Schema Directives In GraphQL
Directives are GraphQL’s built-in extension mechanism. We can use directives to annotate a field (or an entire type definition) to introduce custom logic implemented in the GraphQL server. Directives can be used either in a GraphQL query, or in the schema definition. Here we’ll only concern ourselves with schema directives.
As an example of the power of directives, in neo4j-graphql.js we use a schema directive to map a Cypher query to a field in GraphQL (similar to the concept of defining a computed field). Here is how we define the query to populate our “Star Summary” histogram — shown above in our demo app — using a @cypher schema directive. Whenever a GraphQL query includes the starsByCategory field, we run the attached Cypher query to resolve that field: