
Understanding and building your own tiny blockchain in JavaScript
Requirements: I built this in Node.js, but you can easily build it on Repl.it if you prefer. We’ll also be making use of the sha256 npm package to hash the blocks.
If you’re new to Node.js, first what you’ll need to do is create a new directory, create an index.js file, and then from your terminal, run npm init -y
npm i sha256 to install the sha256 library. If you’re on Repl.it, create a new Nodejs repl, install thejs-sha256 package, and require it.Now that we’re set up, it’s time to create a new class so we have a template that we’ll use to build each block. Each block on our simple blockchain will contain 5 pieces of data: the block’s index, the precise time it was created, some arbitrary data (for bitcoin, this data would be the addresses of the sender and receiver of bitcoin and the amount of the transaction), the hash value of the block preceding it, and a hash of itself. A hash is a digital fingerprint of a piece of data. We’ll see later how this part of each block makes it extremely difficult for anyone to alter the blockchain once a block has been confirmed.
To create our Block, I’m using a JavaScript class, but a constructor function would work just as well since that’s really all a class is under the hood. I set the constructor function to take all of our data except for the hash as parameters. The block will then look at the index, timestamp, data, and previous hash, and generate its own hash or fingerprint.
You may have noticed that since each block requires the hash of the previous block, we have a problem of how to create the first block. The first block, known as the Genesis Block, will get handed zeros as the previous hash, so we’ll have to write a function to create that single block.
On line 15, I use an arrow function to create a new block based on the class we wrote earlier. I hand it a 0 for the index, the current time, a string stating that it’s the Genesis Block, and a previous hash of 0. We now have our first block, and we’re almost done! The genesis block is special, but every other block will use the same formula going forward.
Here, I write a nextBlock function that takes only the last block, and the new block’s data as parameters. The function then creates a new block and sets the index of the new block to whatever the previous block’s index was and adds 1, grabs the current time, and then grabs the previous block’s hash and sets it as prevHash on the new block. This last step, while only a tiny bit of code, is extremely important. This links each block to it’s previous block through a hash. Let’s say someone wanted to alter the bitcoin blockchain so that it looked like they had received more bitcoin than they actually did, or to make it look like they spent less of their bitcoin. If they altered a block, the hash, which serves as a snapshot of the data the block contained when it was created, would no longer match. To remedy this, they’d have to rehash the block. Since all the blocks are linked together and point back to the previous block’s hash, this person would also have to alter all the blocks on the chain following their target block in order to make it look legitimate.
While modern computers could conceivably alter a block, generate new hash, and then generate new hashes for all the following blocks so that the altered block was seen as legitimate, bitcoin in particular implements a method called ‘Proof of Work’ to slow down the confirmation of new blocks, making it nearly impossible. Also, due to the distributed network of ledgers that a blockchain relies on, a nefarious actor would have to control more than 50% of the network in order for their counterfeit blockchain to be accepted. Our blockchain won’t be distributed or utilize proof of work, but it’s an extremely clever solution to the problem and those topics warrant their own explanations.
So now we have everything we need to generate our tiny, simple blockchain! Let’s write a function that will run as many times as we want, adding new blocks, and then we’ll take a look at what it’s created.
On line 20, i create a new function that will create a new blockchain at any length you specify. I create a new blockchain that we’ll store in an array, and I place the genesis block as the first element in the array. Next, I create each block one at a time, handing it the data it requires from the previous block, and then I place that new block into our array. Once we’re done, I log out the result. Let’s take a look at the first few blocks to see what we’ve created.

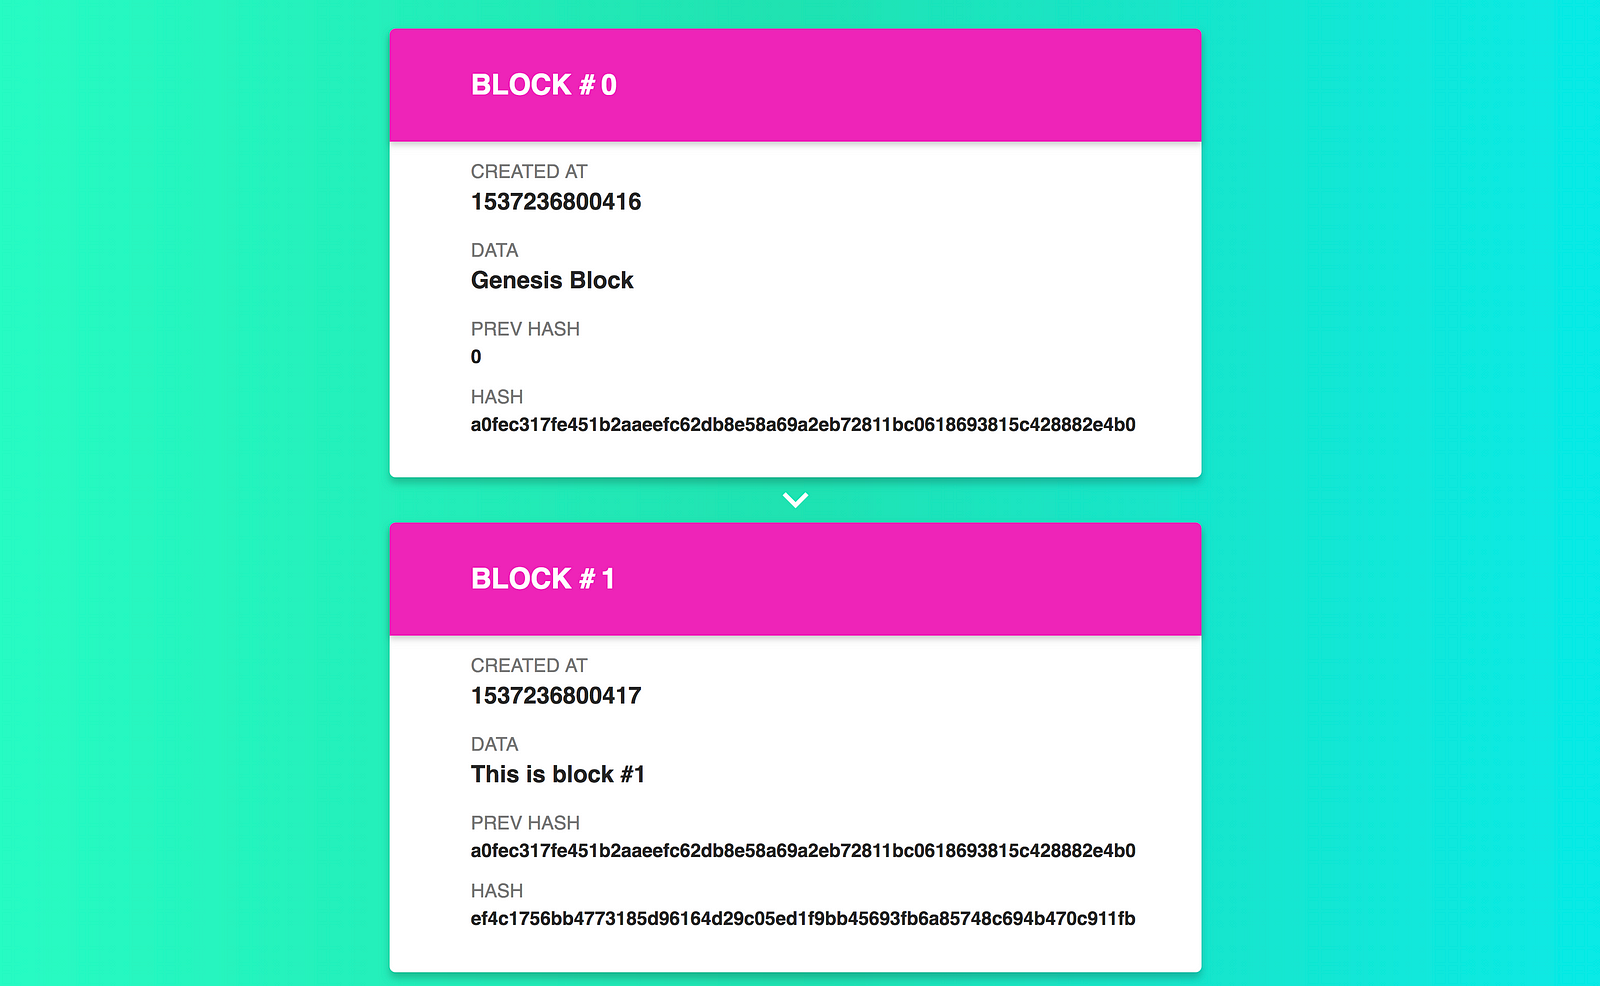
Here’s the first 4 blocks in our chain. Notice how each block’s prevHash value matches the thisHash value of the block preceding it. This links all the blocks together in something similar to a linked-list, and ensures that tampering with the blockchain is extremely difficult.
There’s a lot of information I’ve omitted from this example, but the main idea is there. Until I was able to visualize these ephemeral blocks and blockchains I’d heard so much about, it was all just magic to me. Now, using a few dozen lines of code, we’ve created our own blockchain!
Here’s a repl of all the code for the simple blockchain if you want to play around with it.