iOS Tabbar上增加一個自定義按鈕
阿新 • • 發佈:2019-01-01
前言
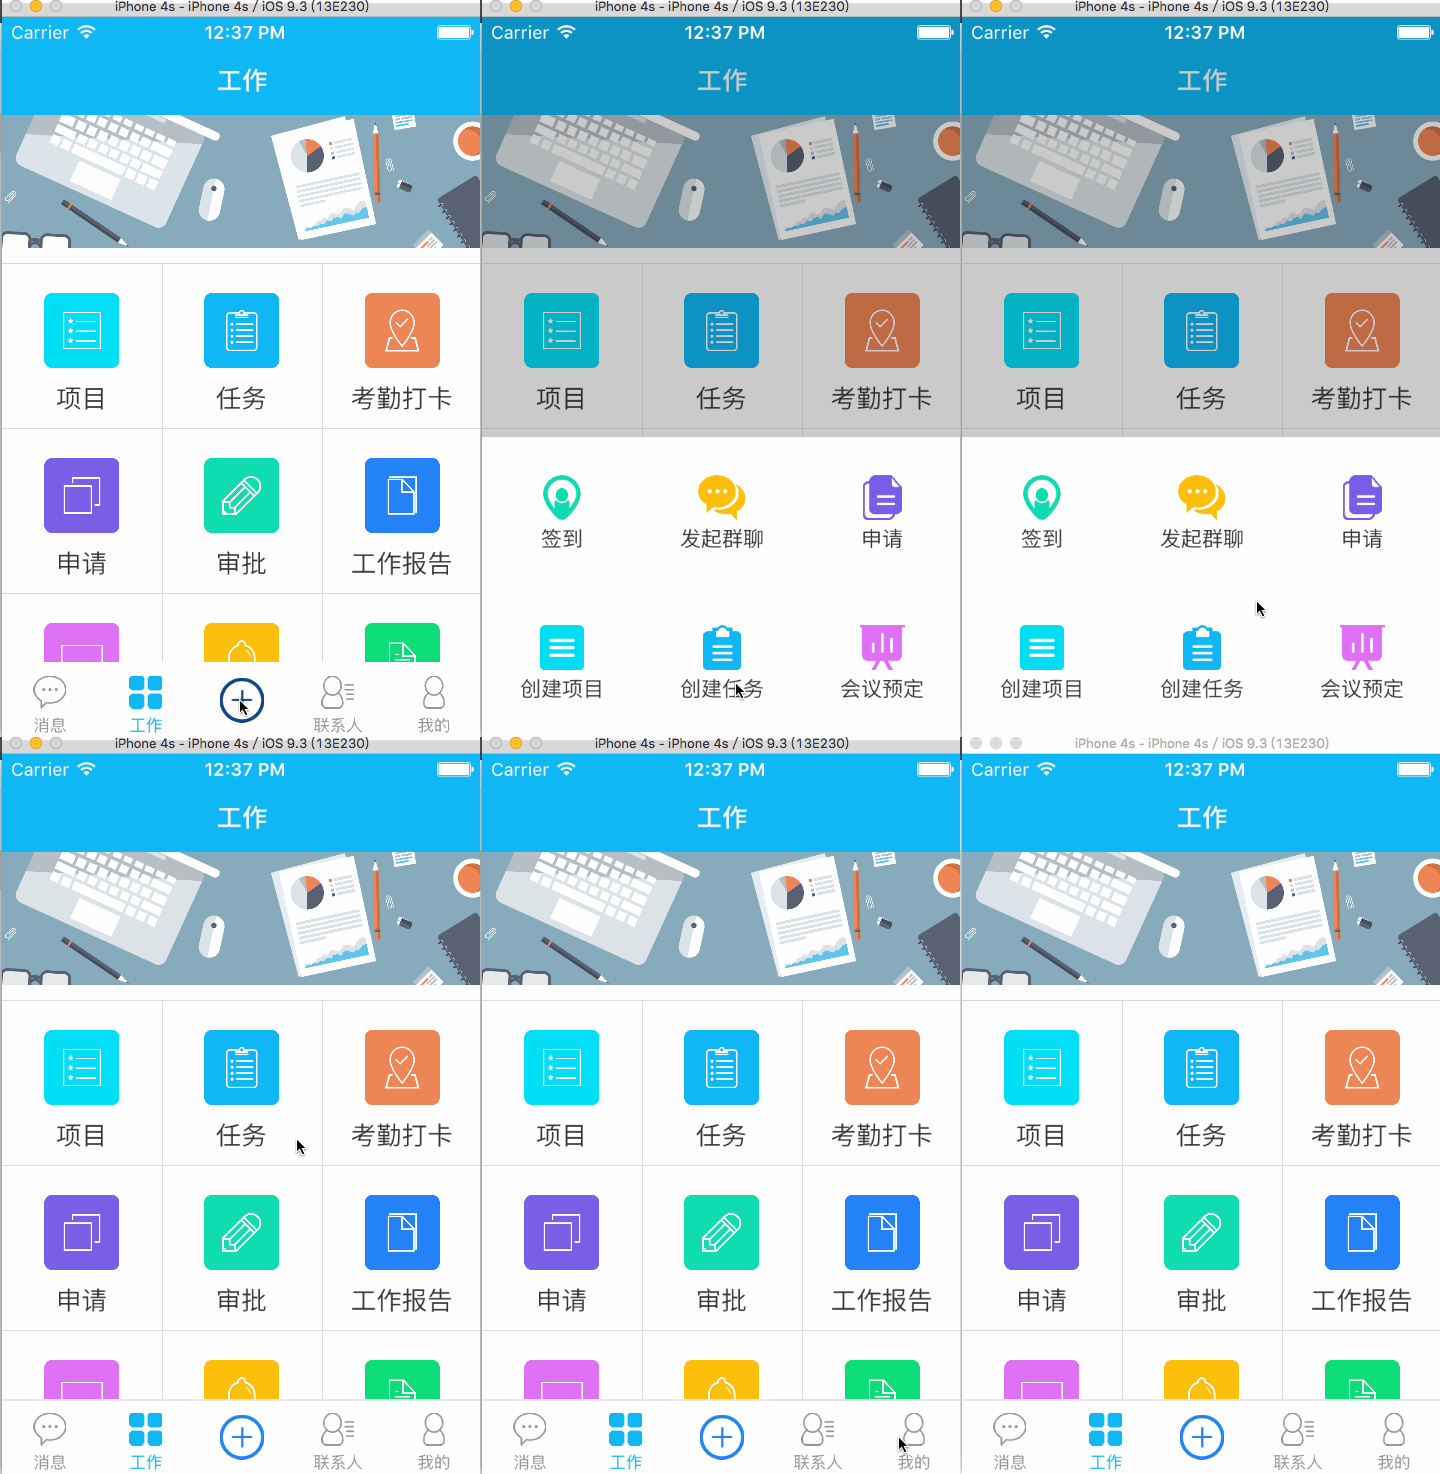
大多情況下,我們使用系統的tabbar基本上可以滿足產品的需求,但是有時候產品不按套路出牌,比如說類似於微部落格戶端一樣,在tabbar中間增加一個”+”號按鈕,那我們就需要自定了,其實也比較簡單。
一、自定義一個UITabBar
1、新建一個類,繼承UITabBar,我取的類名叫做:HSTabBar.
2、在HSTabBar.h中新增如下程式碼:
#import <UIKit/UIKit.h>
@class HSTabBar;
@protocol HSTabBarDelegate <UITabBarDelegate>
@optional
- (void 3、在HSTabBar.m中新增如下程式碼:
#import "HSTabBar.h"
@implementation HSTabBar
- (id)initWithFrame:(CGRect 二、HSTabBar的使用
1、新建一個類,繼承UITabbarViewControll, 類名命名為:RootTabBarController.
2、匯入HSTabBar的標頭檔案
#import "HSTabBar.h"3、在RootTabBarController 中的 viewDidLoad方法中新增程式碼:
  HSTabBar *tabBar = [[HSTabBar alloc] init];
  tabBar.tabBarDelegate = self;
  [self setValue:tabBar forKeyPath:@"tabBar"];
其他的一些建立導航控制器和將控制器加入tabBar中的程式碼此處省略了,自己去吧。
4、實現HSTabBarDelegate代理方法
#pragma mark - HSTabBarDelegate代理方法
- (void)tabBarDidClickPlusButton:(HSTabBar *)tabBar
{
    _bgView = [UICommonCtrl commonViewWithFrame:CGRectMake(0, 0, SCREEN_WIDTH, SCREEN_HEIGHT) color:kColor_Transparent];
    [kAppDelegate.window addSubview:_bgView];

    UITapGestureRecognizer *tapGesture = [[UITapGestureRecognizer alloc] initWithTarget:self action:@selector(tapGesture:)];
    [_bgView addGestureRecognizer:tapGesture];


    NSArray *arrData = @[@{@"title":@"簽到",@"image":@"icon_add_sign"},
                         @{@"title":@"發起群聊",@"image":@"icon_add_group"},
                         @{@"title":@"申請",@"image":@"icon_add_apply"},
                         @{@"title":@"建立專案",@"image":@"icon_add_project"},
                         @{@"title":@"建立任務",@"image":@"icon_add_task"},
                         @{@"title":@"會議預定",@"image":@"icon_add_boardroom"}];

    UIView *baseView = [UICommonCtrl commonViewWithFrame:CGRectMake(0, SCREEN_HEIGHT-200, SCREEN_WIDTH, 200) color:kColor_White];
    [_bgView addSubview:baseView];

    float spaceWidth = (SCREEN_WIDTH-60*3)/6;

    for (NSInteger i=0; i<arrData.count; i++) {

        NSInteger x = i % 3;
        NSInteger y = i / 3;

        UIButton *btn = [UICommonCtrl commonCenterControlButtonWithFrame:CGRectMake(spaceWidth+(spaceWidth*2+60)*x, 20+y*100, 60, 60)
                                                                    text:[[arrData objectAtIndex:i] objectForKey:@"title"]
                                                                   color:kColor_Black
                                                                    font:kFont_Middle
                                                                   image:[UIImage imageNamed:[[arrData objectAtIndex:i]objectForKey:@"image"]]
                                                                 spacing:5.0
                                                                  target:self
                                                                  action:@selector(btnClick:)];
        [btn setTag:i];
        [baseView addSubview:btn];

    }

}

- (void)btnClick:(UIButton *)btn
{
    if (btn.tag == 0) {

    } else if (btn.tag  == 1) {

    } else if (btn.tag  == 2) {

    } else if (btn.tag  == 3) {

    } else if (btn.tag  == 4) {

    } else {

    }
    [_bgView removeFromSuperview];
}

- (void)tapGesture:(UITapGestureRecognizer *)tapGesture
{
    [_bgView removeFromSuperview];
}
根據自己的需求新增或修改相應的程式碼。
效果圖

