JavaScript之屬性操作及小例子
阿新 • • 發佈:2019-01-03
一.屬性操作示例程式碼
程式碼詳解:
首先要知道,html找標籤是通過選擇器,JavaScript尋找標籤是通過,例:
document.getElementById('box');
可這麼理解:在文件下尋找通過id標籤獲取元素
所以,下面兩行程式碼可理解為:宣告變數=後面接收通過box標籤獲得span區域元素,通過ul標籤獲得ul區域元素
var box=document.getElementById('box');
var ul=document.getElementById('ul');
接下來就可以通過變數名進行屬性操作:滑鼠經過box變數(對應box標籤=span元素區),修改ul變數(對應ul標籤=ul元素區域)可見
滑鼠離開span元素區域,ul元素區域不可見
box.onmouseout=function(){
ul.style.opacity=0;
}
上訴操作原理:相當於在樣式表中對應選擇器中添加了函式中的樣式(具體自己試驗,開啟控制檯,滑鼠經過時檢視對應選擇器樣式中是否增添了函式樣式)
1 <!DOCTYPE html> 2 <html lang="en"> 3 <head> 4 <meta charset="UTF-8"> 5 <title>屬性操作</title> 6 <style type="text/css"> 7 *{ 8 margin: 0; 9 padding: 0; 10 list-style: none; 11 } 12 #box{ 13 width: 200px; 14 margin: 0 auto; 15 /*下面兩行被子級元素繼承*/ 16 font: 15px; 17 font-family: "simhei"; 18 } 19 #span{ 20 /*寬72px,高26px*/ 21 display: inline-block; 22 width: 70px; 23 height: 24px; 24 border: 1px solid gray; 25 text-align: center; 26 /*行高和高度一致則垂直居中*/ 27 line-height: 24px; 28 } 29 #ul{ 30 /*寬72px,高106px*/ 31 width: 70px; 32 height: 104px; 33 border: 1px solid gray; 34 margin-top: 3px; 35 line-height: 25px; 36 text-align: center; 37 transition: 0.5s; 38 opacity: 0; 39 } 40 #ul li:hover{ 41 background: blue; 42 } 43 </style> 44 </head> 45 <body> 46 <div id="box"> 47 <span id="span">設定</span> 48 <ul id="ul"> 49 <li>搜尋設定</li> 50 <li>高階設定</li> 51 <li>關閉預測</li> 52 <li>搜尋歷史</li> 53 </ul> 54 </div> 55 </body> 56 </html> 57 <script type="text/javascript"> 58 /* 59 當滑鼠移入到span元素區的時候,讓ul顯示出來 60 html的屬性操作 61 display 62 opacity 63 height 64 width 65 visibility 66 ...... 67 */ 68 var box=document.getElementById('box'); 69 var ul=document.getElementById('ul'); 70 71 box.onmouseover=function(){ 72 ul.style.opacity=1; 73 }; 74 box.onmouseout=function(){ 75 ul.style.opacity=0; 76 } 77 </script>
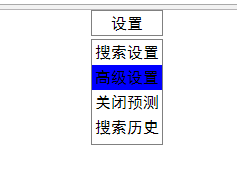
初始效果:

滑鼠經過span元素區:

滑鼠移除還原
二.屬性操作小例子
 1 <!DOCTYPE html>
 2 <html lang="en">
 3 <head>
 4     <meta charset="UTF-8">
 5     <title>屬性操作小例子</title>
 6     <style type="text/css">
 7      #box{
 8          width: 100px;
 9          height: 100px;
10          background: purple;
11          position: relative;
12          left: 0; top: 0;
13          margin-top: 20px;
14          transition: 1s;
15      }
16     </style>
17 </head>
18 <body>
19         <input type="button" value="按鈕1" id="btn1">
20         <input type="button" value="按鈕2" id="btn2">
21         <input type="button" value="按鈕3" id="btn3">
22         <input type="button" value="按鈕4" id="btn4">
23     <div id="box"></div>
24 </body>
25 </html>
26 <script type="text/javascript">
27     /*變數控制div元素區域和相應按鈕元素區域*/
28     var box=document.getElementById('box');
29     var 變寬=document.getElementById('btn1');
30     var 變高=document.getElementById('btn2');
31     var 顏色=document.getElementById('btn3');
32     var 移動=document.getElementById('btn4');
33     /*滑鼠點選事件發生時,增加函式樣式到相應選擇器的樣式表中*/
34     變寬.onclick=function(){
35          box.style.width='200px';
36     };
37
38     變高.onclick=function(){
39          box.style.height='200px';
40     };
41
42     顏色.onclick=function(){
43          box.style.background='gray';
44     };
45
46     移動.onclick=function(){
47         box.style.left='200px';
48     }
49 </script>
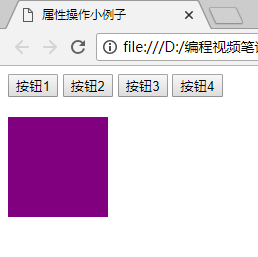
初始效果:

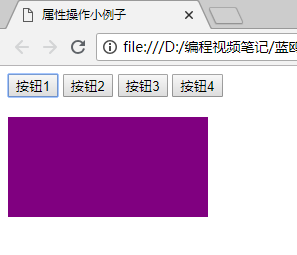
點選第一個按鈕:

點選第二個按鈕:

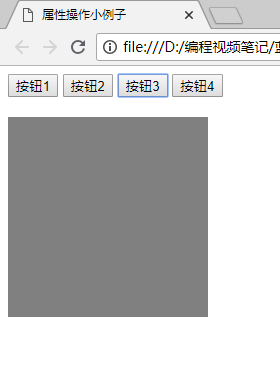
點選第三個按鈕:

點選第四個按鈕:

