
花10分鐘搞懂開源框架吧 - 【NancyFx.Net】
NancyFx是什麼?
Nancy是一個輕量級的獨立的框架,下面是官網的一些介紹:
Nancy 是一個輕量級用於構建基於 HTTP 的 Web 服務,基於 .NET 和 Mono 平臺,框架的目標是保持儘可能多的方式,並提供一個super-duper-happy-path所有互動。
Nancy 設計用於處理
DELETE,GET,HEAD,OPTIONS,POST,PUT和 PATCH等請求方法,並提供簡單優雅的 DSL 以返回響應。Nancy和Asp.net MVC原理相似,但有自己的一套路由機制,在使用上更加易用,可以用Nancy快速開發一些網站。
Nancy並不依賴任何現有的框架,所以他可以執行在任何平臺上面。
其NancyFx官方地址是:http://nancyfx.org/,Nancy這個單詞我們中國人的標準叫法 叫做 “南希”。
我們為何要使用它呢?
沒有配置
為了讓Nancy啟動並執行,不需要配置,沒有令人討厭的XML檔案可以修改,沒有。由於它是主機不可知的,因此您不必修改web.config中的任何內容以使其通過IIS執行。
隨處執行
Nancy是主機不可知的,這意味著您可以在IIS,WCF,嵌入在EXE中,作為Windows服務或在自託管應用程式中執行它。到處都是!
在Mono上
Nancy不把自己繫結在Windows上,它在OSX和Mono下的Linux上工作得一樣好,這讓您的團隊可以在多個平臺上工作。
如何在.NET上使用NancyFx
建立一個.Net Core App,我們需要在專案中安裝NancyFx,通過nuget安裝,也可以通過命令列,NancyFx的依賴項可能有OAuth的邀請,大部分OAuth2.11就ok了。

NancyFx.Net 之 HelloWorld
引用完成之後,我們需要修改Startup.cs了,這裡我們在Configure中進行註冊,其目的是新增到MVC管道中。
public void Configure(IApplicationBuilder app, IHostingEnvironment env)
    {
        if (env.IsDevelopment())
        {
            app.UseDeveloperExceptionPage();
        }

        app.UseOwin(x => x.UseNancy());
} 接下來我們建立一個模組(類),HelloModule繼承自NancyModule
public class HelloModule : NancyModule
{
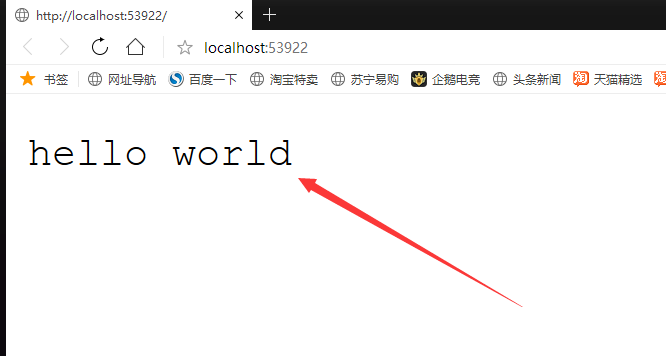
public HelloModule() { Get("/", p => "hello world"); }
}
程式碼說明&結果:
這裡的Get方法有兩個引數,第一個引數就是和.NET Core MVC Route 差不多,那麼第二個就是action,就是具體的定義,我們啟動專案,發現網站正確的顯示出了Hello World!
NancyFx.Net 模組
模組你可以在任何地方上宣告,只要它執行在你的應用程式域即可,Nancy會自動捕捉作為NancyModule型別後代的所有型別(因為你繼承了南希模組)。
我們把程式碼改一下,通過base去構造模組其中寫的是個你想要的路徑:
public class HelloModule : NancyModule
{
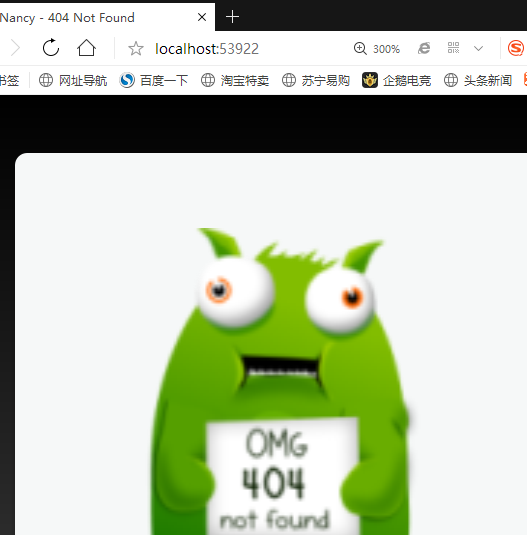
public HelloModule() : base("hello") { Get("/", p => "hello world"); }
}
啟動專案,我們發現,404找不到了,我們的路由應該是port/hello/ 才對。
NancyFx.Net 路由
路由概念分類
這些我們逐一說一說。
純文字路由片段(Literal Segment)
含變數的片段(Capture Segment)
含可空變數的片段(Capture Segment - Optional)
正則片段(RegEx Segment)
- 貪婪片段(Greedy Segment)
警告
注意:如果你是在Asp.net Core MVC中使用,必須是2.0預覽,如不是Core中,則是1.4.5以下,下面是兩個大版本路由語法比較:
Get["/nancy/products"] = x => "hello world";
Get("/", p => "hello world");
純文字路由片段(Literal Segment)
純文字路由片段我們已經知道了其實,開頭的hello,world 即使如此。
含變數的片段(Capture Segment)
 public HelloModule()
        {
            Get("StudentList/{id?}",res=>res.id == null ? "咋不輸入呢" : res.id);
        }
這實際上的第二個引數就是一個Func委託,我們可以通過url去獲取可變引數的值。
含可空變數的片段(Capture Segment - Optional)
 public HelloModule()
        {
            Get("StudentList/{id?}",res=>res.id == null ? "咋不輸入呢" : res.id);
        }
可空型別就是在引數後面加個?就可以了。
正則片段(RegEx Segment)
Nancy的路由是支援正則的
 public HelloModule()
        {
            Get(@"/products/(?<productId>^[1]+[3,5]+\d{9})", p => "Your product id is " + p.productId);
        }
貪婪片段(Greedy Segment)
Nancy中可以在變數尾部追加一個星號,表示當url匹配結束後的字串
public class ProductModule : NancyModule
    {
        public ProductModule()
        {
            Get("/products/{productName*}", p => p.productName);
        }
    }
路由片段引數型別約束
只有為int型別的才會被匹配
    public class ProductModule : NancyModule
    {
        public ProductModule()
        {
            Get("/products/{productId:int}", p => "Product id is " + p.productId);
        }
    }
Nancy 前後端互動
如何返回檢視,我們嘗試著在Views中建立靜態檔案html(地址為:Views/Student/StudentList.html),並構造moduls返回view檢視:
public HelloModule()
        {
            Get("/", p => View["Student/StudentList.html"]);
        }
F5,啟動專案你會發現..

Nancy檢視位置約定
Nancy是有一套自己的約定的,那我們也不想和它約定,誰理他呢,我們可以自己自定義約定。
為此,您需要建立一個自定義載入程式,並將您的約定(使用前面描述的函式簽名)新增到Conventions.ViewLocationConventions集合中。首先建立一個CustomRootPathProvider類,繼承了IRootPathPrvider.
public class CustomRootPathProvider : IRootPathProvider
    {
        public string GetRootPath()
        {
            return Path.Combine(AppDomain.CurrentDomain.BaseDirectory, "Views");
        }
    }
特別提醒:如果是測試環境而並非是生產環境請將路徑換為:Directory.GetCurrentDirectory()
通過拼接我們已經將專案的根目錄改編成了Views,然後我們再建立一個新類,CustomBootstrapper是為了生效我們自定義的去重寫了RootPathProvider。
    public class CustomBootstrapper : DefaultNancyBootstrapper
    {
        protected override IRootPathProvider RootPathProvider
        {
            get
            {
                return new CustomRootPathProvider();
            }
        }
    }
這個時候,原本的Nancy的追蹤的功能就已經被我們給kill掉了,如果想要再啟動則需要在CustomBootstrapper新增程式碼如下:
    public override void Configure(INancyEnvironment environment)
    {
        environment.Tracing(enabled: true, displayErrorTraces: true);
        base.Configure(environment);
    }
那麼我們現在啟動,ok成功了(找到了)!
超級簡單檢視引擎(NancyFx預設推薦)
超級簡單檢視引擎,也稱為SSVE,是一個正則表示式(實現使用正則表示式執行替換)的檢視引擎,旨在支援簡單的模板場景.
沒有必要安裝單獨的Nuget來使用引擎,因為它嵌入到主Nancy元件中,並且將自動連線並準備好在您的應用程式中使用。該引擎處理與任何意見
sshtml,html或htm副檔名。
標準變數替換:
如果未指定引數,則替換引數的字串表示形式或模型本身。如果無法執行替換,例如,如果指定了無效的模型屬性,則將替換為[Err!]
句法
@Model[.Parameters]
例
Hello @Model.Name, your age is @Model.User.Age
迭代:
使您可以迭代集合的模型。迭代器不能巢狀,語法如下:
@Each[.Parameters]
   [@Current[.Parameters]]
@EndEach
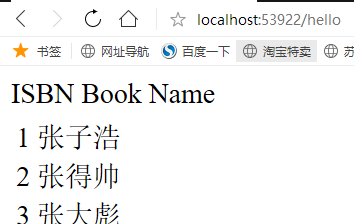
我們將StudentList作為引數傳入到我們的檢視中,程式碼定義如下:
Student類的簡單定義:
public class Student
    {
        public int StudentID { get; set; }
        public string  StudentName { get; set; }
    }
Module.cs的定義:
public class HelloModule : NancyModule
    {
        List<Student> list = new List<Student>()
        {
            new Student(){  StudentID =1 , StudentName = "張子浩"},
            new Student(){  StudentID =2 , StudentName = "張得帥"},
            new Student(){  StudentID =3 , StudentName = "張大彪"}
        };
        public HelloModule()
        {
            Get("/hello", p => {
                return View["hello.html", new
                {
                    list
                }];
            });
        }

    }
hello.html:
<table>
        <tr>
            ISBN
        </tr>
        <tr>
            Book Name
        </tr>
        <tbody>
            @Each.list
            <tr>
                <td>
                    @Current.StudentID
                </td>
                <td>
                    @Current.StudentName
                </td>
            </tr>
            @EndEach
        </tbody>
    </table>
條件:
引數必須是布林值(請參閱下面的隱式條件)。不支援巢狀@If和@IfNot語句,語法如下:
@If[Not].Parameters
   [contents]
@EndIf
栗子:
@IfNot.HasUsers
   No users found!
@EndIf
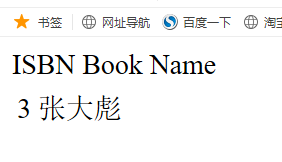
我們在Student實體中添加了一個布林值為了給其中的示例做出演示:
public class HelloModule : NancyModule
    {
        List<Student> list = new List<Student>()
        {
            new Student(){  StudentID =1 , StudentName = "張子浩",isDisplay = false},
            new Student(){  StudentID =2 , StudentName = "張得帥",isDisplay=false},
            new Student(){  StudentID =3 , StudentName = "張大彪",isDisplay=true}
        };
        public HelloModule()
        {
            Get("/hello", p => {
                return View["hello.html", new
                {
                    list
                }];
            });
        }

    }
    public class Student
    {
        public int StudentID { get; set; }
        public string  StudentName { get; set; }
        public bool isDisplay { get; set; }
    }
hello.html:
<table>
        <tr>
            ISBN
        </tr>
        <tr>
            Book Name
        </tr>
        <tbody>
            @Each.list
            @If.isDisplay
            <tr>
                <td>
                    @Current.StudentID
                </td>
                <td>
                    @Current.StudentName
                </td>
            </tr>
            @EndIf
            @EndEach
        </tbody>
    </table>
Partial View
呈現區域性檢視。可以指定當前模型的屬性以用作區域性檢視的模型,或者可以省略它以使用當前檢視的模型。檢視的副檔名是可選的。
語法:
@Partial['<view name>'[, Model.Property]]
例:
//只返回檢視
@Partial['subview.sshtml'];
//帶模型的
@Partial['subview.sshtml', Model.User];
我們建立一個html,名為Partial.html,定義如下:
<body>
部分View: @Model
</body>
hello.html:
<table>
        <tr>
            ISBN
        </tr>
        <tr>
            Book Name
        </tr>
        <tbody>
            @Each.list
            <tr>
                <td>
                    @Current.StudentID
                </td>
                <td>
                    @Partial['Partial.html',Model.StudentName]
                </td>
            </tr>
            @EndEach
        </tbody>
    </table>
如果不需要去構造部分檢視的內部實體,那麼你就不用傳第二個引數。

南希生命週期

當接收到客戶端的請求之後,我們回到南希的管道中,分析了路由和一些模組規則,通過使用irouteinvoker呼叫路由,返回對應的靜態檔案,通過鉤子繼續配置載入程式,看看是否報錯,沒有的話直接通過Handler返回response。
評價NancyFx
在2016年Nancy就停止了更新,它是一個類似於mvc的框架,個人認為它的路由機制很不錯,但是檢視用起來不是很舒服,還是沒人支援啊!