商城專案(ssm+dubbo+nginx+mysql統合專案)總結(3)
我不會在這裡貼程式碼和詳細步驟什麼的,我覺得就算我把它貼出來,你們照著步驟做還是會出很多問題,我推薦你們去看一下黑馬的這個視訊,我個人感覺很不錯,一步一步走下來可以學到很多東西。另外,視訊和相關文件的話,關注微信公眾號“Java面試通關手冊”回覆“資源分享第一波”即可領取.
本節內容具體可參考黑馬該專案第四天的教案,教案以及相關文件和資料都在分享的網盤裡面,下載解壓即可。
第三天學到的內容
1、商品類目選擇功能的實現
實現之後的效果:
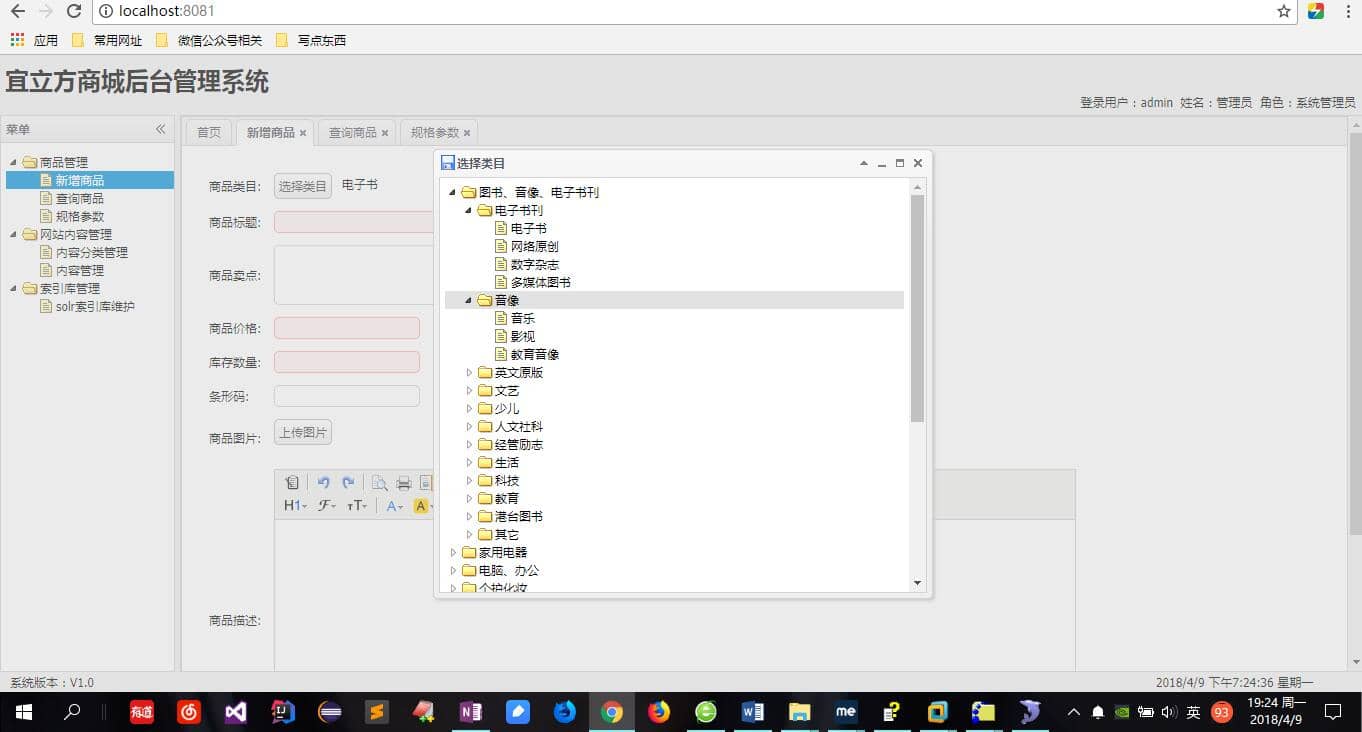
1.1 分析選擇類目

1.2 搜尋事件所在位置
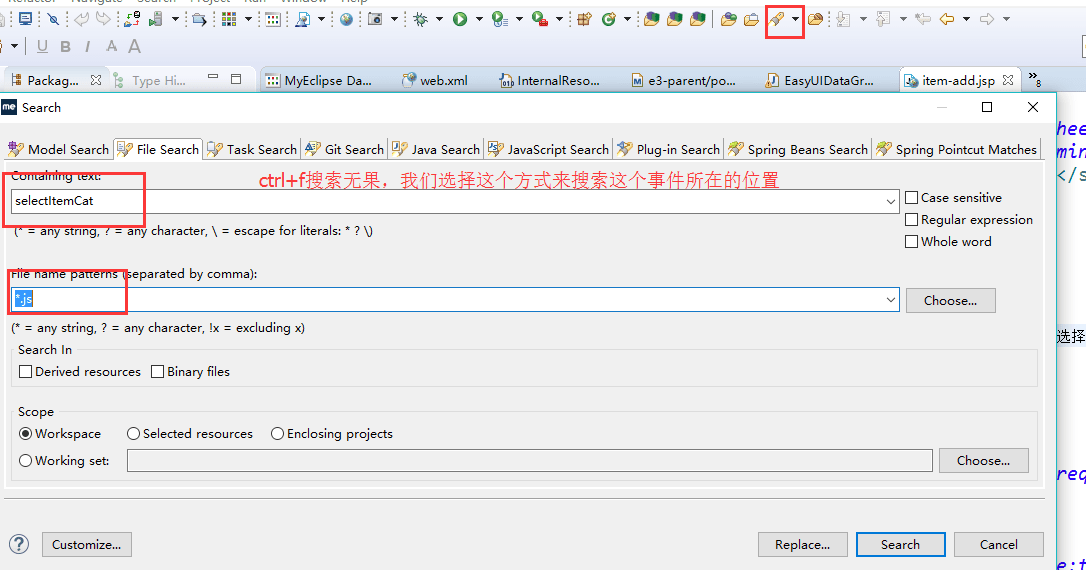
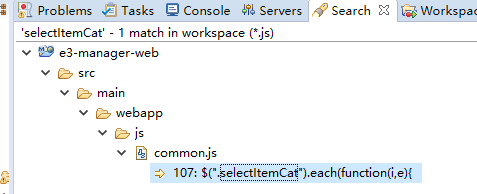
成功找到

1.3展示商品分類列表,使用EasyUI的tree控制元件展示。


這裡用到了非同步樹控制元件,可以去看一下jQuery EasyUI的API文件詳細瞭解。我自己jQuery EasyUI掌握的不是很牢固。
初始化tree請求的url:/item/cat/list
引數:
初始化tree時只需要把第一級節點展示,子節點非同步載入。
1.4程式碼編寫
1.4.1 pojo層:
建立一個pojo來描述tree的節點資訊,包含三個屬性id、text、state。放到e3-common工程中。
public class EasyUITreeNode implements Serializable1.4.2 Dao層
tb_item_cat
可以使用逆向工程
1.4.3 Interface層
相應介面
1.4.4 Service層
相應介面的實現
1.4.5 釋出服務和引用服務
Service層釋出服務:
<dubbo:service interface="cn.e3mall.service.ItemCatService" ref="itemCatServiceImpl" timeout="600000"/>web層引用服務:
<dubbo:reference interface="cn.e3mall.service.ItemCatService" id="itemCatService" /> 1.4.6 controler程式碼編寫
package cn.e3mall.controller;

import org.springframework.stereotype.Controller;
import org.springframework.web.bind.annotation.PathVariable;
import org.springframework.web.bind.annotation.RequestMapping;

/**
 * 頁面跳轉Controller:頁面跳轉功能的實現
 * <p>Title: PageController</p>
 * <p>Description: </p>
 * <p>Company: www.itcast.cn</p>
 * @version 1.0
 */
@Controller
public class PageController {

    @RequestMapping("/")
    public String showIndex() {
        return "index";
    }

    @RequestMapping("/{page}")
    public String showPage(@PathVariable String page) {
        return page;
    }
}
這樣編碼就完成了。
另外下面這個警告不用管:

先執行service層提供服務,再執行web層展示。
注意:兩者配置伺服器的埠不同
service層pom:

    <!-- 配置tomcat外掛 -->
    <build>
        <plugins>
            <plugin>
                <groupId>org.apache.tomcat.maven</groupId>
                <artifactId>tomcat7-maven-plugin</artifactId>
                <configuration>
                    <path>/</path>
                    <port>8080</port>
                </configuration>
            </plugin>
        </plugins>
    </build>
web層pom:

    <!-- 配置tomcat外掛 -->
    <build>
        <plugins>
            <plugin>
                <groupId>org.apache.tomcat.maven</groupId>
                <artifactId>tomcat7-maven-plugin</artifactId>
                <configuration>
                    <path>/</path>
                    <port>8081</port>
                </configuration>
            </plugin>
        </plugins>
    </build>
2、nginx的學習
2.1 nginx的安裝及常見命令
nginx的安裝就不用多說了,聽簡單的,需要提前安裝編譯環境和一些第三方開發包。
nginx的常見命令:
注意:下列命令都是在nginx的sbin目錄下執行的
啟動nginx:./nginx
Linux下檢視程序的命令:ps aux
單獨檢視nginx服務:ps aux|grep nginx
關閉nginx:./nginx -s stop
推薦使用: ./nginx -s quit
重啟nginx:./nginx -s reload
1、先關閉後啟動。
2、重新整理配置檔案:
關閉防火牆的命令:
systemctl stop firewalld.service #停止firewall
systemctl disable firewalld.service #禁止firewall開機啟動
重新啟動nginx可能遇到的問題:
nginx重啟報找不到nginx.pid的解決方法:

按照網上的方法執行下面的命令還是有錯

/usr/local/nginx/sbin/nginx -c /usr/local/nginx/conf/nginx.conf
解決辦法:
/var/run 目錄下新建nginx後再執行上面的命令

另外要注意 如果你改了index.html的內容但是還是顯示原來的內容是,是因為你的
瀏覽器的原因,筆主在這裡卡了很長時間,最後從火狐換成谷歌就好了。。。垃圾火狐啊,垃圾火狐 。。。。。
2.2 配置虛擬主機
2.2.1 通過埠區分不同虛擬機器
Nginx的配置檔案:
/usr/local/nginx/conf/nginx.conf
    server {
        listen       81;
        server_name  localhost;

        #charset koi8-r;

        #access_log  logs/host.access.log  main;

        location / {
            root   html-81;
            index  index.html index.htm;
        }
    }
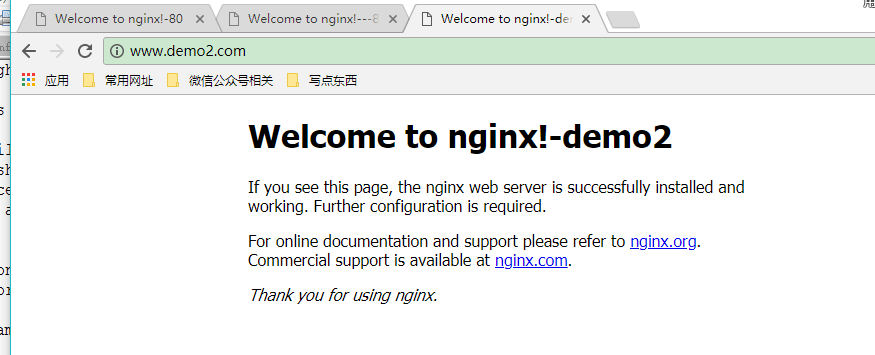
2.2.2 通過域名區分虛擬主機
我這裡是利用修改host檔案做的模擬:
修改window的hosts檔案:(C:\Windows\System32\drivers\etc)
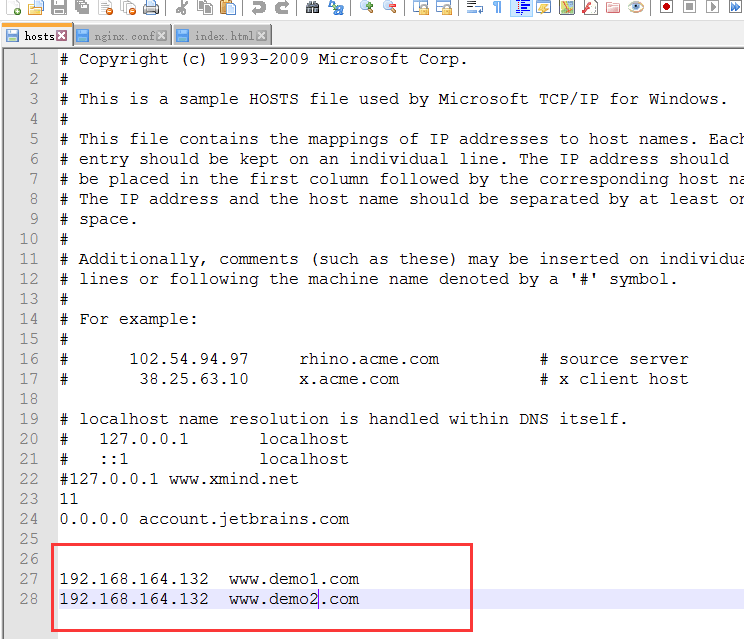
域名的配置:
    server {
        listen       80;
        server_name  www.demo1.com;

        #charset koi8-r;

        #access_log  logs/host.access.log  main;

        location / {
            root   htmldemo1;
            index  index.html index.htm;
        }
    }
    server {
        listen       80;
        server_name  www.demo2.com;

        #charset koi8-r;

        #access_log  logs/host.access.log  main;

        location / {
            root   htmldemo2;
            index  index.html index.htm;
        }
    }
2.3 反向代理
反向代理伺服器決定哪臺伺服器提供服務。
返回代理伺服器不提供伺服器。也是請求的轉發
2.4 負載均衡
如果一個服務由多條伺服器提供,需要把負載分配到不同的伺服器處理,需要負載均衡。
2.4 Nginx的高可用
nginx作為負載均衡器,所有請求都到了nginx,可見nginx處於非常重點的位置,如果nginx伺服器宕機後端web服務將無法提供服務,影響嚴重。
為了遮蔽負載均衡伺服器的宕機,需要建立一個備份機。主伺服器和備份機上都執行高可用(High Availability)監控程式,通過傳送諸如“I am alive”這樣的資訊來監控對方的執行狀況。當備份機不能在一定的時間內收到這樣的資訊時,它就接管主伺服器的服務IP並繼續提供負載均衡服務;當備份管理器又從主管理器收到“I am alive”這樣的資訊時,它就釋放服務IP地址,這樣的主伺服器就開始再次提供負載均衡服務。
