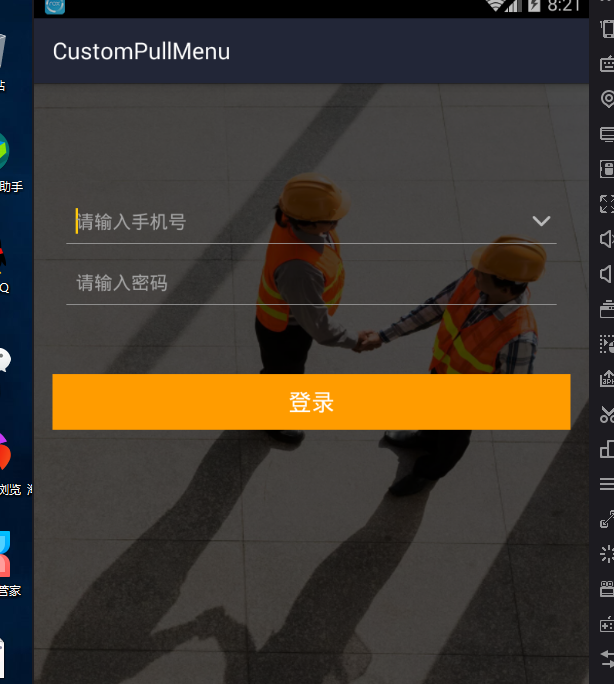
Android仿QQ登入下拉歷史列表
阿新 • • 發佈:2019-01-10
demo中包含了Sqlite資料庫增刪改查,對儲存的賬號進行按照最新的時間排序,限制了最多儲存5條資料。
效果圖:


1.首先建立MyHelper建表:
public class MyHelper extends SQLiteOpenHelper {

    public MyHelper(Context context) {
        super(context,"hayden.db",null,3);
    }

    @Override
    public void onCreate(SQLiteDatabase db) {
        db.execSQL("CREATE TABLE account(_id INTEGER PRIMARY KEY AUTOINCREMENT,phone VARCHAR(20),name VARCHAR(20),time INTEGER(100),fullName VARCHAR(20))");
    }

    @Override
    public void onUpgrade(SQLiteDatabase db, int oldVersion, int newVersion) {

    }
2.接著建立儲存歷史的bean類,包含phone,name,time這三個欄位,然後建立AccountDao對資料增刪改查:
public class AccountDao {
public final static String TABLE_NAME = "account";
private MyHelper helper;
private String phone;
public AccountDao(Context context){
    helper=new MyHelper(context);
}

public void insert(HistoryInfo info){
    SQLiteDatabase db=helper.getWritableDatabase();
    //根據手機號判斷去重
    String[] colum = {"phone"};
    String where = "phone" + "= ?";
    String[] whereValue = {info.getPhone()};
    Cursor cursor = db.query(TABLE_NAME, colum, where, whereValue, null, null, null);
    while (cursor.moveToNext()){
        phone = cursor.getString(cursor.getColumnIndex("phone"));
    }
    cursor.close();
    ContentValues values=new ContentValues();
    values.put("phone",info.getPhone());
    values.put("name",info.getName());
    values.put("time",info.getTime());
    if(!TextUtils.isEmpty(phone)){
        db.update(TABLE_NAME,values,"phone" + "=?",new String[]{phone});
    }else {
        db.insert(TABLE_NAME,null,values);
    }
    db.close();
}
public int delete(String phone){
    SQLiteDatabase db=helper.getWritableDatabase();
    int count=db.delete(TABLE_NAME,"phone=?",new String[]{phone +""});
    db.close();
    return count;
}
public List<HistoryInfo> queryAll(){
    SQLiteDatabase db=helper.getWritableDatabase();
    Cursor cursor=db.query(TABLE_NAME,null,null,null,null,null,null);
    List<HistoryInfo> list=new ArrayList();
        while (cursor.moveToNext()) {
            HistoryInfo historyInfo = new HistoryInfo();
            historyInfo.setPhone(cursor.getString(cursor.getColumnIndex("phone")));
            historyInfo.setName(cursor.getString(cursor.getColumnIndex("name")));
            historyInfo.setTime(cursor.getLong(cursor.getColumnIndex("time")));
            list.add(historyInfo);
        }
        db.close();
        cursor.close();
        return list;
}
}
3.然後監聽是否點選登入歷史按鈕,如果上次登入成功,那麼將這條資料插入到資料庫中,點選歷史按鈕時查詢列表,並且按照登入時間降序。
//是否顯示歷史登入列表
historyCB.setOnCheckedChangeListener(new CompoundButton.OnCheckedChangeListener() {
    @Override
    public void onCheckedChanged(CompoundButton buttonView, boolean isChecked) {
        if (isChecked) {
            initPopuWindow();//顯示歷史列表
            if (historyList.size() == 0) {
                pwdBottom.setVisibility(View.VISIBLE);
            } else {
                pwdBottom.setVisibility(View.GONE);
            }
        } else {
            selectPopupWindow.dismiss(); //隱藏列表
            pwdBottom.setVisibility(View.VISIBLE);
        }
    }
});
@Override
public void onClick(View v) {
  switch (v.getId()){
      case R.id.loginBtn:
          if(TextUtils.isEmpty(userET.getText().toString()) || TextUtils.isEmpty(pwdET.getText().toString())){
              Toast.makeText(LoginActivity.this,"賬號或者密碼不能為空",Toast.LENGTH_LONG).show();
              return;
          }else {
              HistoryInfo historyInfo = new HistoryInfo(userET.getText().toString(), "Tom", new Date().getTime());
              accountDao.insert(historyInfo);
              startActivity(new Intent(LoginActivity.this,new SecondActivity().getClass()));
          }
          break;
  }
}
這樣仿QQ登入歷史列表就完成了,希望對看到文章的同學有所幫助。下載完整demo地址:
https://download.csdn.net/download/heishuai123/10907691
原文地址:https://blog.csdn.net/lou_liang/article/details/80339313
