
建立一個Ceph S3閘道器伺服器
寫作背景是這樣的,公司有個專案,需要通過Ceph物件儲存閘道器寫1億張圖片到Ceph叢集中,由於一個閘道器寫入的速度比較慢,為了縮短寫入時間,需要增加一些伺服器作為閘道器,來將資料寫入到叢集中。
背景說完了,任務是增加一臺叢集外的伺服器作為閘道器,如下圖示意:

首先在伺服器上安裝與叢集一致的客戶端版本,安裝apt-show-versions,以用來檢視ceph-common(ceph的客戶端名稱,使用的時候,直接使用ceph命令即可)的版本號:
[email protected]:/# apt-get install apt-show-versions

[email protected]:/# apt-show-versions -a ceph-common
ceph-common:amd64 10.1.2-0ubuntu1          xenial         nova.clouds.archive.ubuntu.com
ceph-common:amd64 10.2.10-0ubuntu0.16.04.1 xenial-updates nova.clouds.archive.ubuntu.com
ceph-common:amd64 not installed
ceph-common:i386 10.1.2-0ubuntu1          xenial         nova.clouds.archive.ubuntu.com
ceph-common:i386 10.2.10-0ubuntu0.16.04.1 xenial-updates nova.clouds.archive.ubuntu.com
ceph-common:i386 not installed
可以看得是,Ceph客戶端版本是10.1.2,再來看一下Ceph叢集的號:
[email protected]:/up# ceph --version
ceph version 12.2.4 (52085d5249a80c5f5121a76d6288429f35e4e77b) luminous (stable)
很明顯,客戶端版本和叢集版本不一樣。怎麼辦?一步步來,先增加一個源:
[email protected] 再來安裝ceph-common客戶端:
[email protected]:/# apt-get install ceph-common
安裝完成之後再來看一下新的客戶端的版本:

好了,現在一致了。再順手安裝一下閘道器radosgw:
[email protected]:/# apt install radosgw
安裝好了ceph客戶端後,就會出現/etc/ceph的資料夾,現在進入到這個資料夾。在這個資料夾底下操作。首先,是將叢集中的叢集配置檔案 ceph.conf 和鑰匙環 ceph.client.admin.keyring 拷貝到這個資料夾底下。拷貝完之後,現在資料夾底下的內容如下:

用ceph -s 查詢一下叢集的健康狀態來驗證是否已經和叢集聯通:
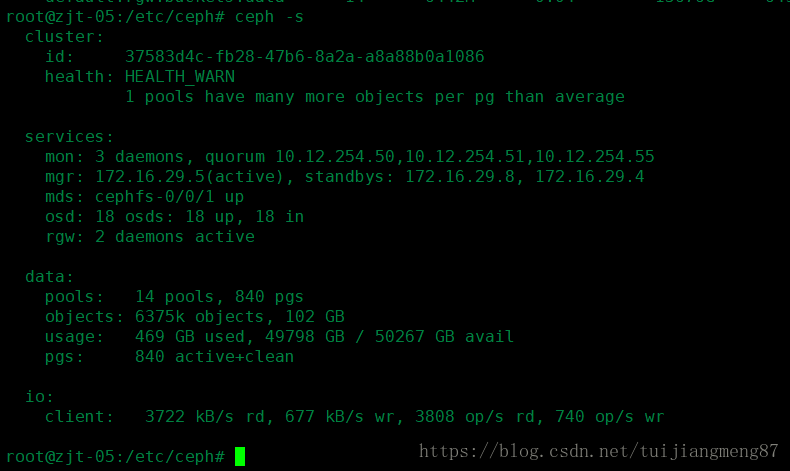
沒有問題。
現在來建立一個閘道器試試看,先創立一個資料夾:
[email protected]:/etc/ceph# sudo mkdir -p /var/lib/ceph/radosgw/ceph-radosgw.zjt-05/
其中,zjt-05是在/etc/hosts下注冊的本機的主機號。
再將從叢集中搬過來的鑰匙複製到剛剛建立的資料夾下,並命名為ceph.keyring
[email protected]:/etc/ceph# cp ./ceph.client.admin.keyring /var/lib/ceph/radosgw/ceph-radosgw.zjt-05/ceph.keyring
執行下面的操作:
[email protected]:/etc/ceph# radosgw -k /var/lib/ceph/radosgw/ceph-radosgw.zjt-05/ceph.keyring 到此,操作都已完成,檢查 radosgw 服務有沒有開啟:

沒有問題,程序已經啟動了。再看一下能不能訪問 7480 埠:

也可以訪問。一切準備就緒。
下面就可以創立使用者,建立bucket等操作了。
大功告成!