
GitHub實戰系列~1.環境部署+建立第一個檔案 2015-12-9
——————————————————————————————————————————————————————
很多人問,明明有git gui 和 github可以直接圖形化操作的嗎?全部指令幹啥???
呃(⊙o⊙)…呃(⊙o⊙)… ===> 裝逼~
O(∩_∩)O~,開玩笑的,其實就是為了通用和熟悉git,linux裡面照樣這樣用,多熟悉點基礎指令很有用的,
如果覺得頓時不開心了、無愛了==>推薦你快速入門:http://www.imooc.com/learn/390
———————————————————————————————————————————————————————
安裝系列:
軟體下載:http://git-scm.com/download/
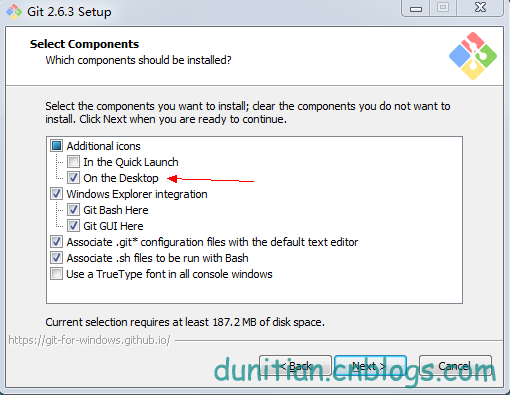
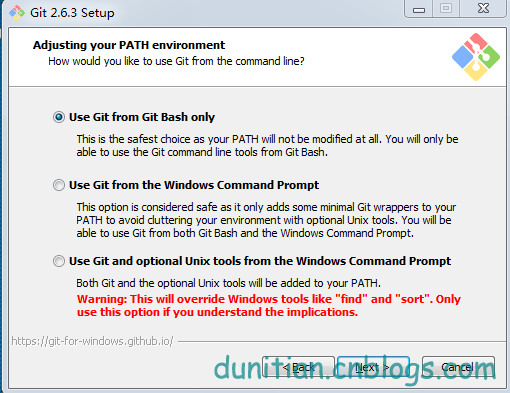
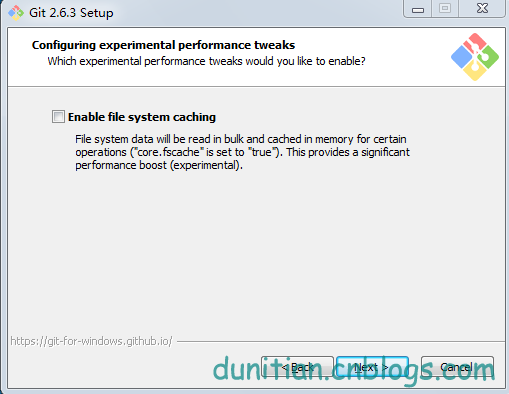
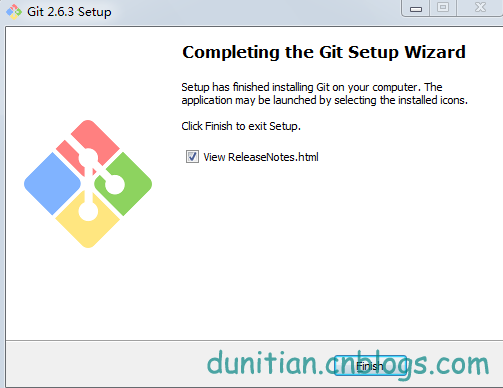
環境搭建:(比較簡單,看圖)


下面是命令模式,需要一點點linux基礎(Linux基礎學習),沒有也沒事,看詳解
1.我們看看git的配置都有哪些:

git config
————————————————————————————————————————
usage: git config [<options>]
Config file location
--global use global config file
--system use system config file
--local use repository config file
-f, --file <file> use given config file
--blob <blob-id> read config from given blob object
Action
--get get value: name [value-regex]
--get-all get all values: key [value-regex]
--get-regexp get values for regexp: name-regex [value-regex]
--get-urlmatch get value specific for the URL: section[.var] URL
--replace-all replace all matching variables: name value [value_rege x]
--add add a new variable: name value
--unset remove a variable: name [value-regex]
--unset-all remove all matches: name [value-regex]
--rename-section rename section: old-name new-name
--remove-section remove a section: name
-l, --list list all
-e, --edit open an editor
--get-color find the color configured: slot [default]
--get-colorbool find the color setting: slot [stdout-is-tty]
Type
--bool value is "true" or "false"
--int value is decimal number
--bool-or-int value is --bool or --int
--path value is a path (file or directory name)
Other
-z, --null terminate values with NUL byte
--name-only show variable names only
--includes respect include directives on lookup
————————————————————————————————————————
2.設定名字:

git config --global user.name "你的名字"
3.設定郵箱:
git config --global user.email "你的郵箱"
————————————————————————————————————————
4.輸出更顯目的設定
git config --global color.ui auto
5.如果忘記自己的配置,就用這個命令來檢視一下
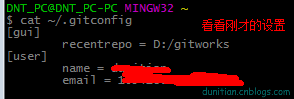
cat ~/.gitconfig
或者用git命令:git config --list
————————————————————————————————————————
[user]
name = 你的名字
email = 你的郵箱
[color]
ui = auto
————————————————————————————————————————
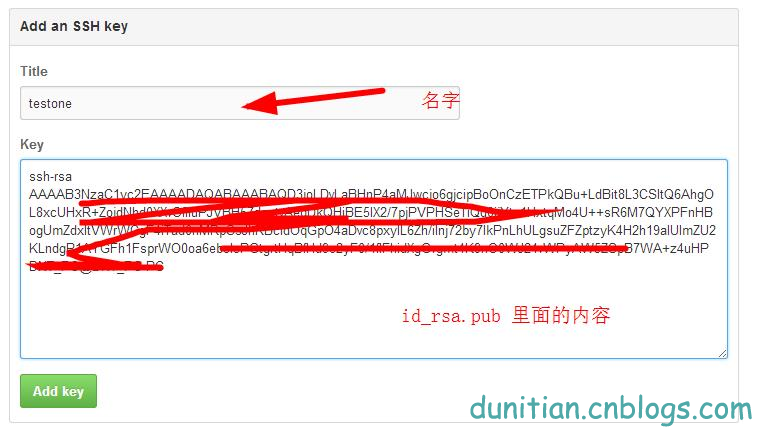
6.設定SSH Key
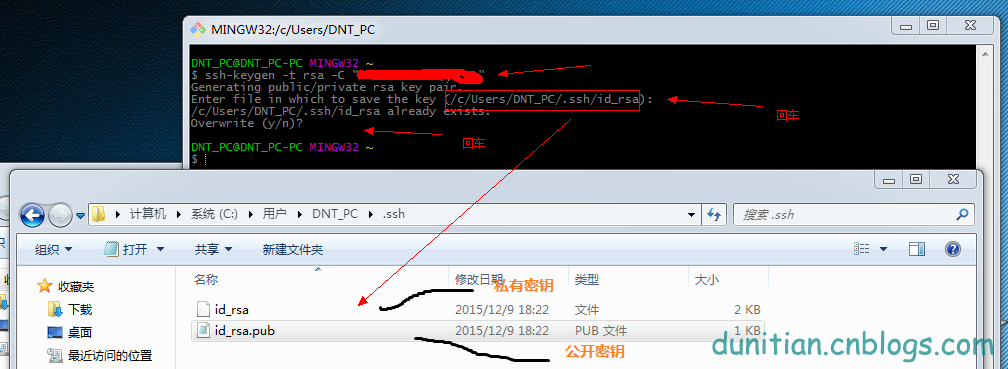
ssh-keygen -t rsa -C "你的郵箱"
Generating public/private rsa key pair.
Enter file in which to save the key (/c/Users/DNT_PC/.ssh/id_rsa): 回車一下
/c/Users/DNT_PC/.ssh/id_rsa already exists.
Overwrite (y/n)? 回車一下
————————————————————————————————————————
7.記不得key用這個指令:
$ cat ~/.ssh/id_rsa.pub
————————————————————————————————————————
ssh-rsa AAAAB3NzaC1yc2EAAAADAQABAAABAQD3joLDvLaBHnP4aMJwcjo6gjcipBoOnCzETPkQBu+LdBit8L3CSltQ6AhgOL8xcUHxR+ZojdNhd0XXvOfIfuPJVBH57dqptvAeqDkQHiBE5lX2/7pjPVPHSeTiQd0ijYtc1HxtqMo4U++sR6M7QYXPFnHBogUmZdxItVWr***********************4H2h19aIUImZU2KLndgP1AYGFh1FsprWO0oa6ebsIsPGtgrtHqBfHd9e2yF0/1fIFhidXgGvgmt4K9nO0WJ24vW****************
————————————————————————————————————————
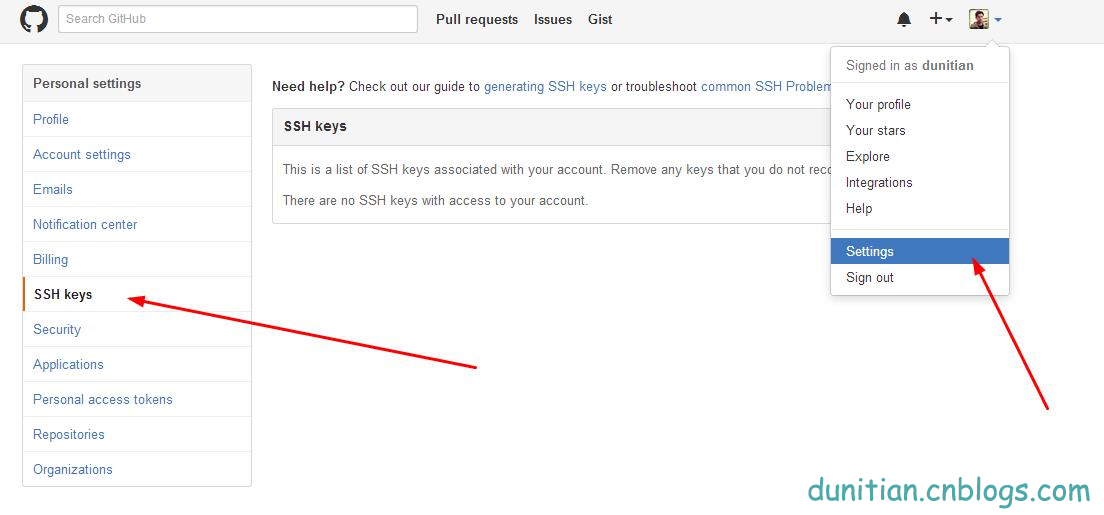
8.在github裡面新增金鑰(公共)
————————————————————————————————————————
9.用手中的私人金鑰和github驗證

ssh -T [email protected]
————————————————————————————————————————
The authenticity of host 'github.com (192.30.252.128)' can't be established.
RSA key fingerprint is SHA256:nThbg6k*************************viKw6E5********.
Are you sure you want to continue connecting (yes/no)? 輸入yes
Warning: Permanently added 'github.com,192.30.252.128' (RSA) to the list of known hosts.
Hi 你的姓名! You've successfully authenticated, but GitHub does not provide shell access.
————————————————————————————————————————
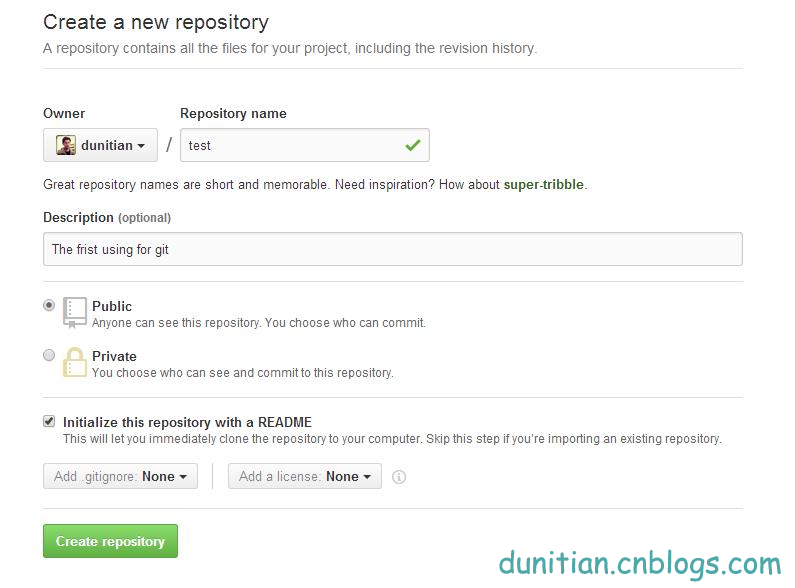
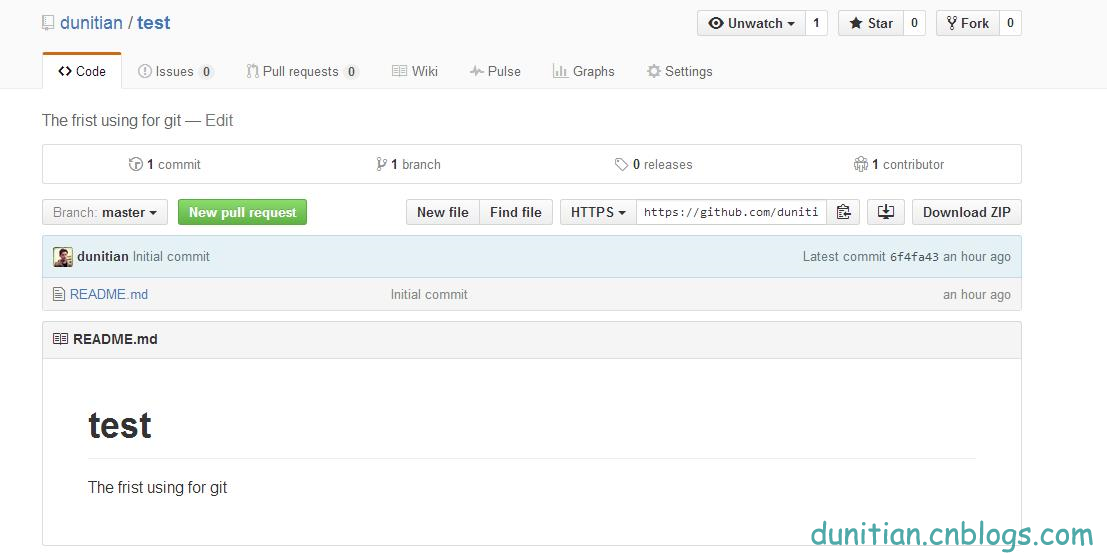
10.在github裡面建立一個公開倉庫(私有的收費)並初始化倉庫(最下面的複選框,最下面的兩個下拉列表後面說)

————————————————————————————————————————
11.複製一份github ssh庫的地址,一會兒有用
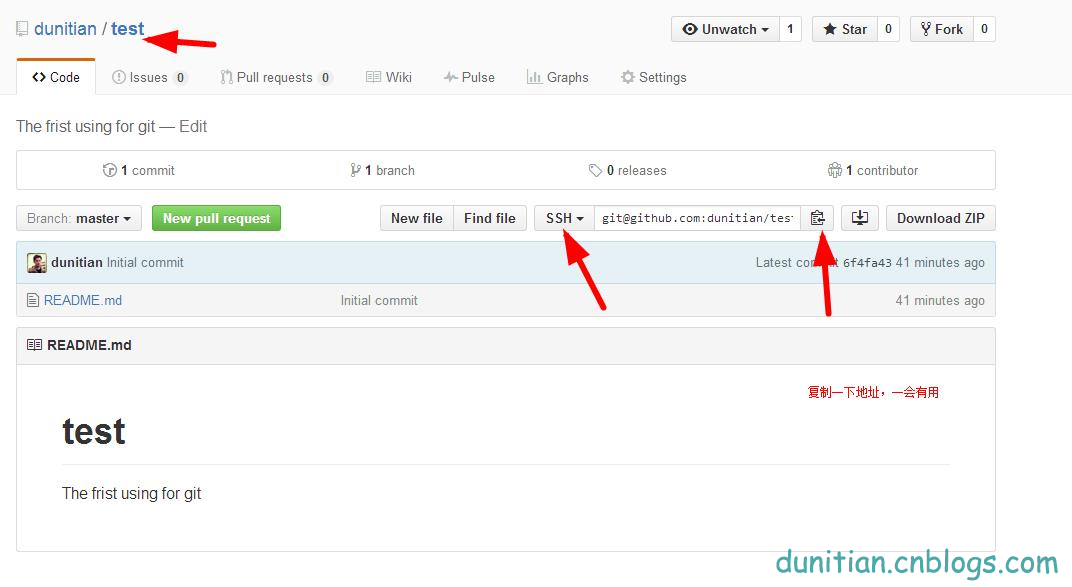
————————————————————————————————————————
12.克隆一份到本地
git clone [email protected]:dunitian/test.git(剛才的地址)
————————————————————————————————————————
Cloning into 'test'...
Warning: Permanently added the RSA host key for IP address '192.30.252.131' to the list of known hosts.
remote: Counting objects: 3, done.
remote: Total 3 (delta 0), reused 0 (delta 0), pack-reused 0
Receiving objects: 100% (3/3), done.
Checking connectivity... done.
————————————————————————————————————————
13.寫點東西測試一下
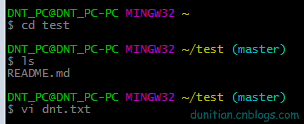
cd test(專案名,注意大小寫)
[email protected]_PC-PC MINGW32 ~/test (master)
ls (檢視當前目錄有哪些東西)
README.md
[email protected]_PC-PC MINGW32 ~/test (master)
vi dnt.txt (如果有dnt.txt的檔案就開啟,沒有就建立一個dnt.txt的檔案)

輸入你想寫的東西,i 進入編輯模式 ,按esc 輸入 :wq 並回車 是儲存
————————————————————————————————————————
14.檢視git的狀態 (沒提交,所以是untracked files狀態)

git status
————————————————————————————————————————
On branch master
Your branch is up-to-date with 'origin/master'.
Untracked files:
(use "git add <file>..." to include in what will be committed)
dnt.txt
nothing added to commit but untracked files present (use "git add" to track)
————————————————————————————————————————
15.把檔案提交到倉庫

git add dnt.txt (新增到暫存區)

git commit -m "add first file to my git" (提交;引號裡面是註釋)
————————————————————————————————————————
[master 4e69105] add first file to my git
warning: LF will be replaced by CRLF in dnt.txt.
The file will have its original line endings in your working directory.
1 file changed, 1 insertion(+)
create mode 100644 dnt.txt
————————————————————————————————————————
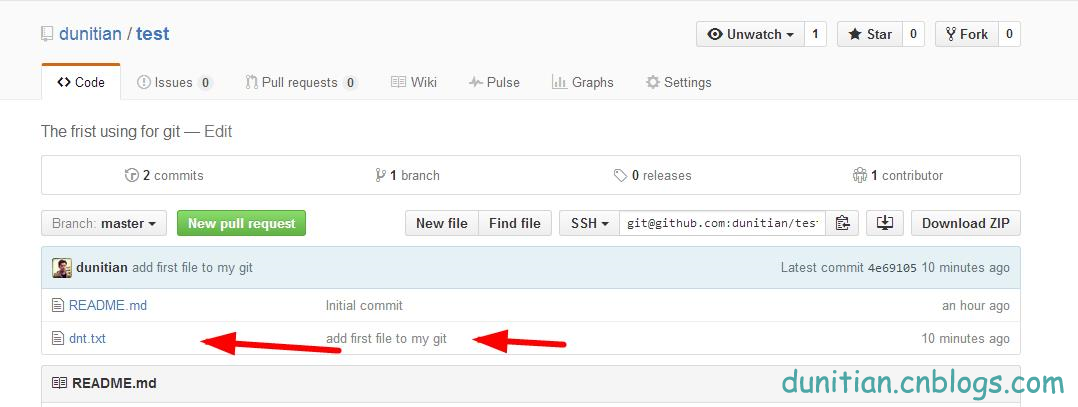
16.到github看看,發現這個時候是木有新增我們的檔案的(不要怕)
————————————————————————————————————————
17.檢視提交日記 (嚇死寶寶了,趕緊看看log)
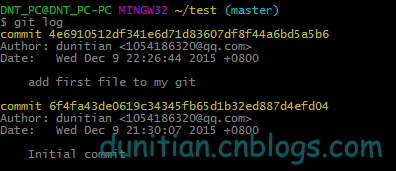
git log
————————————————————————————————————————
commit 4e6910512df341e6d71d83607df8f44a6bd5a5b6
Author: dunitian <[email protected]>
Date: Wed Dec 9 22:26:44 2015 +0800
add first file to my git
commit 6f4fa43de0619c34345fb65d1b32ed887d4efd04
Author: dunitian <[email protected]>
Date: Wed Dec 9 21:30:07 2015 +0800
Initial commit
————————————————————————————————————————
18.原來是要push一下,更新github(如果發現command not found之類的問題再輸入一遍就ok了)
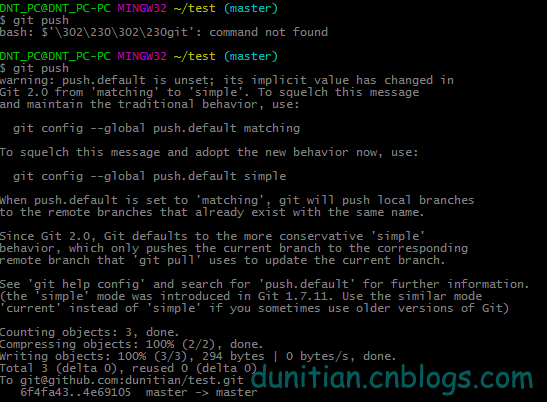
git push
————————————————————————————————————————
warning: push.default is unset; its implicit value has changed in
Git 2.0 from 'matching' to 'simple'. To squelch this message
and maintain the traditional behavior, use:
git config --global push.default matching
To squelch this message and adopt the new behavior now, use:
git config --global push.default simple
When push.default is set to 'matching', git will push local branches
to the remote branches that already exist with the same name.
Since Git 2.0, Git defaults to the more conservative 'simple'
behavior, which only pushes the current branch to the corresponding
remote branch that 'git pull' uses to update the current branch.
See 'git help config' and search for 'push.default' for further information.
(the 'simple' mode was introduced in Git 1.7.11. Use the similar mode
'current' instead of 'simple' if you sometimes use older versions of Git)
Counting objects: 3, done.
Compressing objects: 100% (2/2), done.
Writing objects: 100% (3/3), 294 bytes | 0 bytes/s, done.
Total 3 (delta 0), reused 0 (delta 0)
To [email protected]:dunitian/test.git
6f4fa43..4e69105 master -> master
————————————————————————————————————————
收工,媳婦催了。。。。明天繼續
簡單彙總一下:
————————————設定——————————————————

01.設定名字:
git config --global user.name "你的名字"

02.設定郵箱:
git config --global user.email "你的郵箱"

03.輸出更顯目的設定
git config --global color.ui auto

04.設定SSH Key
ssh-keygen -t rsa -C "你的郵箱"

————————————基礎——————————————————

05.克隆一份到本地
git clone [email protected]:dunitian/test.git(ssh的專案地址)

06.把檔案提交到倉庫
git add dnt.txt (新增到暫存區)
git commit -m "註釋" (提交)

07.push一下,更新github
git push

————————————檢視——————————————————

08.檢視自己的配置
git config --list

09.檢視key
cat ~/.ssh/id_rsa.pub

10.檢視git的狀態
git status

11.檢視提交日記
git log

————————————其他——————————————————
相關推薦
GitHub實戰系列~1.環境部署+建立第一個檔案 2015-12-9
—————————————————————————————————————————————————————— 很多人問,明明有git gui 和 github可以直接圖形化操作的嗎?全部指令幹啥??? 呃(⊙o⊙)…呃(⊙o⊙)… ===> 裝逼~ O(∩_∩)O~,開玩笑的,其實就是為了
Django系列二:Django 建立第一個專案
Django 建立第一個專案 本章我們將介紹Django 管理工具及如何使用 Django 來建立專案,第一個專案我們以 HelloWorld 來命令專案。 Django 管理工具 安裝 Django 之後,您現在應該已經有了可用的管理工具 django-admin
公司nginx keepalived tomcat cxf 搭建高可用負載均衡實戰系列1- keepalived安裝配置
技術分享 cnblogs start ges idt def auth div .cn 1,ip說明 vip 10.50.13.67 server1 10.50.13.68 server2 10.50.13.140 2
SpringBoot系列1-環境配置
一、maven配置 1. 開啟目錄maven setting檔案 D:\devinstall\apache-maven-3.5.4\conf\settings.xml 2.在profiles標籤下,配置下面的內容 <profile> <id>
微服務分散式事務實戰(五)準備資料庫和建立第一個微服務
1)資料庫準備 在資料庫中mysql 分別建立2個數據庫forum1和forum2 forum1 下建立表block forum2下建立表Theme sql程式碼如下: 1 資料庫1Forum1: CREATE DATABASE IF NOT EXISTS forum1; USE forum
Jmeter學習系列----1 環境搭建
注:在安裝Jmeter之前,請先檢查下電腦有沒有裝JDK:開始->執行->然後輸入cmd->進入命令列介面,輸入java -version , 出現以下資訊就是此電腦已安裝了JDK。 下載Jmeter 下載地址:http://jmeter.apache.org/download_jm
GitHub實戰系列彙總
速成: 1.Git Base For Linux 2.Git Pull Github and Gitee or Gitlab 基礎: 1.GitHub實戰系列~1.環境部署+建立第一個檔案 2015-12-9 2.GitHub實戰系列~2.把本地專案
vuejs環境搭建及建立第一個專案
一、vuejs環境搭建 vuejs的執行是基於node和git的所以在安裝Vuejs時要先安裝著兩個軟體才能成功安裝vuejs。 1、node安裝 在node官網下載node安裝軟體,下載完成後軟體如下 ,雙擊安裝軟體,安裝完成後開啟cmd,執行node -v驗證是否成功安裝
實戰系列之Docker部署Redis
使用Docker安裝redis 1、搜尋映象 docker search redis
ESP32系列教程:《入門篇:建立第一個熱點》
[github原始碼地址] (https://github.com/xiaolongba/wireless-tech/tree/master/%E8%BD%AF%E4%BB%B6/%E7%BA%A2%E6%97%AD%E6%97%A0%E7%BA%BF%E5%BC%80%E5%8F%91%E6%
1. React介紹 React開發環境搭建 React第一個程式
什麼是 React React 是 Facebook 釋出的 JavaScript 庫,以其高效能和獨特的設計理念受到了廣泛關注。React的開發背景 Facebook需要解
【OpenStack實戰系列】OpenStack部署都有哪些方式
對於每一個剛接觸到OpenStack的新人而言,安裝無疑是最困難的,同時這也客觀上提高了大家學習OpenStack雲端計算的技術門檻。想一想,自己3年前網上偶然接觸到OpenStack時,一頭茫然,手動搭建一個多節點環境時居然用了3個星期。時至今日,真是感觸頗多
1.2.0 Django 建立第一個專案
1.2.1 安裝 Django 安裝和啟動Django git clone https://github.com/django/django.git //mac下python cd Django && sudo python3 setup.py ins
Spark入門實戰系列--1.Spark及其生態圈簡介
對於Spark Streaming來說,其RDD的傳承關係如下圖所示,圖中的每一個橢圓形表示一個RDD,橢圓形中的每個圓形代表一個RDD中的一個Partition,圖中的每一列的多個RDD表示一個DStream(圖中有三個DStream),而每一行最後一個RDD則表示每一個Batch Size所產生的中間結果
Hive2.1.1環境部署
二、部署需求 Installation and Configuration You can install a stable release of Hive by downloading a tarball, or you can download the source
GitHub實戰系列彙總篇
速成: 1.Git Base For Linux 2.Git Pull Github and Gitee or Gitlab 3.SSH授權免登陸(GitHub and Gitee) 基礎: 1.GitHub實戰系列~1.環境部署+建立第一個檔案 2015-12-9 2.Git
GitHub實戰系列~2.把本地專案提交到github中 2015-12-10
—————————————————————————————————————————————————————— 很多人問,明明有git gui 和 github可以直接圖形化操作的嗎?全部指令幹啥??? 呃(⊙o⊙)…呃(⊙o⊙)… ===> 裝逼~ O(∩_∩)O~,開玩笑的,其實就是為了通用
GitHub實戰系列~4.把github裡面的庫克隆到指定目錄+日常使用 2015-12-11
—————————————————————————————————————————————————————— 很多人問,明明有git gui 和 github可以直接圖形化操作的嗎?全部指令幹啥??? 呃(⊙o⊙)…呃(⊙o⊙)… ===> 裝逼~ O(∩_∩)O~,開玩笑的,其實就是為了通用
07.GitHub實戰系列~7.Git之VS2013團隊開發(如果不想了解git命令直接學這篇即可)
GitHub實戰系列彙總:http://www.cnblogs.com/dunitian/p/5038719.html —————————————————————————————————————————————————————— 直接實戰~(如果你之前安裝了git其他版本都可以解除安裝了~這個就夠了【而且
05.GitHub實戰系列~5.釋出版本之分支操作+Tag講解 2015-12-14
如果是自己開發的話,git你最關心的可能就是今天所講的東西了,屁話不多說,步入正軌~ Tag推送: 先看看需求: 1. 引入,git檢視tag的命令是:git tag 2. 建立Tag 是直接加名字就ok了,格式: git tag 名字 –m "註釋" 3.有些人可能會問建立完了有毛用