Nine-Patch格式圖片淺析
關於Nine-Patch圖片,Google官方文件有如下定義:
The Draw 9-patch tool is a WYSIWYG editor that allows you to create bitmap images that automatically resize to accommodate the contents of the view and the size of the screen. Selected parts of the image are scaled horizontally or vertically
based indicators drawn within the image.
大概意思是:通過一種富文字編輯器(What are you see is what are you get)繪製9-patch格式的圖片,這種圖片可以自動適配檢視和螢幕上文字內容的大小。根據圖片中的顯示內容,可以選定這塊區域進行橫向或豎向的拉伸。
也就是說,9-patch圖片是因為螢幕的適配問題而出現的,由於Android裝置的螢幕有大有小,所以無論是在Android系統中,還是在APP中,都大量使用了9-patch圖片。
下面通過一個demo,演示9-patch圖片的意義(該demo僅是演示9-patch的顯示效果,故沒有activity的邏輯程式碼):
圖片資源

原圖

拉伸區域_5

拉伸區域_7

拉伸區域_2,文字區域為全部

拉伸區域_ 7,文字內容為區域_7
XML佈局
<ScrollView xmlns:android="http://schemas.android.com/apk/res/android"
android:layout_width="match_parent"
android:layout_height="wrap_content" >
<HorizontalScrollView
android:layout_width="wrap_content"
android:layout_height - 1
- 2
- 3
- 4
- 5
- 6
- 7
- 8
- 9
- 10
- 11
- 12
- 13
- 14
- 15
- 16
- 17
- 18
- 19
- 20
- 21
- 22
- 23
- 24
- 25
- 26
- 27
- 28
- 29
- 30
- 31
- 32
- 33
- 34
- 35
- 36
- 37
- 38
- 39
- 40
- 41
- 42
- 43
- 44
- 45
- 46
- 47
- 48
- 49
- 50
- 51
- 52
- 53
- 54
- 55
- 56
- 57
- 58
- 59
- 60
- 61
- 62
- 63
- 64
- 65
- 66
- 67
- 68
- 69
- 70
- 71
- 72
- 73
- 74
- 75
- 76
- 77
- 78
- 79
- 80
- 81
- 82
- 83
- 84
- 85
- 86
- 87
- 88
- 89
- 90
- 91
- 92
- 93
- 94
- 95
- 96
- 97
- 98
- 99
- 100
- 101
- 102
- 103
- 104
- 105
- 106
- 107
- 108
- 109
- 110
- 111
- 112
- 113
- 114
- 115
- 116
- 117
- 118
- 119
- 1
- 2
- 3
- 4
- 5
- 6
- 7
- 8
- 9
- 10
- 11
- 12
- 13
- 14
- 15
- 16
- 17
- 18
- 19
- 20
- 21
- 22
- 23
- 24
- 25
- 26
- 27
- 28
- 29
- 30
- 31
- 32
- 33
- 34
- 35
- 36
- 37
- 38
- 39
- 40
- 41
- 42
- 43
- 44
- 45
- 46
- 47
- 48
- 49
- 50
- 51
- 52
- 53
- 54
- 55
- 56
- 57
- 58
- 59
- 60
- 61
- 62
- 63
- 64
- 65
- 66
- 67
- 68
- 69
- 70
- 71
- 72
- 73
- 74
- 75
- 76
- 77
- 78
- 79
- 80
- 81
- 82
- 83
- 84
- 85
- 86
- 87
- 88
- 89
- 90
- 91
- 92
- 93
- 94
- 95
- 96
- 97
- 98
- 99
- 100
- 101
- 102
- 103
- 104
- 105
- 106
- 107
- 108
- 109
- 110
- 111
- 112
- 113
- 114
- 115
- 116
- 117
- 118
- 119
展示效果如下:

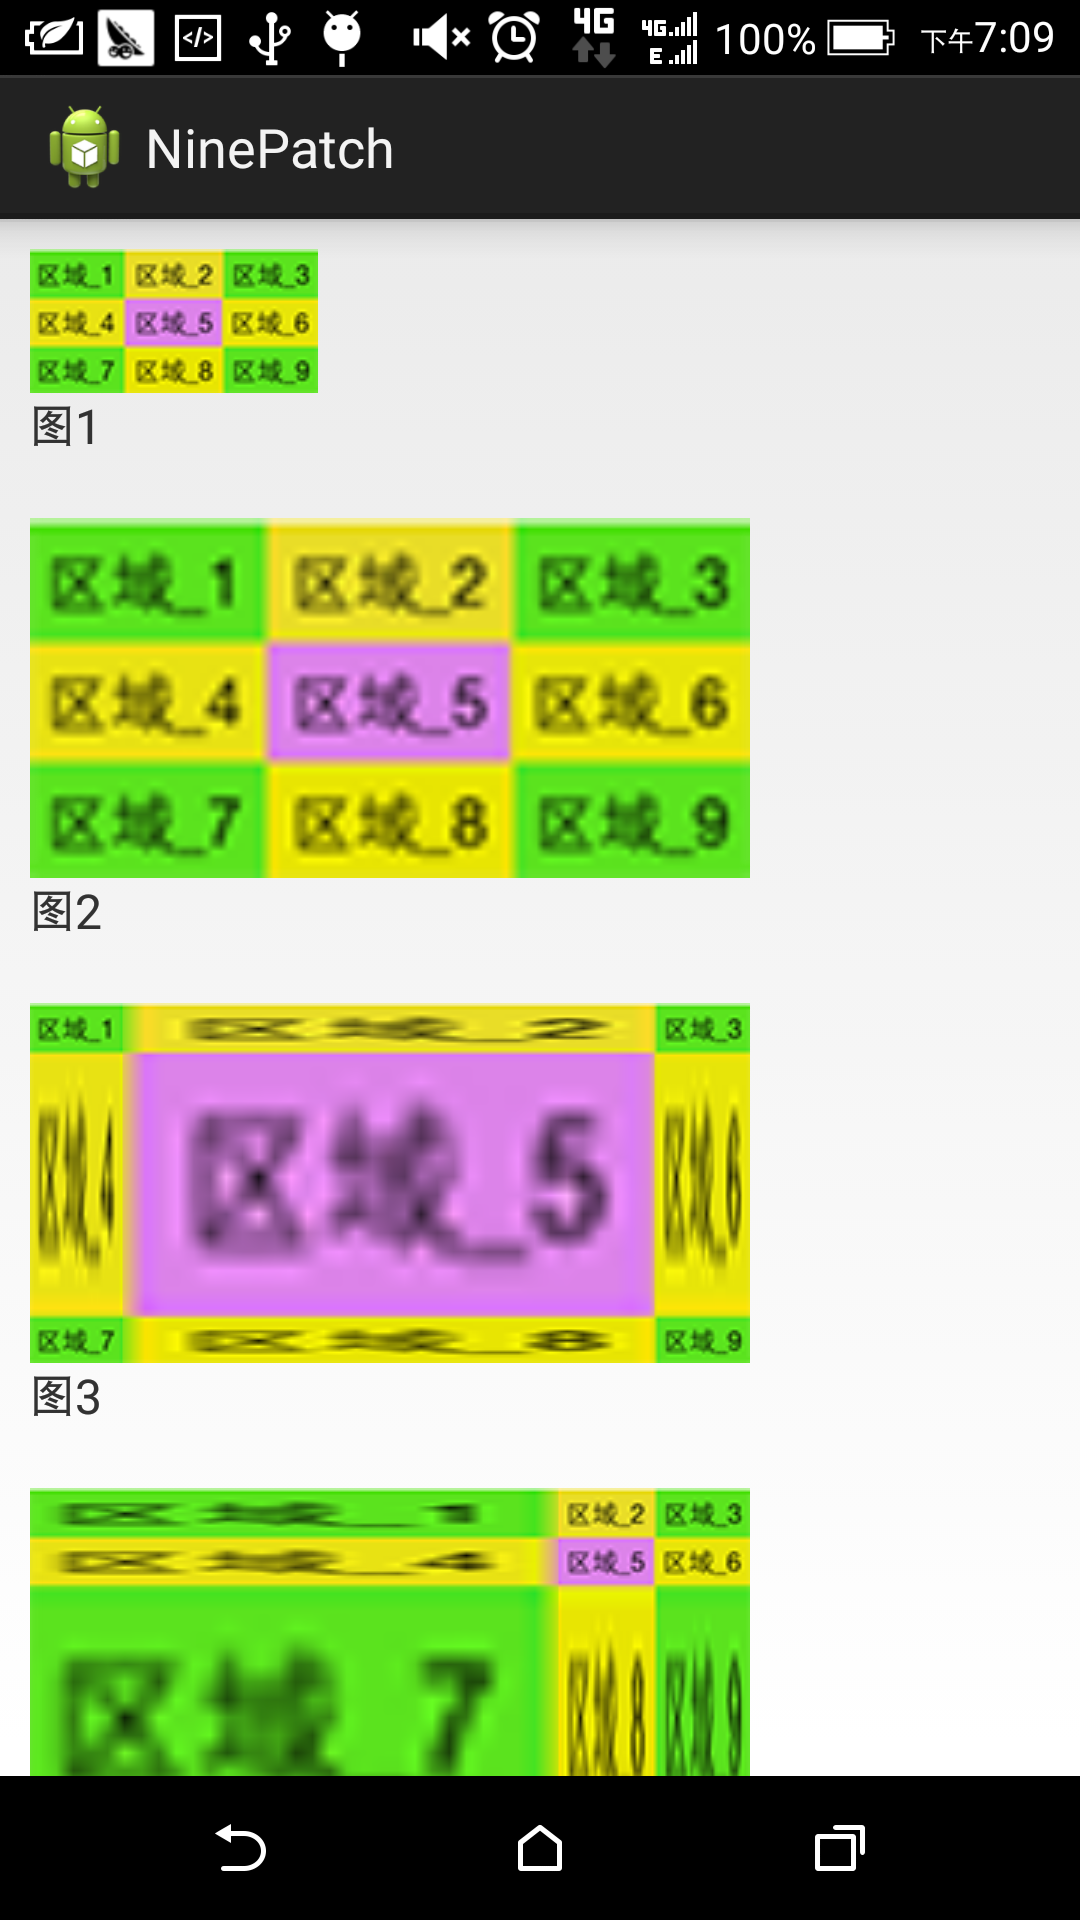
圖1,圖2,圖3

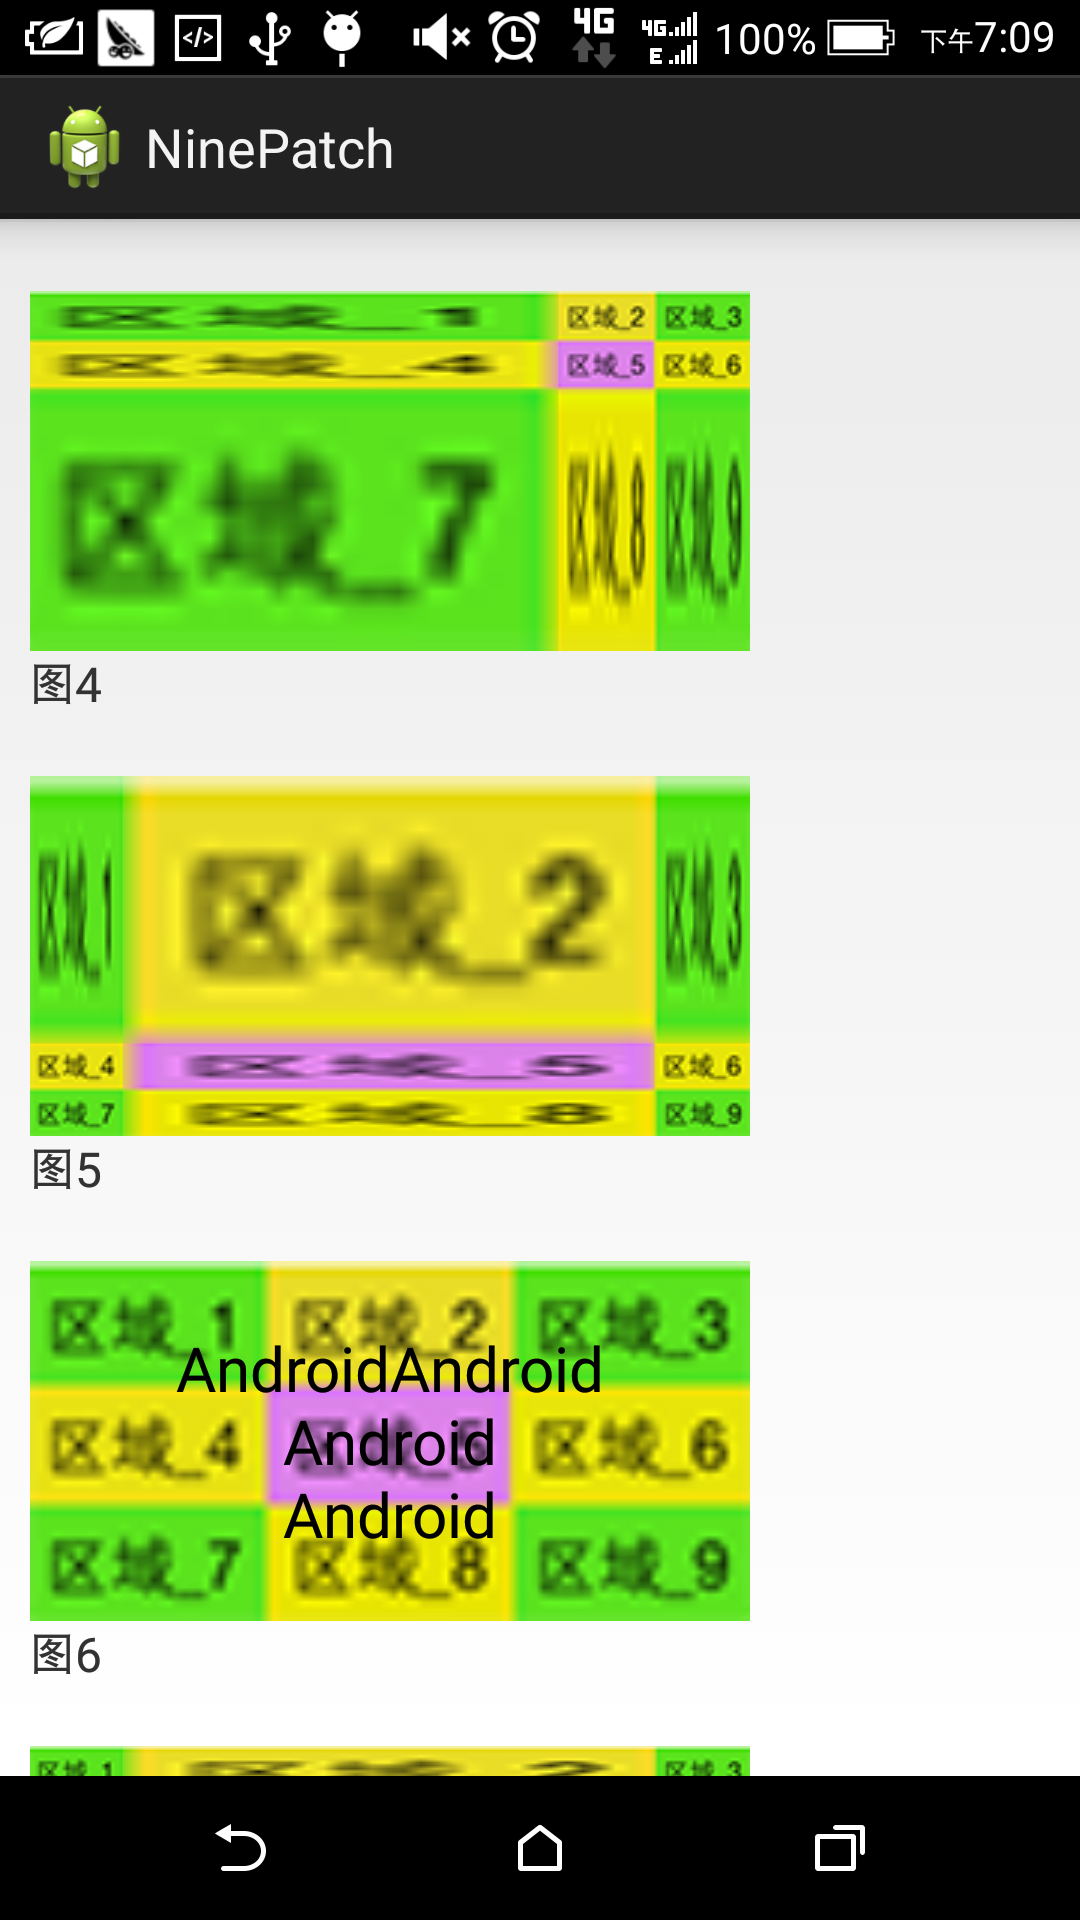
圖4,圖5,圖6

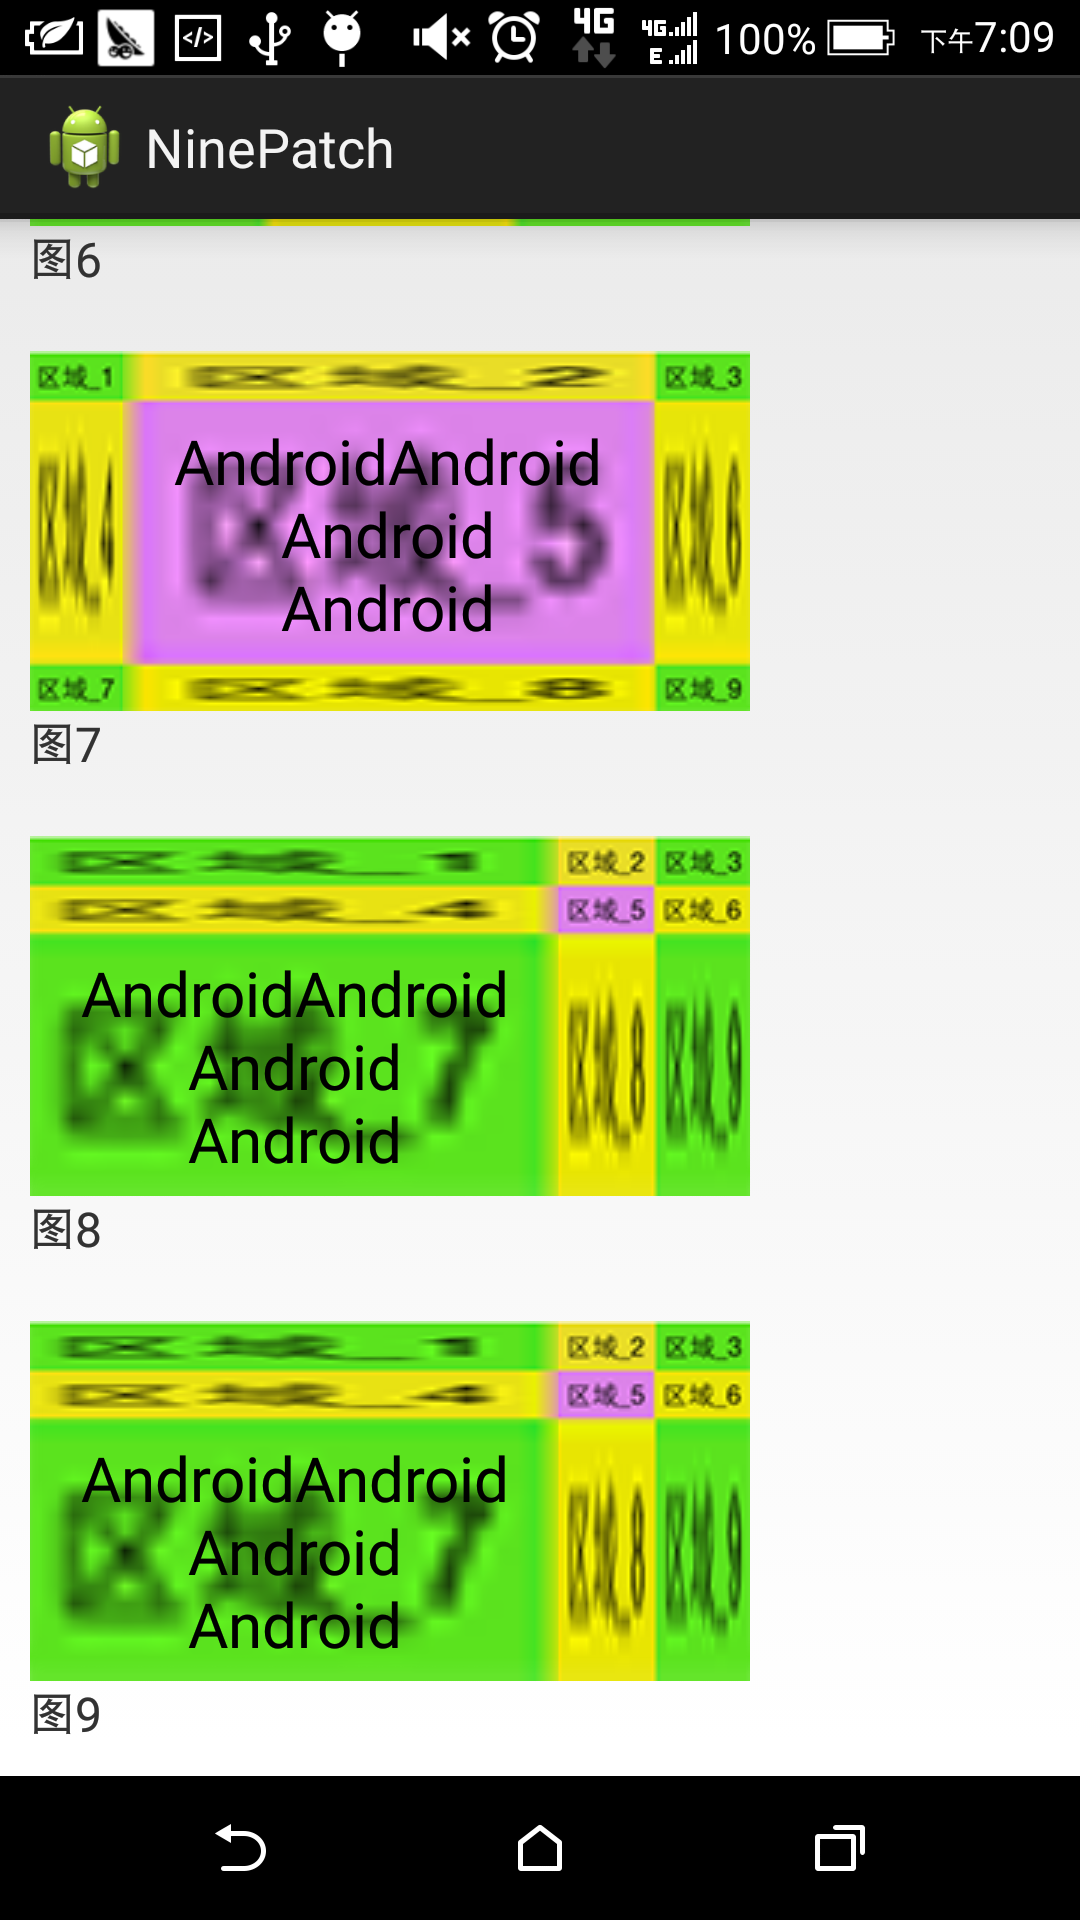
圖7,圖8,圖9
對照XML程式碼和顯示圖片得知:
- 圖1是原尺寸的普通圖片;
- 圖2是等比例放大的普通圖片,發生了失真;
- 圖3是將區域5放大的9-patch圖片,為了保證未拉伸區域1、3、7、9的長度不變,區域4和區域6的寬度進行了拉伸;同時為了保證未拉伸區域1、3、7、9的寬度不變,區域2和區域8的長度進行了拉伸;
- 圖4是將區域7放大的9-patch圖片,原理與圖3一樣;
- 圖5是將區域2放大的9-patch圖片,原理與圖3一樣;
- 圖6是等比例放大的普通圖片,且文字區域未指定;
- 圖7是將區域5放大的9-patch圖片,但文字區域未指定,其預設顯示區域為圖片拉伸的區域;
- 圖8將區域7放大的9-patch圖片,但文字區域未指定,其預設顯示區域為圖片拉伸的區域;
- 圖9將區域7放大的9-patch圖片,且文字區域也指定為區域7;
製作9-patch可總結以下要點:
- 使用批處理工具 sdk/toos/draw9patch.bat 製作9-patch;
- 使用draw9patch.bat工具開啟某個圖片後,工具會在上下左右各多留出1dp的寬度用於指定拉伸的範圍和文字顯示的大小,其中左側和上側用於定點陣圖片拉伸的區域,而右側和下側用於定點陣圖片文字的區域;
- 圖片的伸縮區域以外,為不可伸縮區域,不可伸縮的區域不會失真;
- 可以為一張圖片同時指定多個可伸縮區域;
- 圖片製作完成後,字尾名是 “.9.png”,同一個目錄下不能同時包含同名的png圖片(如在drawable中,有一張”abc.9.png”圖片,則不能再有 “abc.png”圖片);
- 從APK檔案解壓後得到的.9.png圖片。預設將額外的邊界畫素去掉了,使用時要重新新增。
相關推薦
Nine-Patch格式圖片淺析
關於Nine-Patch圖片,Google官方文件有如下定義: The Draw 9-patch tool is a WYSIWYG editor that allows you to create bitmap images that automatically res
制作Nine-Patch圖片
其他 img 圖片 alt drawable and open .cn draw Nine-Patch圖片是一種靜特殊處理過的圖片,可以指定哪些地方可以被拉伸那些地方不可以 通過android sdk>tools>draw9patch.bat文件,雙擊後,fil
黃聰:濃縮的才是精華:淺析GIF格式圖片的存儲和壓縮(轉)
meid 單獨 圖片分辨率 change 之前 dex 本質 0.11 blog http://www.cnblogs.com/qcloud1001/p/6647080.html 成文迪, 在Web前端摸爬滾打的碼農一枚,對技術充滿熱情的菜鳥,致力為手Q的建設添磚加瓦
android中使用Nine-Patch圖片
android中可以把圖片進行處理,如果圖片被拉伸的話,允許讓圖片部分割槽域不拉伸,部分割槽域拉伸。這個功能非常好,比如聊天的氣泡,如果整個氣泡被拉伸的話,會非常的醜。 老版的sdk中提供的有draw9patch.bat檔案,允許對圖片進行該項處理,不過新版的已經沒有這個檔案了,而是被整合到了Android
製作 Nine-Patch 圖片
Android的UI是非常重的,關乎使用者的體驗,一個好的UI能帶給這個系統很強的粘性。 若將這張圖片圖片放入佈局中。設定為android:layout_height="match_parent"
繪製Nine-Patch圖片
Idols http://blog.csdn.net/xiaanming 夏安明的blog http://blog.csdn.net/sinyu890807/ 郭霖的專欄《第一行程式碼》 http://stormzhang.com/ stormzhang Android
Android下的Nine-Patch圖片製作總結
1>Nine-Patch工具所在的位置: 在 AndroidSD \ tools\ 可以看到: 2>使用技巧 在邊緣無畫素的位置通過按住滑鼠左鍵拖動,即可選中我們要標記的位置, 通過按住shift+滑鼠左鍵即可擦除之前我們標記的黑點區域 圖片上邊框拉伸的
ps在psd格式圖片裏面切圖流程
mage bsp nbsp str ima col size round src 第一、 第二、 xx的地方自己重新命名 第三、 第四、 ps在psd格式圖片裏面切圖流程
android jpg格式圖片引用錯誤
今天 修改 出現 png 問題 handler java 圖片 mage 今天在學習Handler,通過開啟一個新線程周期性的修改ImageView,運行時出現了以下錯誤:java.lang.OutOfMemoryError: Failed to allocate a 23
Glide終於解決了同時加載webp格式圖片的問題
測試 ide 4.0 api web picasso 問題 net 今天 前端時間,要給項目換個圖片加載的庫,使用Glide 3.7版本進行測試, 發現在快速滑動列表(每個item都會加載一個app的圖標,采用webp格式,即同時加載多個webp格式)的時候,一屏至少有2
dflatex插入EPS格式圖片的兩種方法
epst center 兩種 參考 shell opd flat -s 產生 1. 將eps圖片轉成pdf或者將pdf圖片轉成eps,也就是說一張圖片有pdf、eps兩種格式。方法一:\includegraphics{pic} %不要擴展名。這樣pdflatex自動調相應的
js獲取input上傳圖片裝換為base64格式圖片
file .get reader wim fileread script gen fun return <input name="upimage" id="upload_file" type="file"> <img src="/img/touxiang
SVG格式圖片相關
java svg 一、阿裏巴巴的圖標庫 http://www.iconfont.cn ,裏邊可下載svg、png、AI格式圖標。 二、Java生成SVG格式文件的開源工具庫jfreesvg 官網: http://www.jfree.org/jfreesvg/ GitHub: h
[技術分享]20171129_mybatis _ ORA-01830: 日期格式圖片在轉換整個輸入字符串之前結束
color tty myba var state pre spa sele strong 最近在做項目的時候遇到了ORA-01830的問題, 問題的解決辦法是: 使用substr對日期進行一個截取 <select id="findActiveBlogWithTitl
SVG格式圖片轉成HTML中SVG的Path路徑
顏色 工具 back spa 如果 .org 彈出 技術分享 pyc AI圖標制作完成之後,保存的svg文件包含許多AI的信息,如果要在HTML中使用,我們需要在svg文件中提取/修改信息,重新保存。 1、在AI中已經完成圖標,要保存SVG文件,點擊“文件(File)”-
ORA-01830: 日期格式圖片在轉換整個輸入字符串之前結束(增量同步)
最大的 IE 比較 and value close when pda bst mdm_organization(源表)與mdm_zn_organiztaion(目標表)之間進行增量同步,同步規則:先查詢目標表中數據的最大的最後修改時間,根據最大的最後修改時間在源表中進行過濾
tensorflow讀取jpg格式圖片報錯 ValueError: Only know how to handle extensions: ['png']; with Pillow installed matplotlib can handle more images
nac pill images flow value bubuko 技術分享 img info 當運行mpimg.imread("img.jpg")時,spyder 出現如下錯誤: ValueError: Only know how to handle extensions
LaTeX中插入eps格式圖片
之前向LaTeX插入圖片的時候,一直使用.jpg格式,編譯出來效果很不好,很多地方稍微放大就顯得很模糊。後來採用.eps(Encapsulated Post Script)格式的圖片,因為是向量圖,即使放大也不會失真,效果很好,推薦使用。 下面介紹如何在LaTeX中插入.eps格式的圖片。
elas演算法原始碼賞析(一):PGM格式圖片的讀取和儲存
image.h原始碼 來說說標頭檔案 pgm格式 簡約筆記 // basic image I/O, based on Pedro Felzenszwalb's code #ifndef IMAGE_H #define
heic格式圖片怎麼開啟 heic轉jpg教程
iOS11系統已經更新很長一段時間了,但是對於其新使用者來說,關於圖片格式還是一個謎,今天統一說一說關於其特殊的圖片格式,有將蘋果手機拍的照片傳到電腦上的朋友會發現,在電腦上是打不開蘋果的heic格式的,因為電腦中不相容的問題,想平時經常使用的是jpg格式,只有將蘋果中的圖片格式轉換為jpg或者pn
