
安卓自定義Dialog的實現
一、Dialog佈局檔案
<?xml version="1.0" encoding="utf-8"?>
<FrameLayout xmlns:android="http://schemas.android.com/apk/res/android"
android:layout_width="fill_parent"
android:layout_height="fill_parent"
android:clickable="true"
android:orientation="vertical"
android:padding="20.0dip" 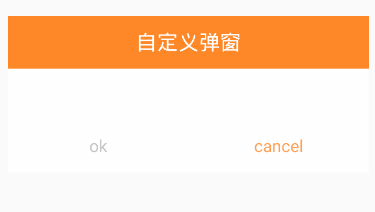
二、Style
 <style name="Dialog" parent="android:style/Theme.Dialog">
        <item name="android:background">#00000000</item>
        <item name="android:windowBackground">@android:color/transparent</item>
        <item name="android:windowNoTitle">true</item>
        <item name="android:windowIsFloating">true</item>
    </style>
三、MainActivity程式碼
 CustomDialog.Builder builder = new CustomDialog.Builder(MainActivity.this);
                builder.setMessage("這個就是自定義的提示框");
                builder.setTitle("提示");
                builder.setPositiveButton("確定", new DialogInterface.OnClickListener() {
                    public void onClick(DialogInterface dialog, int which) {
                        dialog.dismiss();
                        //設定你的操作事項
                        Toast.makeText(MainActivity.this,"queding",Toast.LENGTH_SHORT).show();
                    }
                });

                builder.setNegativeButton("取消",
                        new android.content.DialogInterface.OnClickListener() {
                            public void onClick(DialogInterface dialog, int which) {
                                Toast.makeText(MainActivity.this,"queding",Toast.LENGTH_SHORT).show();
                                dialog.dismiss();
                            }
                        });

                builder.create().show();
四、自定義DialogClass
package com.cavytech.widget;

import android.app.Dialog;
import android.content.Context;
import android.content.DialogInterface;
import android.view.LayoutInflater;
import android.view.View;
import android.widget.LinearLayout;
import android.widget.TextView;

import com.cavytech.wear2.R;

/**
 * Created by LiBin on 2016/6/16.
 */
public class CustomDialog extends Dialog {

    public CustomDialog(Context context) {
        super(context);
    }

    public CustomDialog(Context context, int theme) {
        super(context, theme);
    }

    public static class Builder {
        private Context context;
        private String title;
        private String message;
        private String positiveButtonText;
        private String negativeButtonText;
        private View contentView;
        private DialogInterface.OnClickListener positiveButtonClickListener;
        private DialogInterface.OnClickListener negativeButtonClickListener;

        public Builder(Context context) {
            this.context = context;
        }

        public Builder setMessage(String message) {
            this.message = message;
            return this;
        }

        /**
         * Set the Dialog message from resource
         *
         * @param
         * @return
         */
        public Builder setMessage(int message) {
            this.message = (String) context.getText(message);
            return this;
        }

        /**
         * Set the Dialog title from resource
         *
         * @param title
         * @return
         */
        public Builder setTitle(int title) {
            this.title = (String) context.getText(title);
            return this;
        }

        /**
         * Set the Dialog title from String
         *
         * @param title
         * @return
         */

        public Builder setTitle(String title) {
            this.title = title;
            return this;
        }

        public Builder setContentView(View v) {
            this.contentView = v;
            return this;
        }

        /**
         * Set the positive button resource and it's listener
         *
         * @param positiveButtonText
         * @return
         */
        public Builder setPositiveButton(int positiveButtonText,
                                         DialogInterface.OnClickListener listener) {
            this.positiveButtonText = (String) context
                    .getText(positiveButtonText);
            this.positiveButtonClickListener = listener;
            return this;
        }

        public Builder setPositiveButton(String positiveButtonText,
                                         DialogInterface.OnClickListener listener) {
            this.positiveButtonText = positiveButtonText;
            this.positiveButtonClickListener = listener;
            return this;
        }

        public Builder setNegativeButton(int negativeButtonText,
                                         DialogInterface.OnClickListener listener) {
            this.negativeButtonText = (String) context
                    .getText(negativeButtonText);
            this.negativeButtonClickListener = listener;
            return this;
        }

        public Builder setNegativeButton(String negativeButtonText,
                                         DialogInterface.OnClickListener listener) {
            this.negativeButtonText = negativeButtonText;
            this.negativeButtonClickListener = listener;
            return this;
        }

        public CustomDialog create() {
            LayoutInflater inflater = (LayoutInflater) context
                    .getSystemService(Context.LAYOUT_INFLATER_SERVICE);
            // instantiate the dialog with the custom Theme
            final CustomDialog dialog = new CustomDialog(context, R.style.Dialog);
            View layout = inflater.inflate(R.layout.dialog_normal_layout, null);
            dialog.addContentView(layout, new LinearLayout.LayoutParams(
                    LinearLayout.LayoutParams.FILL_PARENT, LinearLayout.LayoutParams.WRAP_CONTENT));
            // set the dialog title
            ((TextView) layout.findViewById(R.id.title)).setText(title);
            // set the confirm button
            if (positiveButtonText != null) {
                ((TextView) layout.findViewById(R.id.positiveTextView))
                        .setText(positiveButtonText);
                if (positiveButtonClickListener != null) {
                    ((TextView) layout.findViewById(R.id.positiveTextView))
                            .setOnClickListener(new View.OnClickListener() {
                                public void onClick(View v) {
                                    positiveButtonClickListener.onClick(dialog,
                                            DialogInterface.BUTTON_POSITIVE);
                                }
                            });
                }
            } else {
                // if no confirm button just set the visibility to GONE
                layout.findViewById(R.id.positiveTextView).setVisibility(
                        View.GONE);
            }
            // set the cancel button
            if (negativeButtonText != null) {
                ((TextView) layout.findViewById(R.id.negativeTextView))
                        .setText(negativeButtonText);
                if (negativeButtonClickListener != null) {
                    ((TextView) layout.findViewById(R.id.negativeTextView))
                            .setOnClickListener(new View.OnClickListener() {
                                public void onClick(View v) {
                                    negativeButtonClickListener.onClick(dialog,
                                            DialogInterface.BUTTON_NEGATIVE);
                                }
                            });
                }
            } else {
                // if no confirm button just set the visibility to GONE
                layout.findViewById(R.id.negativeTextView).setVisibility(
                        View.GONE);
            }
            // set the content message
            if (message != null) {
                ((TextView) layout.findViewById(R.id.message)).setText(message);
            } else if (contentView != null) {
                // if no message set
                // add the contentView to the dialog body
                ((LinearLayout) layout.findViewById(R.id.content))
                        .removeAllViews();
                ((LinearLayout) layout.findViewById(R.id.content))
                        .addView(contentView, new LinearLayout.LayoutParams(LinearLayout.LayoutParams.FILL_PARENT, LinearLayout.LayoutParams.FILL_PARENT));
            }
            dialog.setContentView(layout);
            return dialog;
        }
    }
}
相關推薦
安卓自定義Dialog的實現
一、Dialog佈局檔案 <?xml version="1.0" encoding="utf-8"?> <FrameLayout xmlns:android="http://schemas.android.com/apk/res/andr
去除安卓自定義Dialog黑色背景,設置無邊框,透明
isf window bsp 希望 nbsp tle -name rep lan 我們在自定義Dialog的時候,往往會希望除去安卓系統定義背景和標題,以便於更好的顯示我們自己想要的效果。 其實我們只需要註意幾個地方就行了。 1.在Style文件的中定義Dialog的主題
安卓自定義dialog
MyDialog.java public class MyDialog extends Dialog { public MyDialog(@NonNull Context context) { super(context); se
解決安卓自定義Dialog不能水平填滿螢幕
問題描述: UI設計,需要展示一個底部充滿螢幕的彈出框,但是發現下面和左右都沒有充滿。 預期: 實際: 解決方案: 自定義的Dialog中呼叫父類建構函式時,需要設定style 完整自定義dialog程式碼如下: 1.CustDialog.java pa
安卓自定義View實現簡單折線圖
自定義View實現折線圖: 執行效果: 少說廢話,實現起來還是比較簡單的,無非就是使用canvas進行繪圖,以及座標的計算,下面直接貼程式碼: ChartView.java /** * Created by wangke on 2017/2/2
安卓自定義Dialog之BaseDialog
專案裡用到的dialog越來越多,樣式也各式各樣,為了方便,所以就考慮寫一個BaseDialog。 新建BaseDialog繼承Dialog public class BaseDialog extends Dialog {
安卓自定義Dialog(一)
這個自定義Dialog主要是提醒使用者一些資訊:該環境沒有網,登入賬號是提示密碼錯誤.... 話不多說直接上程式碼: 一.實現功能的.java類 public static Dialog CreatDialog(Context context, String s,
安卓自定義彈框(Dialog)
1.在style檔案中建立一個style <style name="dialog" parent="@android:style/Theme.Dialog"> <item name="android:windowFrame">@null</
【安卓自定義控制元件】自定義ViewGroup實現透明背景的ViewPager效果
HelloWorld! 作為一名屌絲程式設計師,在部落格園寫第一篇技術部落格內心是無比激動滴,其實作為一名忙成狗的Android開發人員,一直覺得自己永遠都不會有時間去寫部落格, 因為我TM連找女朋友的時間都沒用== 言歸正傳,今天自定義控制元件系列要實現的效果是自定義Vi
安卓自定義下拉框---Spinner的實現
最近專案中用到下拉列表,剛開始一頭霧水,後來在網上找了一個Demo,自己修改了一下,現在把它分享出來,給大家參考,寫的不好,多多關照!不過功能還是實現的了······先上圖給大家看看效果! 效果圖: 實現思路: 1.定義下拉控制元件佈局(ListView及子控
安卓自定義列表dialog
前言 這個形式也是最常用的,不過最近需要用到列表資訊Dialog,原生的不光樣式不能滿足需求,而且是開發電視端的APP,需要對焦點進行特殊處理,所以就需要自定義Dialog 我們先來看一下系統自帶的列表Dialog。 系統自帶列表Dialog
【安卓-自定義佈局】安卓App開發思路 一步一個腳印(十)實現內嵌在app中的webview 騰訊開源X5 高效安全
實現內嵌在app中的webview 採用騰訊開源X5 高效安全 webview在app的使用中,十分頻繁,原生的webview載入速度相對來說很慢,而且很費流量。騰訊開源了x5的webview
安卓自定義控制元件-實現IOS版UC瀏覽器三點載入動畫效果
1.實現分析 廢話不多說,看下IOS版UC瀏覽器的載入效果 簡單畫個圖看下整個過程 1.B圓的圓心移動的座標為:A圓和B圓的圓心的距離L的中點為圓心O1的下半圓的運動軌跡經過的座標,就有一個由B位置到A位置圓周運動的軌跡。 2.C圓的圓心
【安卓-自定義佈局】安卓App開發思路 一步一個腳印(九)實現自定義滾動的新聞條目上下滾動-仿蘑菇街
實現自定義滾動的新聞條目上下滾動-仿蘑菇街 這種上下滾動的自定義佈局,就像是公告那種上下的翻滾,一般為文字的滾動,很明顯,就是自定義佈局,一般是線性佈局。這裡提到的安卓原生的控制元件自然是
安卓自定義:Toast 以及Toast的出場動畫 以及Toast上新增圖片 以及點選事件
安卓自定義Toast: 1.自定義一個類:CustomToast 繼承自:Toast 2.在CustomToast類中 新增一個靜態 mCustomToast 物件 private static CustomToast mCustomToast; 3.在CustomToast類中 新
安卓自定義switch樣式
榮耀手機鬧鐘開關的switch樣式,最近簡單的方法可以直接設定兩張圖片,根據按鈕狀態來進行切換。 這裡主要說另外一種方式 首先建立兩個track的資原始檔,也就是後面的背景 建立未開啟狀態下的track起名為track_bg_gray <?xml version="1.0
Android安卓自定義由底部彈出對話方塊
努力不一定立刻會有好的結果,但一定是朝著好的方向 ——李尚龍 《你所謂的穩定,不過是在浪費生命》
安卓自定義View進階-手勢檢測(GestureDecetor)
Android 手勢檢測,主要是 GestureDetector 相關內容的用法和注意事項,本文依舊屬於事件處理這一體系,部分內容會涉及到之前文章提及過的知識點,如果你沒看過之前的文章,可以到 自定義 View 系列 來檢視這些內容。 在開發 Android 手機應用過程中,可
安卓自定義View進階-多點觸控詳解
Android 多點觸控詳解,在前面的幾篇文章中我們大致瞭解了 Android 中的事件處理流程和一些簡單的處理方案,本次帶大家瞭解 Android 多點觸控相關的一些知識。 多點觸控 ( Multitouch,也稱 Multi-touch ),即同時接受螢幕上多個點的人機互動
安卓自定義View進階-特殊控制元件的事件處理方案
本文帶大家瞭解 Android 特殊形狀控制元件的事件處理方式,主要是利用了 Region 和 Matrix 的一些方法,超級實用的事件處理方案,相信看完本篇之後,任何奇葩控制元件的事件處理都會變得十分簡單。 不得不說,Android 對事件體系封裝的非常棒,即便對事件體系不太