
cocos2dx opengl入門系列三-畫一個四邊形
阿新 • • 發佈:2019-01-24
執行環境:
mac10.12.2
xcode Version 8.2.1
cocos2dx-x-3.13.1
程式碼:
新建cocos2dx專案,具體操作官網有教程。新建好後,
新建Test.cpp,程式碼如下:
//
//  Test.cpp
//  Rectangle
//
//  Created by zhufu on 2017/3/27.
//
//

#include "Test.h"
typedef struct {
    float Position[3];
    float Color[4];
} Vertex;
Test* Test::create()
{
    Test* test = new(std::nothrow) Test();
    if(test && test->init())
    {
        test->autorelease();
        return test;
    }
    else
    {
        delete test;
        test = nullptr;
        return nullptr;
    }
}

bool Test::init()
{
    _glProgram = new GLProgram();
    _glProgram->initWithFilenames("shader/myVertexShader.vsh", "shader/myFragmentShader.fsh");
    _glProgram->link();
    //set uniform locations
    //使用此shader
    _glProgram->use();


    glGenVertexArrays(1, &_vao);
    glBindVertexArray(_vao);

    GLubyte indices[] = { 0,1,2,  //第一個三角形索引
        2,3,1}; //第二個三角形索引

    GLuint indexVBO;
    glGenBuffers(1, &indexVBO);
    glBindBuffer(GL_ELEMENT_ARRAY_BUFFER, indexVBO);
    glBufferData(GL_ELEMENT_ARRAY_BUFFER, sizeof(indices) , indices, GL_STATIC_DRAW);

    GLuint vertexVBO, colorVBO;
    //建立和繫結vbo
    glGenBuffers(1, &vertexVBO);
    glBindBuffer(GL_ARRAY_BUFFER, vertexVBO);


    Vertex data[] =
    {
        {{-1,-1, 0},{0,1,0,1}},

        {{1,-1, 0},{1,0,0,1}},

        { {-1,1, 0},{0,0,1,1}},

        {{1,1, 0},{0,0,0,1}}
    };
    glBufferData(GL_ARRAY_BUFFER, sizeof(data), data, GL_STATIC_DRAW);

    //獲取vertex attribute "a_position"的入口點
    GLuint positionLocation = glGetAttribLocation(_glProgram->getProgram(), "a_position");
    //開啟入a_position入口點
    glEnableVertexAttribArray(positionLocation);
    //傳遞頂點資料給a_position,注意最後一個引數是陣列的偏移了。
    glVertexAttribPointer(positionLocation, 3, GL_FLOAT, GL_FALSE, sizeof(Vertex), (GLvoid*)offsetof(Vertex,Position));

    //set for color
    glGenBuffers(1, &colorVBO);
    glBindBuffer(GL_ARRAY_BUFFER, colorVBO);
    glBufferData(GL_ARRAY_BUFFER, sizeof(data), data, GL_STATIC_DRAW);

    GLuint colorLocation = glGetAttribLocation(_glProgram->getProgram(), "a_color");
    glEnableVertexAttribArray(colorLocation);
    glVertexAttribPointer(colorLocation, 4, GL_FLOAT, GL_FALSE, sizeof(Vertex), (GLvoid*)offsetof(Vertex,Color));

    _command.init(_globalZOrder);
    _command.func = CC_CALLBACK_0(Test::onDraw, this);

    return true;
}

void Test::draw(Renderer *renderer, const Mat4 &parentTransform, uint32_t parentFlags)
{
    CCLOG("vvv");


    Director::getInstance()->getRenderer()->addCommand(&_command);
}

void Test::onDraw()
{
    glClearColor(0, 0, 0, 1); // black
    glClear(GL_COLOR_BUFFER_BIT);

    // bind the program (the shaders)
    glUseProgram(_glProgram->getProgram());
    // bind the VAO (the triangle)
    glBindVertexArray(_vao);

    // draw the VAO
    glDrawElements(GL_TRIANGLES, 6, GL_UNSIGNED_BYTE,(GLvoid*)0);
    // unbind the VAO
    glBindVertexArray(0);

    // unbind the program
    glUseProgram(0);
}
新建Test.h,程式碼如下:
//
//  Test.h
//  Rectangle
//
//  Created by zhufu on 2017/3/27.
//
//

#ifndef Test_h
#define Test_h

#include <stdio.h>
USING_NS_CC;
class Test : public Node
{
public:
    GLuint _program = 0;
    virtual bool init() override;
    static Test* create();
    virtual void draw(Renderer *renderer, const Mat4& parentTransform, uint32_t parentFlags) override;
    void onDraw();

    cocos2d::CustomCommand _command;
    GLProgram* _glProgram;

    GLuint _vao = 0;
    GLuint _vertexVBO = 0;
    GLuint _colorVBO = 0;
};

#endif /* Test_h */
如圖:

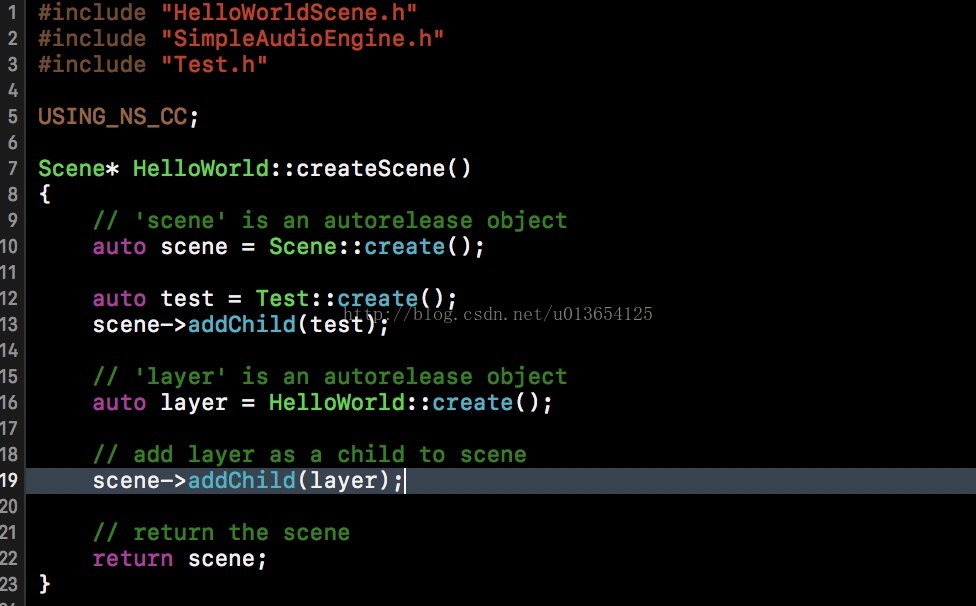
修改HelloWorldScene.cpp,
先
include "Test.h"再修改CreateScene方法:
如圖:Scene* HelloWorld::createScene() { // 'scene' is an autorelease object auto scene = Scene::create(); auto test = Test::create(); scene->addChild(test); // 'layer' is an autorelease object auto layer = HelloWorld::create(); // add layer as a child to scene scene->addChild(layer); // return the scene return scene; }
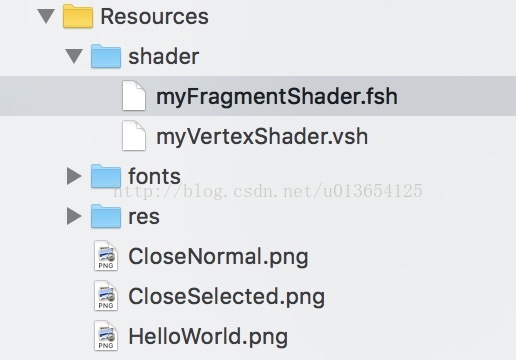
在Resources方位夾下新建shader資料夾,再在shader新建myVertexShader.vsh和myFragmentShader.fsh檔案。
如圖:
myVertexShader.vsh
attribute vec4 a_position;
attribute vec4 a_color;

varying vec4 v_fragmentColor;

void main()
{
    gl_Position = a_position;
    v_fragmentColor = a_color;
}
myFragmentShader.fsh
varying vec4 v_fragmentColor;

void main()
{
    gl_FragColor = v_fragmentColor;
}
執行效果:
