Android自定義錄影(一)之錄影功能實現(附demo原始碼)
引言
最近在做一個專案,是有關用手機攝像頭做影象實時識別的。所以裡面需要自定義一個錄影功能。該demo實現了錄影和錄影後文件的儲存檢視,錄影會實時自動對焦(AutoFocus)。根據功能分兩篇講述。這第一篇講述錄影基本實現思路和需要注意的點。後面附有github的demo原始碼下載連結。
思路
*Android實現錄影主要依靠MediaRecorder和SurfaceView這兩個類。另外,因為需要對攝像頭引數做一些設定,所以也需要Camera類。它們的作用分別是:MediaRecorder通過控制錄影音視訊源和輸出編碼等;surfaceview則是作為View的存在提供使用者介面,在surfaceview的不同生命週期實現不同的操作;camera類則用於對攝像頭引數做一些設定,再呼叫MediaRecorder的setCamera()
程式碼
1.佈局
<?xml version="1.0" encoding="utf-8"?>
<FrameLayout android:layout_width="fill_parent"
android:layout_height="fill_parent"
android:baselineAligned="false"
xmlns:android="http://schemas.android.com/apk/res/android">
<SurfaceView
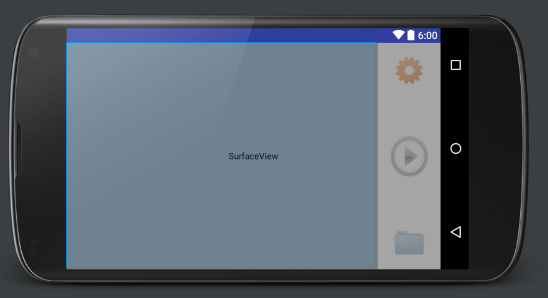
2.佈局截圖:
3.核心程式碼及註釋:
package com.alanjet.videorecordertest;

    import android.annotation.TargetApi;
    import android.app.Activity;
    import android.content.Intent;
    import android.content.pm.ActivityInfo;
    import android.graphics.PixelFormat;
    import android.hardware.Camera;
    import android.media.CamcorderProfile;
    import android.media.MediaRecorder;
    import android.os.Build;
    import android.os.Bundle;
    import android.os.Environment;
    import android.util.Log;
    import android.view.SurfaceHolder;
    import android.view.SurfaceView;
    import android.view.View;
    import android.view.Window;
    import android.view.WindowManager;
    import android.widget.ImageButton;
    import android.widget.Toast;

    import java.io.File;
    import java.util.Calendar;

    public class MainActivity extends Activity implements SurfaceHolder.Callback {
        private static final String TAG = "MainActivity";
        private SurfaceView mSurfaceview;
        private ImageButton mBtnStartStop;
        private ImageButton mBtnSet;
        private ImageButton mBtnShowFile;
        private boolean mStartedFlg = false;
        private MediaRecorder mRecorder;
        private SurfaceHolder mSurfaceHolder;
        private Camera myCamera;
        private Camera.Parameters myParameters;
        private Camera.AutoFocusCallback mAutoFocusCallback=null;
        private boolean isView = false;
        @Override
        public void onCreate(Bundle savedInstanceState) {
            super.onCreate(savedInstanceState);
            //重寫AutoFocusCallback介面
            mAutoFocusCallback=new Camera.AutoFocusCallback() {
            @Override
            public void onAutoFocus(boolean success, Camera camera) {
                if(success){
                    Log.i(TAG, "AutoFocus: success...");
                }else {
                    Log.i(TAG, "AutoFocus: failure...");
                }
            }
        };

        initScreen();
        setContentView(R.layout.activity_main);
        mSurfaceview  = (SurfaceView)findViewById(R.id.capture_surfaceview);
        mBtnStartStop = (ImageButton) findViewById(R.id.ib_stop);
        mBtnSet= (ImageButton) findViewById(R.id.capture_imagebutton_setting);
        mBtnShowFile= (ImageButton) findViewById(R.id.capture_imagebutton_showfiles);
        mBtnShowFile.setOnClickListener(new View.OnClickListener() {
            @Override
            public void onClick(View v) {
                Intent intent=new Intent(MainActivity.this,ShowVideoActivity.class);
                startActivity(intent);
                finish();
            }
        });
        mBtnSet.setOnClickListener(new View.OnClickListener() {
            @Override
            public void onClick(View v) {
                Toast.makeText(MainActivity.this,"相機設定待開發~",Toast.LENGTH_SHORT).show();
            }
        });

        SurfaceHolder holder = mSurfaceview.getHolder();// 取得holder

        holder.addCallback(this); // holder加入回撥介面


        holder.setType(SurfaceHolder.SURFACE_TYPE_PUSH_BUFFERS);

    }

        /**
         * 獲取系統時間,儲存檔案以系統時間戳命名
         */
        public static String getDate(){
            Calendar ca = Calendar.getInstance();
            int year = ca.get(Calendar.YEAR);
            int month = ca.get(Calendar.MONTH);
            int day = ca.get(Calendar.DATE);
            int minute = ca.get(Calendar.MINUTE);
            int hour = ca.get(Calendar.HOUR);
            int second = ca.get(Calendar.SECOND);

            String date = "" + year + (month + 1 )+ day + hour + minute + second;
            Log.d(TAG, "date:" + date);

            return date;
        }

        /**
         * 獲取SD path
         */
        public String getSDPath(){
            File sdDir = null;
            boolean sdCardExist = Environment.getExternalStorageState()
                    .equals(android.os.Environment.MEDIA_MOUNTED); // 判斷sd卡是否存在
            if (sdCardExist)
            {
                sdDir = Environment.getExternalStorageDirectory();// 獲取跟目錄
                return sdDir.toString();
            }

            return null;
        }

        //初始化螢幕設定
        public void initScreen(){
            requestWindowFeature(Window.FEATURE_NO_TITLE);// 去掉標題欄
            getWindow().setFlags(WindowManager.LayoutParams.FLAG_FULLSCREEN,
                    WindowManager.LayoutParams.FLAG_FULLSCREEN);// 設定全屏

            // 設定橫屏顯示
            setRequestedOrientation(ActivityInfo.SCREEN_ORIENTATION_LANDSCAPE);

            // 選擇支援半透明模式,在有surfaceview的activity中使用。
            getWindow().setFormat(PixelFormat.TRANSLUCENT);
        }

        //初始化Camera設定
        public void initCamera()
        {
            if(myCamera == null && !isView)
            {
                myCamera = Camera.open();
                Log.i(TAG, "camera.open");
            }
            if(myCamera != null && !isView) {
                try {
                    myParameters = myCamera.getParameters();
                    myParameters.setPreviewSize(1920, 1080);
                    myParameters.setFocusMode(Camera.Parameters.FOCUS_MODE_CONTINUOUS_VIDEO);
                    myCamera.setParameters(myParameters);
                    myCamera.setPreviewDisplay(mSurfaceHolder);
                    myCamera.startPreview();
                    isView = true;
                } catch (Exception e) {
                    // TODO: handle exception
                    e.printStackTrace();
                    Toast.makeText(MainActivity.this, "初始化相機錯誤",
                            Toast.LENGTH_SHORT).show();
                }
            }
        }

        @Override
        public void surfaceChanged(SurfaceHolder holder, int format, int width,
                                   int height) {
            // TODO Auto-generated method stub
            mSurfaceHolder = holder;
        }

        @Override
        public void surfaceCreated(SurfaceHolder holder) {
            // TODO Auto-generated method stub
            mSurfaceHolder = holder;
            initCamera();
            mBtnStartStop.setOnClickListener(new View.OnClickListener() {

                @TargetApi(Build.VERSION_CODES.LOLLIPOP)
                @Override
                public void onClick(View v) {
                    // TODO Auto-generated method stub

                    if (!mStartedFlg) {
                        // Start
                        if (mRecorder == null) {
                            mRecorder = new MediaRecorder(); // Create MediaRecorder
                        }
                        try {
                            myCamera.unlock();
                            mRecorder.setCamera(myCamera);
                            // Set audio and video source and encoder
                            // 這兩項需要放在setOutputFormat之前
                            mRecorder.setAudioSource(MediaRecorder.AudioSource.MIC);
                            mRecorder.setVideoSource(MediaRecorder.VideoSource.CAMERA);
                            mRecorder.setProfile(CamcorderProfile.get(CamcorderProfile.QUALITY_720P));
                            mRecorder.setPreviewDisplay(mSurfaceHolder.getSurface());

                            // Set output file path
                            String path = getSDPath();
                            if (path != null) {

                                File dir = new File(path + "/VideoRecorderTest");
                                if (!dir.exists()) {
                                    dir.mkdir();
                                }
                                path = dir + "/" + getDate() + ".mp4";
                                mRecorder.setOutputFile(path);
                                Log.d(TAG, "bf mRecorder.prepare()");
                                mRecorder.prepare();
                                Log.d(TAG, "af mRecorder.prepare()");
                                Log.d(TAG, "bf mRecorder.start()");
                                mRecorder.start();   // Recording is now started
                                Log.d(TAG, "af mRecorder.start()");
                                mStartedFlg = true;
                                mBtnStartStop.setBackground(getDrawable(R.drawable.rec_stop));
                            }
                        } catch (Exception e) {
                            e.printStackTrace();
                        }
                    } else {
                        // stop
                        if (mStartedFlg) {
                            try {
                                mRecorder.stop();
                                mRecorder.reset();
                                mBtnStartStop.setBackground(getDrawable(R.drawable.rec_start));
                            } catch (Exception e) {
                                e.printStackTrace();
                            }
                        }
                        mStartedFlg = false;
                    }
                }

            });
        }

        @Override
        public void surfaceDestroyed(SurfaceHolder holder) {
            // TODO Auto-generated method stub
            // surfaceDestroyed的時候同時物件設定為null
            mSurfaceview = null;
            mSurfaceHolder = null;
            if (mRecorder != null) {
                mRecorder.release();
                mRecorder = null;
            }
        }

        @Override
        protected void onRestart() {
            super.onRestart();
        }

        @Override
        protected void onResume() {
            super.onResume();
        }

        @Override
        protected void onStart() {
            super.onStart();
        }
    }
4.manifest許可權配置:
<uses-permission android:name="android.permission.RECORD_AUDIO" />
        <uses-permission android:name="android.permission.WRITE_EXTERNAL_STORAGE" />
        <uses-permission android:name="android.permission.CAMERA" />
        <uses-permission android:name="android.permission.MOUNT_UNMOUNT_FILESYSTEMS" />
5.注意點:
Surfaceview主要是通過
SurfaceHolder holder = mSurfaceview.getHolder();中的SurfaceHolder來做控制的,SurfaceHolder加入回撥介面holder.addCallback(this)來重寫介面中的三個生命週期方法:public void surfaceChanged(), public void surfaceCreated(), public void surfaceDestroyed().實現自動對焦的關鍵在於重寫
Camera.AutoFocusCallback()介面。並且需要將camera的parameters設定對焦模式為myParameters.setFocusMode(Camera.Parameters.FOCUS_MODE_CONTINUOUS_VIDEO)。
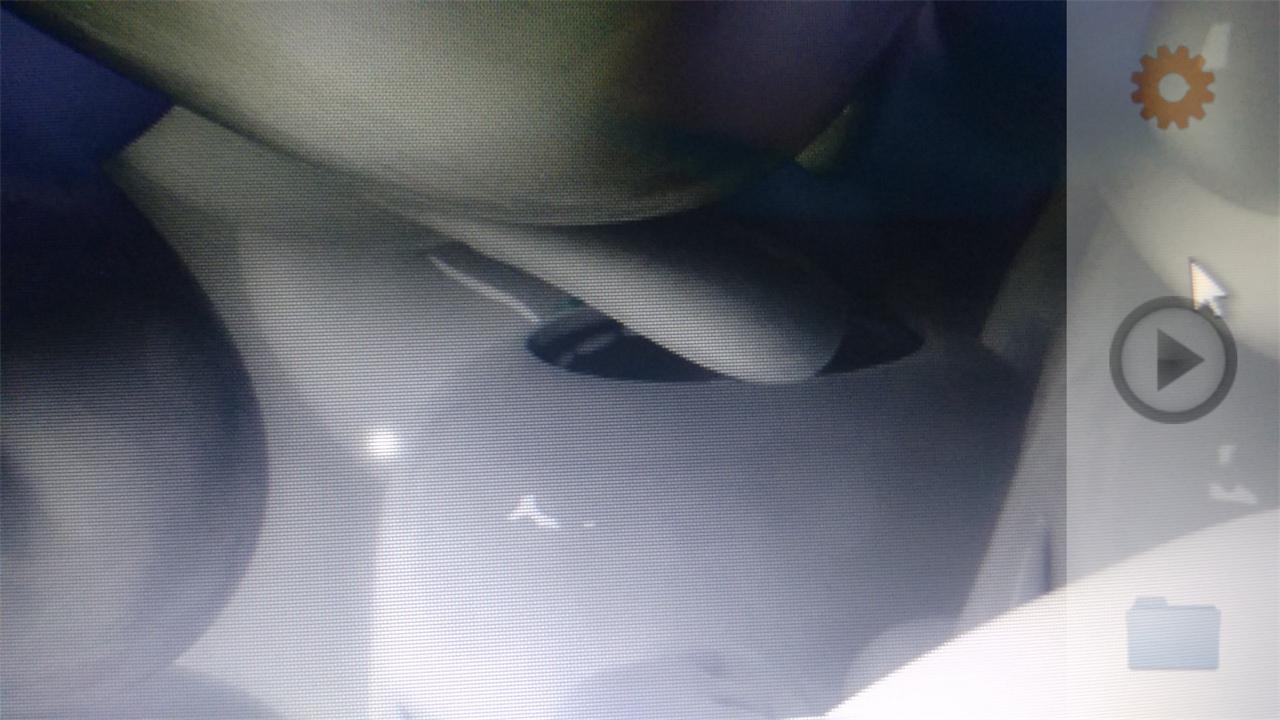
6.執行截圖:
7.demo原始碼下載連結:
後言
還有一篇部落格《Android自定義錄影(二)之錄影檔案儲存檢視實現(附demo原始碼)》將在近期推出!
在實踐中求真知,在技術中尋快樂。這是自己在做專案中的一點小積累,希望能幫到有需要的Android開發小夥伴。這也是自己第一次寫csdn部落格。可能表達得並不是很到位,一些地方寫的也比較稚嫩,歡迎大家在評論中多指點多交流,在技術之路上不斷前進。


