一步一步實現直播和彈幕
序言
最近在研究直播的彈幕,東西有點多,準備記錄一下免得自己忘了又要重新研究,也幫助有這方面需要的同學少走點彎路。關於直播的技術細節其實就是兩個方面一個是推流一個是拉流,而彈幕的實現核心在即時聊天,使用聊天室的就能實現,只是訊息的展示方式不同而已。在大多數的專案中還是使用第三方的直播平臺實現推流功能,因此關於直播平臺的選擇也是至關重要。下面由我娓娓道來。
效果
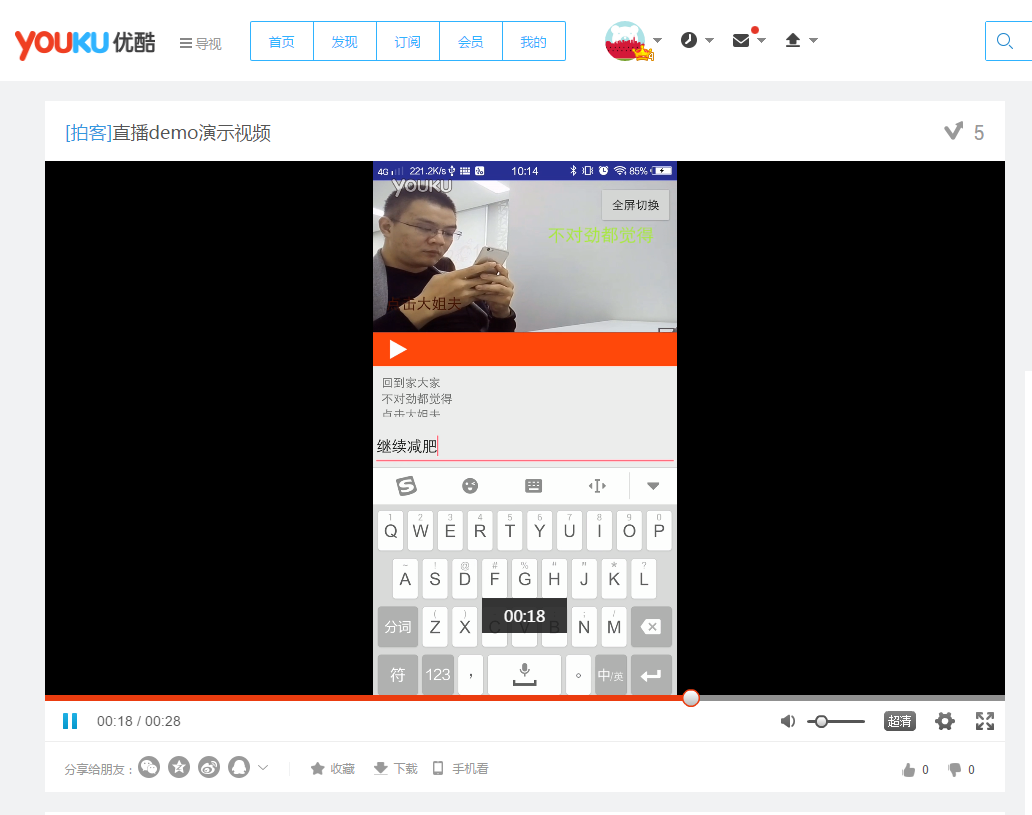
為了演示方便我把螢幕錄影上傳到優酷了,這是視訊地址
功能
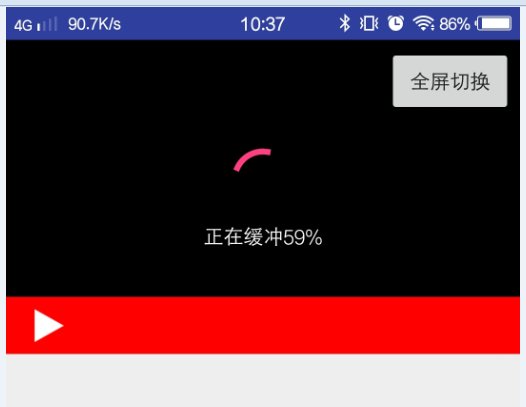
1.緩衝進度
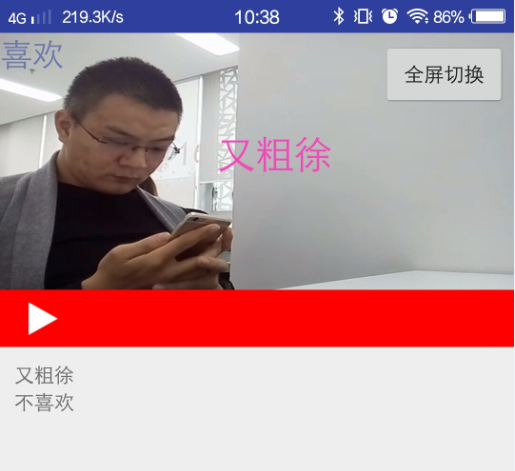
2.彈幕
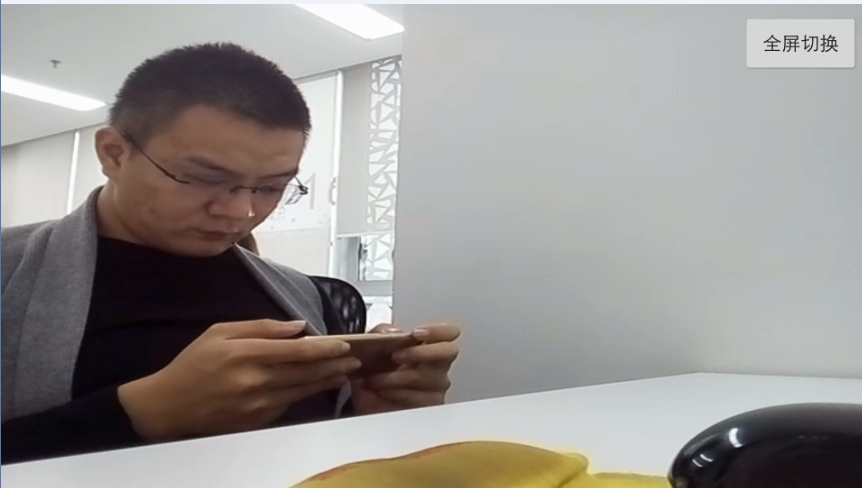
3.橫豎屏切換
實現
1.直播SDK的選擇
提供直播功能的廠商有很多,比如七牛雲,樂視,百度雲,騰訊雲,金山雲,等等。功能也大同小異,常見的縮圖,視訊錄製,轉碼,都可以實現。但是對於SDK的易用程度還是不敢恭維的。下面我說說我遇到的一些問題。
1.樂視
優點:
樂視直播的註冊流程還是很方便的,選擇個人開發者,然後驗證身份資訊就可以使用了,每人每月免費10GB的流量。
缺點
最大的缺點就是穩定性,至少在我測試的時候也就是2016年9月份穩定性很差,不是說視訊的穩定性,而是推流的穩定性,我有一臺在同樣的網路下我的ViVO X7能推流,但是魅藍NOTE2不能推流。然而ViVO X7推出去的流在電腦上用VLC能播放,在其他手機上顯示黑屏,既不報錯也沒畫面。隨後使用同樣的網路,同樣的魅藍NOTE2,百度的SDK就能推流。看來樂視的直播技術方面還有待改進,直接pass。
2.七牛雲
優點
態度好,服務周到,其他方面的不能再評價了,因為沒有真正使用過,這的確很尷尬,不過態度的確很好,會有客服打電話過來詢問需求,會有技術支援人員主動溝通,這是很值得肯定的。
缺點
倒不能算是缺點,可能算特點吧,七牛雲需要使用域名別名解析來做RTMP直播流域名,也就是說你要使用七牛雲必須要有一個備案過的域名,由於我司的域名我不能輕易去改,而且我也沒有備案過的域名,所以不能測試。
3.騰訊雲
還沒有通過稽核,效率太低。
4.阿里雲
也需要域名,跳過。
5.百度雲
優點
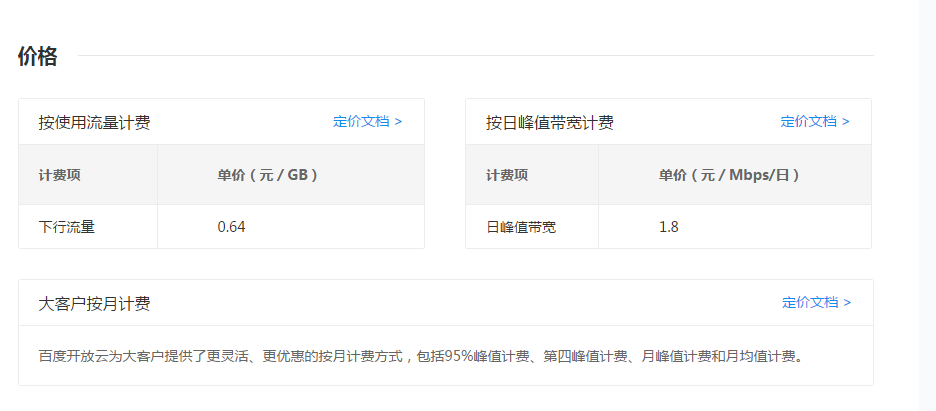
稽核速度挺快的,實名認證大概15分鐘搞定(這是我的速度,僅供參考),不需要域名,為個人開發者免費提供10G流量測試,這點很良心。而且功能很全面,推流很簡單。下面是價格表:
缺點
企業使用者需要認證,否則單月最大流量為1TB,個人使用者總流量限制在1000GB。
經過以上對比最終選擇了百度雲來實現直播。
2.及時聊天SDK的選擇
這裡邊倒沒有太多的考慮,環信,融雲,LeanCloud都可以,但是長期使用leancloud發現其文件質量很高,SDK簡單易用。所以使用了LeanCloud來實現即時通訊。
3.彈幕實現
彈幕說白了就是聊天室,只是聊天室的訊息需要在視訊節目上顯示而已,所以首先要實現一個聊天室,此處使用LeanCloud實現。
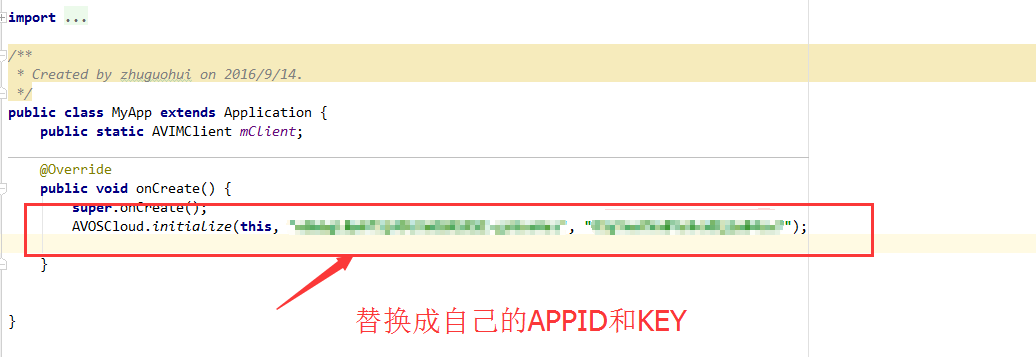
第一步:初始化
第二步:登入
package com.zgh.livedemo;

import android.content.Intent;
import android.os.Bundle;
import android.support.v7.app.AppCompatActivity;
import android.text.TextUtils;
import android.view.View;
import android.widget.EditText;
import android.widget.Toast;

import com.avos.avoscloud.im.v2.AVIMClient;
import com.avos.avoscloud.im.v2.AVIMException;
import com.avos.avoscloud.im.v2.callback.AVIMClientCallback;

public class LoginActivity extends AppCompatActivity {
    EditText et_name;

    @Override
    protected void onCreate(Bundle savedInstanceState) {
        super.onCreate(savedInstanceState);
        setContentView(R.layout.activity_login);
        et_name = (EditText) findViewById(R.id.et_name);
        findViewById(R.id.btn_login).setOnClickListener(new View.OnClickListener() {
            @Override
            public void onClick(View v) {
                String name = et_name.getText().toString();
                if (TextUtils.isEmpty(name)) {
                    Toast.makeText(LoginActivity.this, "登入名不能為空", Toast.LENGTH_SHORT).show();
                    return;
                }
                login(name);
            }
        });
    }


    public void login(String name) {
          //使用name作為cliendID
        AVIMClient jerry = AVIMClient.getInstance(name);
        jerry.open(new AVIMClientCallback() {

            @Override
            public void done(AVIMClient client, AVIMException e) {
                if (e == null) {
                    Toast.makeText(LoginActivity.this, "登入成功", Toast.LENGTH_SHORT).show();
                    //儲存client
                    MyApp.mClient = client;
                    startActivity(new Intent(LoginActivity.this, MainActivity.class));
                } else {
                    Toast.makeText(LoginActivity.this, "登入失敗:" + e.getMessage(), Toast.LENGTH_SHORT).show();
                }
            }
        });
    }


}
第三步,進入聊天室
在進入直播介面的時候呼叫此方法,進入聊天室。conversationId應該從伺服器獲取,此處用於測試使用了一個固定的ID。
    private void join() {
        MyApp.mClient.open(new AVIMClientCallback() {

            @Override
            public void done(AVIMClient client, AVIMException e) {
                if (e == null) {
                    //登入成功
                    conv = client.getConversation("57d8b2445bbb50005e420535");
                    conv.join(new AVIMConversationCallback() {
                        @Override
                        public void done(AVIMException e) {
                            if (e == null) {
                                //加入成功
                                Toast.makeText(MainActivity.this, "加入聊天室成功", Toast.LENGTH_SHORT).show();
                                et_send.setEnabled(true);
                            } else {
                                Toast.makeText(MainActivity.this, "加入聊天室失敗:" + e.getMessage(), Toast.LENGTH_SHORT).show();
                                et_send.setEnabled(false);
                                android.util.Log.i("zzz", "加入聊天室失敗 :" + e.getMessage());
                            }
                        }
                    });
                }
            }
        });
    }
登入成功以後,在onResum的時候將此Activity註冊為訊息處理者,在onPause的時候取消註冊。而在application的onCreate的時候註冊一個預設的處理器,也就是說當APP在後頭執行的時候,通過預設處理器處理訊息,即彈出狀態列彈出通知,而在聊天介面由當前介面處理訊息。
    @Override
    protected void onResume() {
        super.onResume();
        AVIMMessageManager.registerMessageHandler(AVIMTextMessage.class, roomMessageHandler);
    }

    @Override
    protected void onPause() {
        super.onPause();
        AVIMMessageManager.unregisterMessageHandler(AVIMTextMessage.class, roomMessageHandler);
    }
在接收到訊息以後把訊息顯示在彈幕控制元件上。
    public class RoomMessageHandler extends AVIMMessageHandler {
        //接收到訊息後的處理邏輯
        @Override
        public void onMessage(AVIMMessage message, AVIMConversation conversation, AVIMClient client) {
            if (message instanceof AVIMTextMessage) {
                String info = ((AVIMTextMessage) message).getText();
                //新增訊息到螢幕
                addMsg(info);
            }
        }

    }

    private void addMsg(String msg) {
        TextView textView = new TextView(MainActivity.this);
        textView.setText(msg);
        ViewGroup.MarginLayoutParams params = new ViewGroup.MarginLayoutParams(ViewGroup.LayoutParams.WRAP_CONTENT, ViewGroup.LayoutParams.WRAP_CONTENT);
        params.setMargins(5, 10, 5, 10);
        textView.setLayoutParams(params);
        ll_room.addView(textView, 0);
        barrageView.addMessage(msg);
    }
彈幕的控制元件
package com.zgh.livedemo.view;

import android.content.Context;
import android.graphics.Color;
import android.graphics.Rect;
import android.os.Handler;
import android.os.Message;
import android.text.TextPaint;
import android.util.AttributeSet;
import android.view.animation.AccelerateDecelerateInterpolator;
import android.view.animation.Animation;
import android.view.animation.TranslateAnimation;
import android.widget.RelativeLayout;
import android.widget.TextView;

import java.util.ArrayList;
import java.util.List;
import java.util.Random;

/**
 * Created by lixueyong on 16/2/19.
 */
public class BarrageView extends RelativeLayout {
    private Context mContext;
    private BarrageHandler mHandler = new BarrageHandler();
    private Random random = new Random(System.currentTimeMillis());
    private static final long BARRAGE_GAP_MIN_DURATION = 1000;//兩個彈幕的最小間隔時間
    private static final long BARRAGE_GAP_MAX_DURATION = 2000;//兩個彈幕的最大間隔時間
    private int maxSpeed = 10000;//速度,ms
    private int minSpeed = 5000;//速度,ms
    private int maxSize = 30;//文字大小,dp
    private int minSize = 15;//文字大小,dp

    private int totalHeight = 0;
    private int lineHeight = 0;//每一行彈幕的高度
    private int totalLine = 0;//彈幕的行數
    private List<String> messageList = new ArrayList<>();
    // private String[] itemText = {"是否需要幫忙", "what are you 弄啥來", "哈哈哈哈哈哈哈", "搶佔沙發。。。。。。", "************", "是否需要幫忙",
    //        "我不會輕易的狗帶", "嘿嘿", "這是我見過的最長長長長長長長長長長長的評論"};
    private int textCount;
//    private List<BarrageItem> itemList = new ArrayList<BarrageItem>();

    public BarrageView(Context context) {
        this(context, null);
    }

    public BarrageView(Context context, AttributeSet attrs) {
        this(context, attrs, 0);
    }

    public BarrageView(Context context, AttributeSet attrs, int defStyleAttr) {
        super(context, attrs, defStyleAttr);
        mContext = context;
        init();
    }

    private void init() {
        // textCount = itemText.length;

        int duration = (int) ((BARRAGE_GAP_MAX_DURATION - BARRAGE_GAP_MIN_DURATION) * Math.random());
        mHandler.sendEmptyMessageDelayed(0, duration);
    }

    public void addMessage(String message) {
        messageList.add(message);
    }

    @Override
    public void onWindowFocusChanged(boolean hasWindowFocus) {
        super.onWindowFocusChanged(hasWindowFocus);
        totalHeight = getMeasuredHeight();
        lineHeight = getLineHeight();
        totalLine = totalHeight / lineHeight;
    }

    private void generateItem() {
        if (messageList.size() > 0) {
            BarrageItem item = new BarrageItem();
            String tx = messageList.remove(0);
            int sz = (int) (minSize + (maxSize - minSize) * Math.random());
            item.textView = new TextView(mContext);
            item.textView.setText(tx);
            item.textView.setTextSize(sz);
            item.textView.setTextColor(Color.rgb(random.nextInt(256), random.nextInt(256), random.nextInt(256)));
            item.textMeasuredWidth = (int) getTextWidth(item, tx, sz);
            item.moveSpeed = (int) (minSpeed + (maxSpeed - minSpeed) * Math.random());
            if (totalLine == 0) {
                totalHeight = getMeasuredHeight();
                lineHeight = getLineHeight();
                totalLine = totalHeight / lineHeight;
            }
            item.verticalPos = random.nextInt(totalLine) * lineHeight;
//        itemList.add(item);
            showBarrageItem(item);
        }
    }

    private void showBarrageItem(final BarrageItem item) {

        int leftMargin = this.getRight() - this.getLeft() - this.getPaddingLeft();

        LayoutParams params = new LayoutParams(LayoutParams.WRAP_CONTENT, LayoutParams.WRAP_CONTENT);
        params.addRule(RelativeLayout.ALIGN_PARENT_TOP);
        params.topMargin = item.verticalPos;
        this.addView(item.textView, params);
        Animation anim = generateTranslateAnim(item, leftMargin);
        anim.setAnimationListener(new Animation.AnimationListener() {
            @Override
            public void onAnimationStart(Animation animation) {

            }

            @Override
            public void onAnimationEnd(Animation animation) {
                item.textView.clearAnimation();
                BarrageView.this.removeView(item.textView);
            }

            @Override
            public void onAnimationRepeat(Animation animation) {

            }
        });
        item.textView.startAnimation(anim);
    }

    private TranslateAnimation generateTranslateAnim(BarrageItem item, int leftMargin) {
        TranslateAnimation anim = new TranslateAnimation(leftMargin, -item.textMeasuredWidth, 0, 0);
        anim.setDuration(item.moveSpeed);
        anim.setInterpolator(new AccelerateDecelerateInterpolator());
        anim.setFillAfter(true);
        return anim;
    }

    /**
     * 計算TextView中字串的長度
     *
     * @param text 要計算的字串
     * @param Size 字型大小
     * @return TextView中字串的長度
     */
    public float getTextWidth(BarrageItem item, String text, float Size) {
        Rect bounds = new Rect();
        TextPaint paint;
        paint = item.textView.getPaint();
        paint.getTextBounds(text, 0, text.length(), bounds);
        return bounds.width();
    }

    /**
     * 獲得每一行彈幕的最大高度
     *
     * @return
     */
    private int getLineHeight() {
      /*  BarrageItem item = new BarrageItem();
        String tx = itemText[0];
        item.textView = new TextView(mContext);
        item.textView.setText(tx);
        item.textView.setTextSize(maxSize);

        Rect bounds = new Rect();
        TextPaint paint;
        paint = item.textView.getPaint();
        paint.getTextBounds(tx, 0, tx.length(), bounds);
        return bounds.height();*/
        return 50;
    }

    class BarrageHandler extends Handler {
        @Override
        public void handleMessage(Message msg) {
            super.handleMessage(msg);
            generateItem();
            //每個彈幕產生的間隔時間隨機
            int duration = (int) ((BARRAGE_GAP_MAX_DURATION - BARRAGE_GAP_MIN_DURATION) * Math.random());
            this.sendEmptyMessageDelayed(0, duration);
        }
    }

}
剩下的細節看demo吧。
4.視訊播放
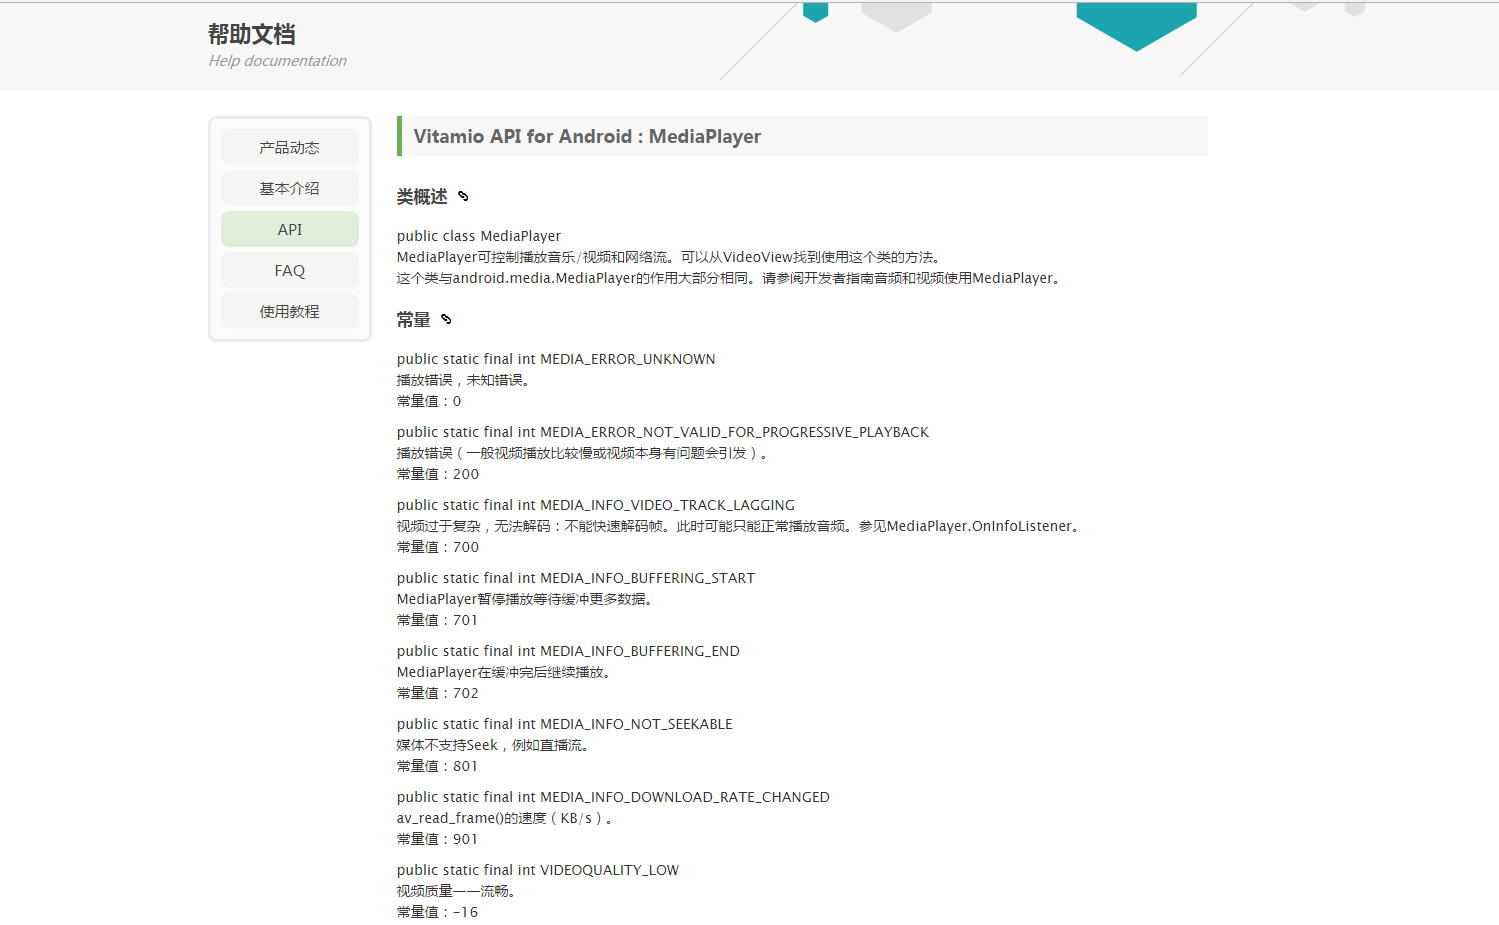
視訊的播放使用的是vitamio框架關於具體的API請參考這裡這裡
需要注意的是在狀態的獲取,通過設定不同的監聽來實現的。
     mVideoView.setOnInfoListener(new MediaPlayer.OnInfoListener() {
            public boolean onInfo(MediaPlayer mp, int what, int extra) {
                //緩衝開始
                if (what == MediaPlayer.MEDIA_INFO_BUFFERING_START) {
                    layout_loading.setVisibility(View.VISIBLE);
                    android.util.Log.i("zzz", "onStart");
                //緩衝結束
                } else if (what == MediaPlayer.MEDIA_INFO_BUFFERING_END) {
                    //此介面每次回撥完START就回調END,若不加上判斷就會出現緩衝圖示一閃一閃的卡頓現象
                    android.util.Log.i("zzz", "onEnd");
                    layout_loading.setVisibility(View.GONE);
                 //   mp.start();
                    mVideoView.start();
                }
                return true;
            }
        });
        //獲取快取百分比
        mVideoView.setOnBufferingUpdateListener(new MediaPlayer.OnBufferingUpdateListener() {
            @Override
            public void onBufferingUpdate(MediaPlayer mp, int percent) {
                if(!mp.isPlaying()) {
                    layout_loading.setVisibility(View.VISIBLE);
                    tv_present.setText("正在緩衝" + percent + "%");
                }else{
                    layout_loading.setVisibility(View.GONE);
                }

            }
        });

        mVideoView.setOnPreparedListener(new MediaPlayer.OnPreparedListener() {
            @Override
            public void onPrepared(MediaPlayer mediaPlayer) {
                mediaPlayer.setPlaybackSpeed(1.0f);
            }
        });
        //出錯處理
        mVideoView.setOnErrorListener(new MediaPlayer.OnErrorListener() {
            @Override
            public boolean onError(MediaPlayer mp, int what, int extra) {

                tv_present.setText("載入失敗");
                return true;
            }
});還有就是MediaController的使用,可以參考農民伯伯的vitamio中文API
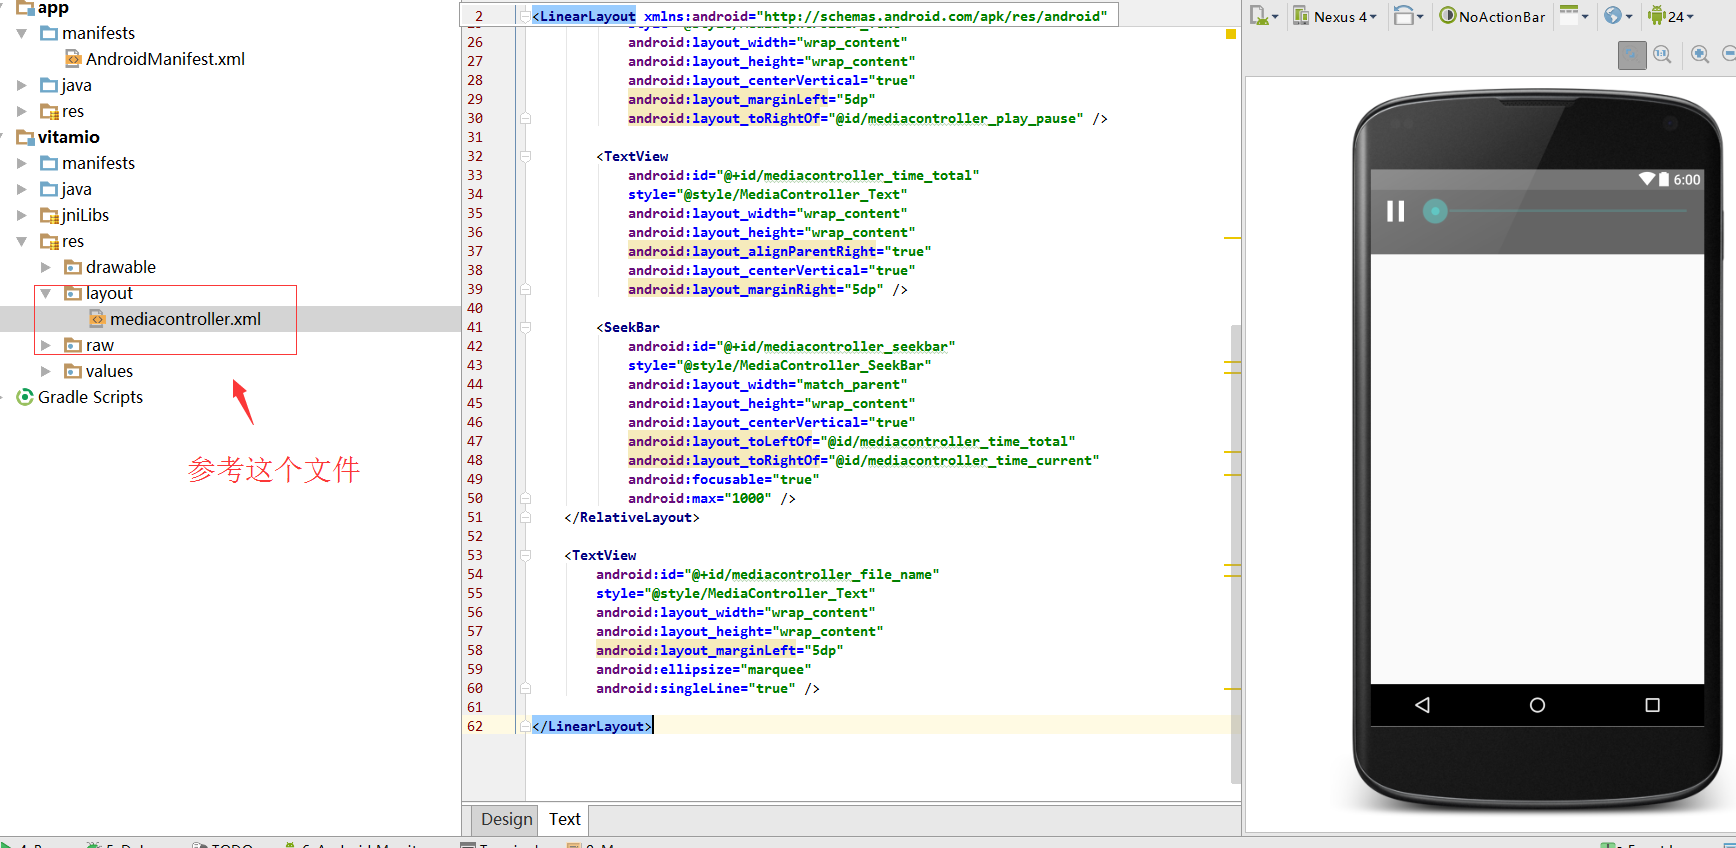
需要注意的是在xml中使用MediaController時需要這樣使用位置為VideoView之上,高度為需要顯示的控制條的高度,內部需要包括控制控制元件,id必須為指定的ID,佈局可以參考原始碼中這個檔案
  <io.vov.vitamio.widget.MediaController
            android:id="@+id/mediacontroller"
            android:layout_width="match_parent"
            android:layout_height="40dp"
            android:layout_alignParentBottom="true"
            android:background="#ff0000">

            <RelativeLayout
                android:layout_width="match_parent"
                android:layout_height="wrap_content"
                android:orientation="horizontal">

                <ImageButton
                    android:id="@+id/mediacontroller_play_pause"
                    android:layout_width="wrap_content"
                    android:layout_height="wrap_content"
                    android:layout_centerVertical="true"
                    android:layout_marginLeft="5dp"
                    android:background="@drawable/mediacontroller_button"
                    android:contentDescription="@string/mediacontroller_play_pause"
                    android:src="@drawable/mediacontroller_pause" />
            </RelativeLayout>
        </io.vov.vitamio.widget.MediaController>
5.視訊的全屏模式
其核心的邏輯是點選按鈕,改變螢幕方向,在改變方向的時候隱藏聊天室,輸入框等。同時改變控制元件的大小。要讓Activity在螢幕切換的時候不重新建立需要新增這個選項。
android:configChanges="keyboardHidden|orientation|screenSize"核心程式碼
 private void fullScreen() {
        if (isScreenOriatationPortrait(this)) {// 當螢幕是豎屏時
            full(true);
            // 點選後變橫屏
            setRequestedOrientation(ActivityInfo.SCREEN_ORIENTATION_LANDSCAPE);
            // 設定當前activity為橫屏
            // 當橫屏時 把除了視訊以外的都隱藏
            //隱藏其他元件的程式碼
            ll_room.setVisibility(View.GONE);
            et_send.setVisibility(View.GONE);
            int width=getResources().getDisplayMetrics().widthPixels;
            int height=getResources().getDisplayMetrics().heightPixels;
            layout_video.setLayoutParams(new LinearLayout.LayoutParams(height, width));
            mVideoView.setLayoutParams(new RelativeLayout.LayoutParams(height,width));


        } else {
            full(false);
            setRequestedOrientation(ActivityInfo.SCREEN_ORIENTATION_PORTRAIT);// 設定當前activity為豎屏
            //顯示其他元件
            ll_room.setVisibility(View.VISIBLE);
            et_send.setVisibility(View.VISIBLE);
            int width=getResources().getDisplayMetrics().heightPixels;
            int height= (int) (width*9.0/16);
            layout_video.setLayoutParams(new LinearLayout.LayoutParams(width, height));
            mVideoView.setLayoutParams(new RelativeLayout.LayoutParams(width,height));

        }
    }

    //動態隱藏狀態列
    private void full(boolean enable) {
        if (enable) {
            WindowManager.LayoutParams lp = getWindow().getAttributes();
            lp.flags |= WindowManager.LayoutParams.FLAG_FULLSCREEN;
            getWindow().setAttributes(lp);
            getWindow().addFlags(WindowManager.LayoutParams.FLAG_LAYOUT_NO_LIMITS);
        } else {
            WindowManager.LayoutParams attr = getWindow().getAttributes();
            attr.flags &= (~WindowManager.LayoutParams.FLAG_FULLSCREEN);
            getWindow().setAttributes(attr);
            getWindow().clearFlags(WindowManager.LayoutParams.FLAG_LAYOUT_NO_LIMITS);
        }
    }
Demo
關於demo中的配置資訊,我抽取到相關的config介面中了,大家只需要配置好就行了
package com.zgh.livedemo;

/**
 * Created by zhuguohui on 2016/9/20.
 */
public interface Config {
    /**
     * learnCloud APP_ID
     */
    String APP_ID = "";
    /**
     * learnCloud APP_KEY
     */
    String APP_KEY = "";
    /**
     * learnCloud 聊天室ID
     */
    String CONVERSATION_ID = "";
    /**
     * rtmp 視訊地址
     */
    String VIDEO_URL = "";
}
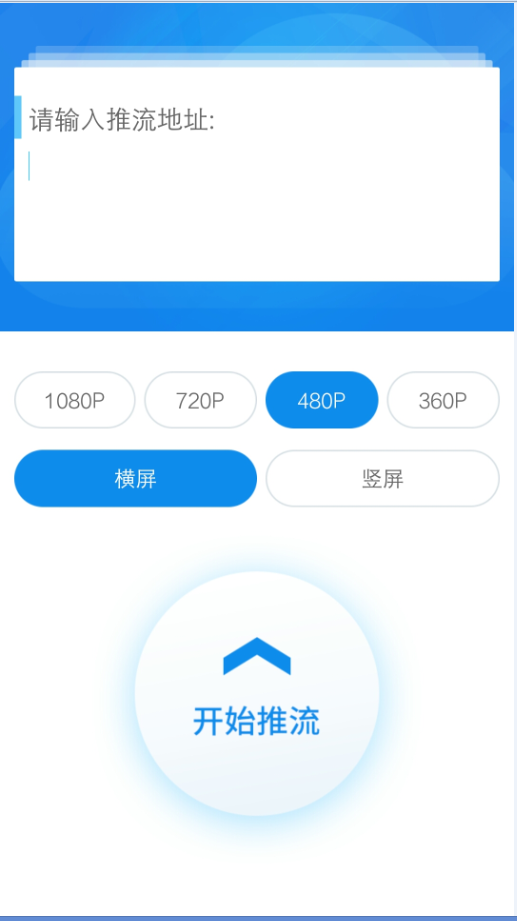
關於推流用的是百度直播SDK的官方的Demo

