
Android 自定義View(基礎)
一:引言
Android的開發中,在移動裝置上展示的所有內容,都是靠一個一個具體的檢視控制元件,按照一定的排列規則展示出來的,這些一個個控制元件,都是系統提供給我們的。但是我們看到,app商店上有些比較炫酷的頁面展示,我們會發現,系統根本沒有提供那些控制元件,那麼這是怎麼實現的呢?對就是通過我們的自定義控制元件去完成。那麼什麼是自定義控制元件呢,這裡我個人理解可以分為三類:
- 自定義試圖,——繼承 View,然後自繪試圖內容
- 自定義組合試圖,——繼承ViewGroup,然後對子類試圖進行重新佈局。
自定義已有試圖,——繼承已有的View,比如繼承ImageView
自定義控制元件是android修行道路上的必經之路,也是得道昇仙的必備能力。所以我們的跨過去,每天練習一點點,就一點點。
二:自定義View步驟
這裡介紹下自定義試圖的主要步驟
- 自定義屬相
- 繼承View重寫構造方法
- 獲取自定義屬性
- 重寫測量控制元件的寬高
- 繪製控制元件顯示
- 提供自定義事件
三:自定義View
- 自定義屬性
自定義屬性一共有10中定義型別,String,boolean等,具體的型別
和使用對應如下程式碼
<?xml version="1.0" encoding="utf-8"?>
<resources>
<attr name="text" format="string"></attr - 編寫自定義控制元件,使用自定義屬性
<?xml version="1.0" encoding="utf-8"?>
<RelativeLayout xmlns:android="http://schemas.android.com/apk/res/android"
xmlns:app="http://schemas.android.com/apk/res-auto"
xmlns:tools="http://schemas.android.com/tools"
android:layout_width="match_parent"
android:layout_height="match_parent"
>
<com.zhang.zs.customviewdemo.MyCuntomView
android:layout_centerInParent="true"
android:layout_width="wrap_content"
android:layout_height="wrap_content"
android:padding="20dp"
app:mcolor="#ff0"
app:msize="18sp"
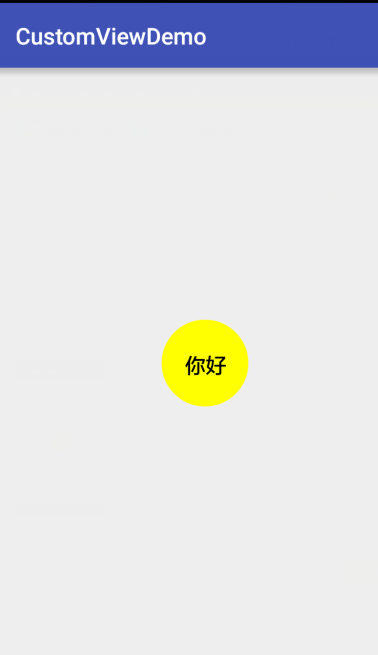
app:text="你好" />
</RelativeLayout>
- 建立自定義View繼承View(重寫構造方法)
在建立View的時候,需要重寫構造方法,一般重寫前三個構造方法就可以了,但是如果我們的自定控制元件是通過佈局檔案的形式載入,則第二個構造必須重寫,不然會報錯。
   public MyCuntomView(Context context) {
        this(context, null);
    }

    public MyCuntomView(Context context, AttributeSet attrs) {
        this(context, attrs, 0);
    }

    public MyCuntomView(Context context, AttributeSet attrs, int defStyleAttr) {
        super(context, attrs, defStyleAttr);

        //獲取自定義屬性
        initViewAtrr(context, attrs, defStyleAttr);
}- 獲取自定屬性的值
在獲取自定義屬性值的時候,我們通過迴圈的方式來獲取值,這樣獲取到屬性值,就是我們xml檔案中使用到的,沒有使用到的就獲取不到。而並獲取我們所有自定義的屬性。
  private void initViewAtrr(Context context, AttributeSet attrs, int defStyleAttr) {

        TypedArray a = context.getTheme().obtainStyledAttributes(attrs, R.styleable.customView, defStyleAttr, 0);

        //獲取有幾個自定義屬相
        final int count = a.getIndexCount();
        Log.e("TAG", "=====" + count);

        for (int i = 0; i < count; i++) {
            int type = a.getIndex(i);
            switch (type) {
                case R.styleable.customView_text:

                    text = a.getString(type);
                    if (TextUtils.isEmpty(text)) {
                        text = "我是文字";
                    }
                    break;

                case R.styleable.customView_mcolor:

                    corlor = a.getColor(type, Color.RED);

                    break;

                case R.styleable.customView_msize:

                    msize = a.getDimensionPixelSize(type, 15);
                    break;


            }

        }

        a.recycle();

        paint = new Paint();
        //抗鋸齒
        paint.setAntiAlias(true);


}- 測量控制元件的大小(重寫onMeasure方法)
測量之前先了解MeasureSpec的specMode,mode共有三種情況,取值分別為MeasureSpec.UNSPECIFIED, MeasureSpec.EXACTLY, MeasureSpec.AT_MOST。
MeasureSpec.EXACTLY是精確尺寸,當我們將控制元件的layout_width或layout_height指定為具體數值時如andorid:layout_width=”50dip”,或者為FILL_PARENT是,都是控制元件大小已經確定的情況,都是精確尺寸。
MeasureSpec.AT_MOST是最大尺寸,當控制元件的layout_width或layout_height指定為WRAP_CONTENT時,控制元件大小一般隨著控制元件的子空間或內容進行變化,此時控制元件尺寸只要不超過父控制元件允許的最大尺寸即可。因此,此時的mode是AT_MOST,size給出了父控制元件允許的最大尺寸。
MeasureSpec.UNSPECIFIED是未指定尺寸,這種情況不多,一般都是父控制元件是AdapterView,通過measure方法傳入的模式。
知道以上概念之後我們重寫測量就容易的多了
 @Override
    protected void onMeasure(int widthMeasureSpec, int heightMeasureSpec) {

        int mode = MeasureSpec.getMode(widthMeasureSpec);
        int size = MeasureSpec.getSize(widthMeasureSpec);
        bounds = new Rect();
        if (mode == MeasureSpec.EXACTLY) {
            mwidth = size;
        } else {

            paint.setTextSize(msize);

            paint.getTextBounds(text, 0, text.length(), bounds);
            mwidth = getPaddingLeft() + getPaddingRight() + bounds.width();

        }


        mode = MeasureSpec.getMode(heightMeasureSpec);
        size = MeasureSpec.getSize(heightMeasureSpec);
        if (mode == MeasureSpec.EXACTLY) {

            mheight = size;
        } else {

            paint.getTextBounds(text, 0, text.length(), bounds);
            mheight = getPaddingBottom() + getPaddingTop() + bounds.height();
        }

      r=Math.max(mwidth,mheight);
        setMeasuredDimension(r, r);

}- 繪製控制元件顯示(重寫onDraw方法)
  @Override
    protected void onDraw(Canvas canvas) {
        paint.setColor(corlor);
        canvas.drawCircle(r/2,r/2,r/2,paint);
        paint.setColor(Color.BLACK);
        canvas.drawText(text,r/2-bounds.width()/2,r/2+bounds.height()/2,paint);

    }
- 定義事件
 @Override
    public boolean onTouchEvent(MotionEvent event) {
        if(event.getAction()==MotionEvent.ACTION_DOWN){
            if(changeColor!=null){
                changeColor.change(this,text);
            }

        }
        return super.onTouchEvent(event);
    }


    public interface  ChangeColor{

        public void change(MyCuntomView  view,String name);
    }

    public ChangeColor changeColor;

    public void setChangeColor(ChangeColor changeColor) {
        this.changeColor = changeColor;
    }
MainActivity程式碼
public class MainActivity extends AppCompatActivity {
    private MyCuntomView name;
    @Override
    protected void onCreate(Bundle savedInstanceState) {
        super.onCreate(savedInstanceState);
        setContentView(R.layout.activity_main);


        name = (MyCuntomView) findViewById(R.id.name);
        name.setChangeColor(new MyCuntomView.ChangeColor() {
            @Override
            public void change(MyCuntomView view,String text) {

                Toast.makeText(MainActivity.this,text,Toast.LENGTH_SHORT).show();

            }
        });

    }
以上就是自定義View的整個流程。