
Flutter(一):用BottomNavigationBar實現底部導航欄架構
阿新 • • 發佈:2019-02-08
效果圖(左ios右Android):
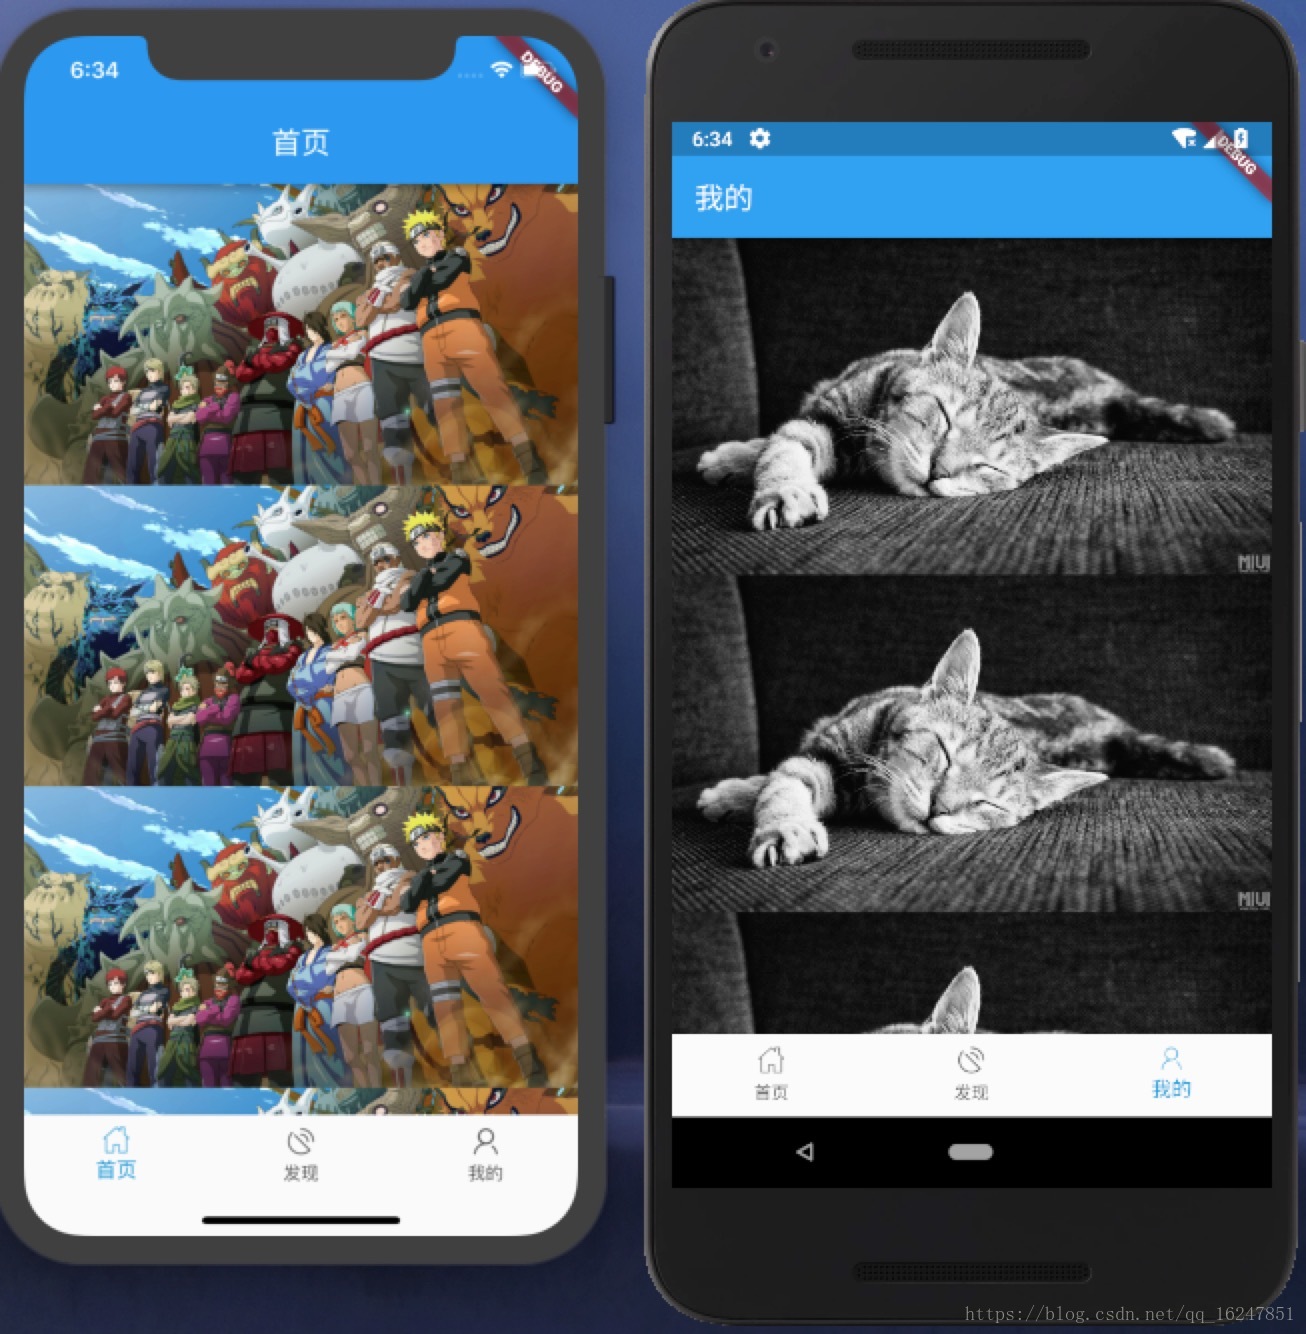
主要涉及到5個檔案,main.dart是程式入口,MainPage.dart是主要介面(相當於Android中的MainActivity),HomePge.dart、FindPage.dart、MinePage.dart分別是首頁、發現、我的。

首先看Main.dart程式碼:
import 'package:flutter/material.dart';
import 'package:flutter_app/MainPage.dart';

void main() => runApp(new MyApp());

class MyApp extends StatelessWidget {
  @override
  Widget build(BuildContext context) {
    return new MaterialApp(
      theme: new ThemeData(
        primarySwatch: Colors.blue,
      ),
      home: MainPage(),//啟動MainPage
    );
  }
}
MainPage.dart程式碼:
import 'package:flutter/material.dart';
import 'package:flutter_app/FindPage.dart';
import 'package:flutter_app/HomePage.dart';
import 'package:flutter_app/MinePage.dart';

class MainPage extends StatelessWidget {
  @override
  Widget build(BuildContext context) {
    return new MaterialApp(
        debugShowCheckedModeBanner: false, home: new MainPageWidget());
  }
}

class MainPageWidget extends StatefulWidget {
  @override
  State<StatefulWidget> createState() {
    return new MainPageState();
  }
}

class MainPageState extends State<MainPageWidget> {
  int _tabIndex = 0;
  var tabImages;
  var appBarTitles = ['首頁', '發現', '我的'];
  /*
   * 存放三個頁面,跟fragmentList一樣
   */
  var _pageList;

  /*
   * 根據選擇獲得對應的normal或是press的icon
   */
  Image getTabIcon(int curIndex) {
    if (curIndex == _tabIndex) {
      return tabImages[curIndex][1];
    }
    return tabImages[curIndex][0];
  }
  /*
   * 獲取bottomTab的顏色和文字
   */
  Text getTabTitle(int curIndex) {
    if (curIndex == _tabIndex) {
      return new Text(appBarTitles[curIndex],
          style: new TextStyle(fontSize: 14.0, color: const Color(0xff1296db)));
    } else {
      return new Text(appBarTitles[curIndex],
          style: new TextStyle(fontSize: 14.0, color: const Color(0xff515151)));
    }
  }
  /*
   * 根據image路徑獲取圖片
   */
  Image getTabImage(path) {
    return new Image.asset(path, width: 24.0, height: 24.0);
  }


  void initData() {
    /*
     * 初始化選中和未選中的icon
     */
    tabImages = [
      [getTabImage('images/home.png'), getTabImage('images/home_selected.png')],
      [getTabImage('images/find.png'), getTabImage('images/find_selected.png')],
      [getTabImage('images/mine.png'), getTabImage('images/mine_selected.png')]
    ];
    /*
     * 三個子介面
     */
    _pageList = [
      new HomePage(),
      new FindPage(),
      new MinePage(),
    ];
  }

  @override
  Widget build(BuildContext context) {
    //初始化資料
    initData();
    return Scaffold(
        body: _pageList[_tabIndex],
        bottomNavigationBar: new BottomNavigationBar(
          items: <BottomNavigationBarItem>[
            new BottomNavigationBarItem(
                icon: getTabIcon(0), title: getTabTitle(0)),
            new BottomNavigationBarItem(
                icon: getTabIcon(1), title: getTabTitle(1)),
            new BottomNavigationBarItem(
                icon: getTabIcon(2), title: getTabTitle(2)),
          ],
          type: BottomNavigationBarType.fixed,
          //預設選中首頁
          currentIndex: _tabIndex,
          iconSize: 24.0,
          //點選事件
          onTap: (index) {
            setState(() {
              _tabIndex = index;
            });
          },
        ));
  }
}
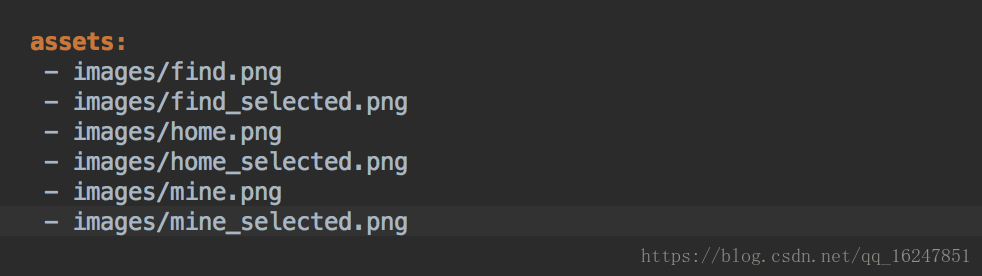
專案所需資原始檔,我在專案目錄下新建一個images資料夾

然後所有資源必須得在pubspec.yaml(專案根目錄下)檔案裡宣告(如下圖)
以下程式碼是三個子介面中的首頁(HomePage.dart):
import 'package:flutter/material.dart';

class HomePage extends StatefulWidget {
  @override
  State<StatefulWidget> createState() {
    // TODO: implement createState

    return new Page();
  }
}

class Page extends State<HomePage> {
  @override
  Widget build(BuildContext context) {
    return layout(context);
  }

  Widget layout(BuildContext context) {
    return new Scaffold(
      appBar: buildAppBar(context),
      body: new ListView(
        children: <Widget>[
          header(context),
          header(context),
          header(context),
          header(context),
          header(context),
        ],
      ),
    );
  }

  Widget buildAppBar(BuildContext context) {
    return new AppBar(title: const Text('首頁'));
  }

  Widget header(BuildContext context) {
    return new Image.network(
      'http://i2.yeyou.itc.cn/2014/huoying/hd_20140925/hyimage06.jpg',

    );
  }
}
其實細細寫來,實現這個導航欄的跟Android的實現思路是差不多的,將介面儲存在_pageList中,將icon的儲存在tabImages中,將文字儲存在appBarTitles中,通過Scaffold中的bottomNavigationBar來實現,再通過BottomNavigationBar的點選事件方法onTap: (index){}方法來更新_tabIndex,然後設定Scaffold的body來實現切換介面。