
element-ui vue-quill-editor 富文字編輯框自定義圖片插入
阿新 • • 發佈:2019-02-12
前言
因為使用者需要編輯自定義頁面,這裡就要用到富文字編輯框,可以插入圖片插入視訊。我選擇了vue-quill-editor。然後問題來了,現實需求和引入的框架衝突。
問題引入
vue-quill-editor預設的圖片插入方式,是直接將圖片轉成base64編碼,這樣的結果是整個富文字的html片段十分冗餘。我們的伺服器端接收的post的資料大小都是有限制的,這樣的話導致提交失敗,就算不提交失敗,大量的資料存入資料庫也不是好事。為了解決這個問題,我考慮了兩個方案,換一個富文字編輯框框架,另一個是修改vue-quill-editor的框架程式碼。
百度一番,果斷開始嘗試修改框架程式碼框架,因為換個富文字編輯框有太多不確定性,增加測試成本。
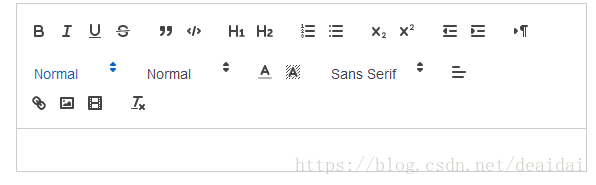
解決方式
如上圖,我們點選圖片,不是把圖片的base64編碼插入富文字框,而是將本地檔案上傳到我的檔案上傳地址(我這裡預設提供post方式上傳圖片,並且返回圖片地址),將圖片以html方式插入在富文字框內。這樣由原來的圖片資料優化為了<img src="...">的html格式資料。
改造過程
template部分
<el-form-item label="課程詳情">
<!-- 圖片上傳元件輔助-->
<el-upload
class="avatar-uploader quill-img"
action vue data部分
editorOption: {
    placeholder: '',
    theme: 'snow',  // or 'bubble'
    modules: {
    toolbar: {
        container: toolbarOptions,  // 工具欄
        handlers: {
        'image': function (value) {
          if (value) {
            // 觸發input框選擇圖片檔案
            document.querySelector('.quill-img input').click()
          } else {
            this.quill.format('image', false);
          }
        }
        }
    }
    }
},
toolbarOptions自定義工具欄
// 工具欄配置
const toolbarOptions = [
    ['bold', 'italic', 'underline', 'strike'],        // toggled buttons
    ['blockquote', 'code-block'],

    [{'header': 1}, {'header': 2}],               // custom button values
    [{'list': 'ordered'}, {'list': 'bullet'}],
    [{'script': 'sub'}, {'script': 'super'}],      // superscript/subscript
    [{'indent': '-1'}, {'indent': '+1'}],          // outdent/indent
    [{'direction': 'rtl'}],                         // text direction

    [{'size': ['small', false, 'large', 'huge']}],  // custom dropdown
    [{'header': [1, 2, 3, 4, 5, 6, false]}],

    [{'color': []}, {'background': []}],          // dropdown with defaults from theme
    [{'font': []}],
    [{'align': []}],
    ['link', 'image', 'video'],
    ['clean']                                         // remove formatting button
]
vue method部分:
quillImgSuccess(res, file) { // 富文字編輯框圖片上傳
  // console.log(URL.createObjectURL(file.raw));
  // this.form.icon = URL.createObjectURL(file.raw);
  // res為圖片伺服器返回的資料
  // 獲取富文字元件例項
  let quill = this.$refs.myQuillEditor.quill
  // 如果上傳成功
  if (res.errno == '0') {
      // 獲取游標所在位置
      let length = quill.getSelection().index;
      // 插入圖片  res.data為伺服器返回的圖片地址
      quill.insertEmbed(length, 'image', res.data)
      // 調整游標到最後
      quill.setSelection(length + 1)
  } else {
      this.$message.error('圖片插入失敗')
  }
},
參考
尾記
寫得比較急,可能程式碼不夠相容,有問題直接在下方留言。