仿知乎滑動隱藏與顯示ToolBar,SwipRefreshLayout重新整理
阿新 • • 發佈:2019-02-14
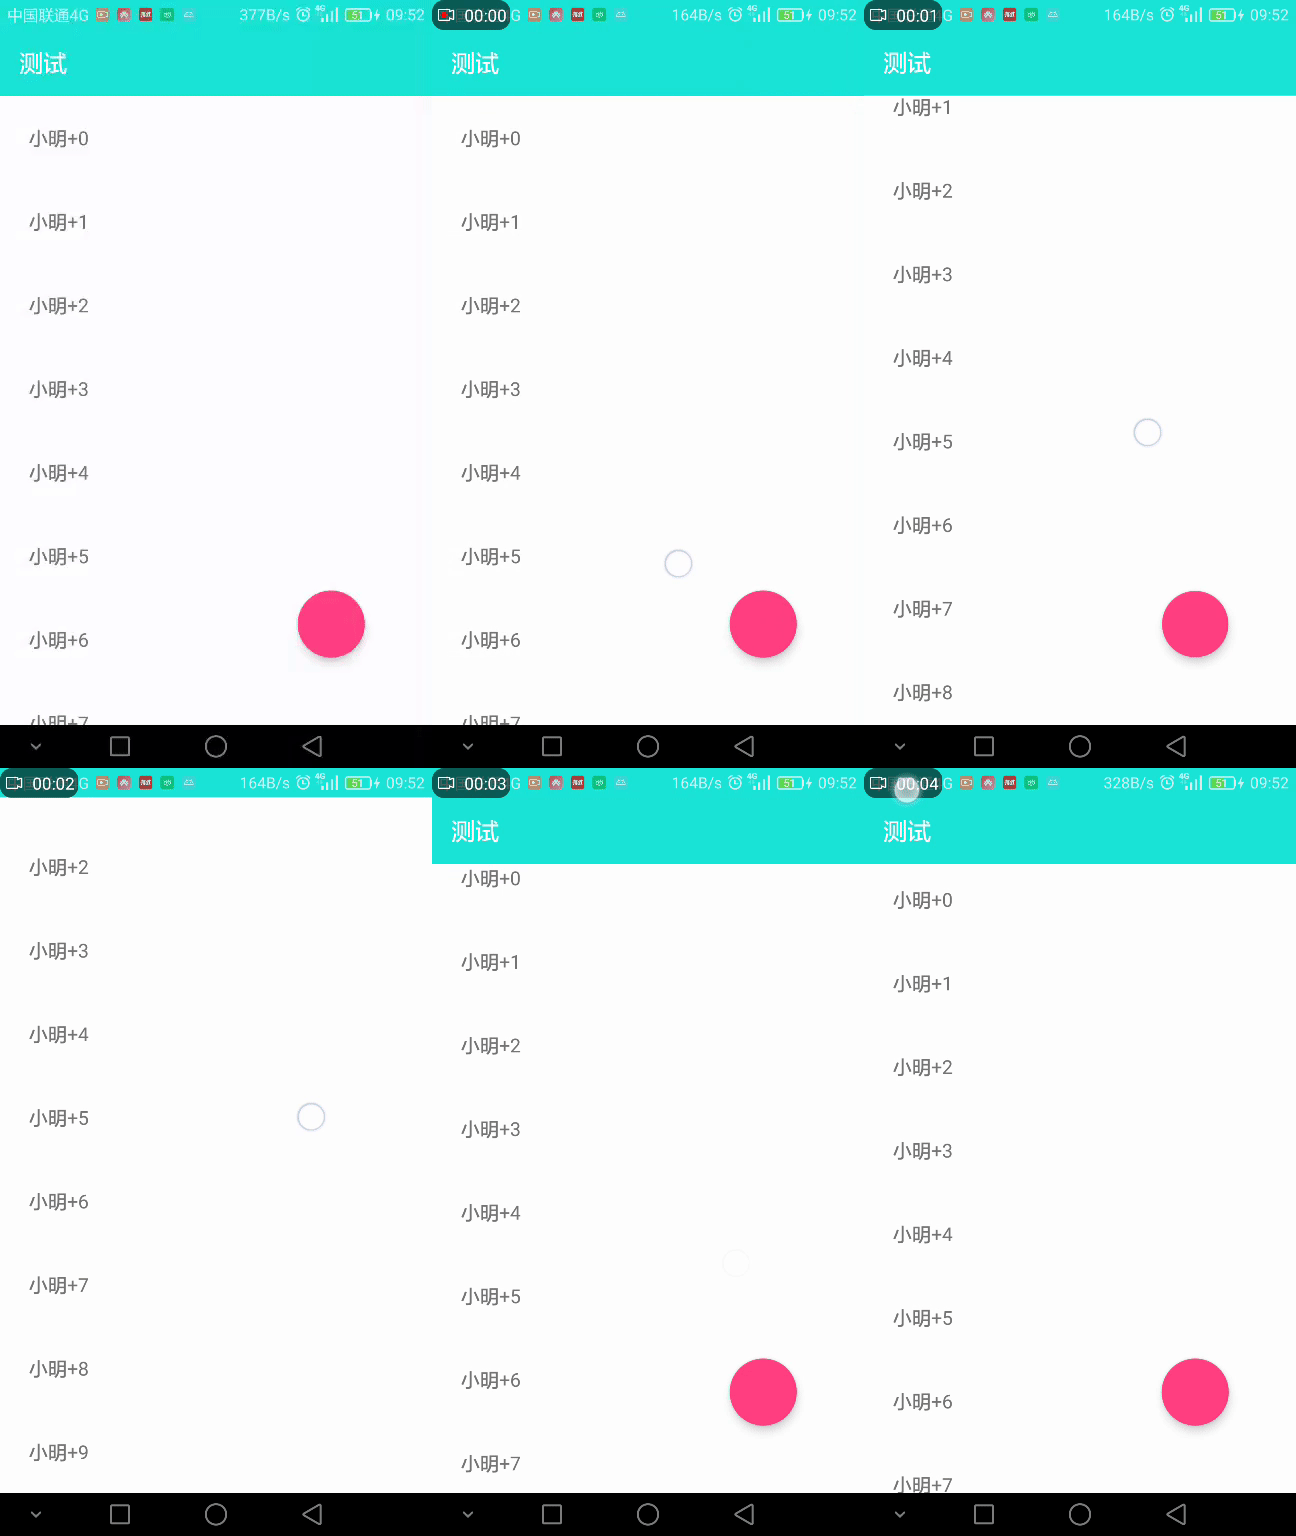
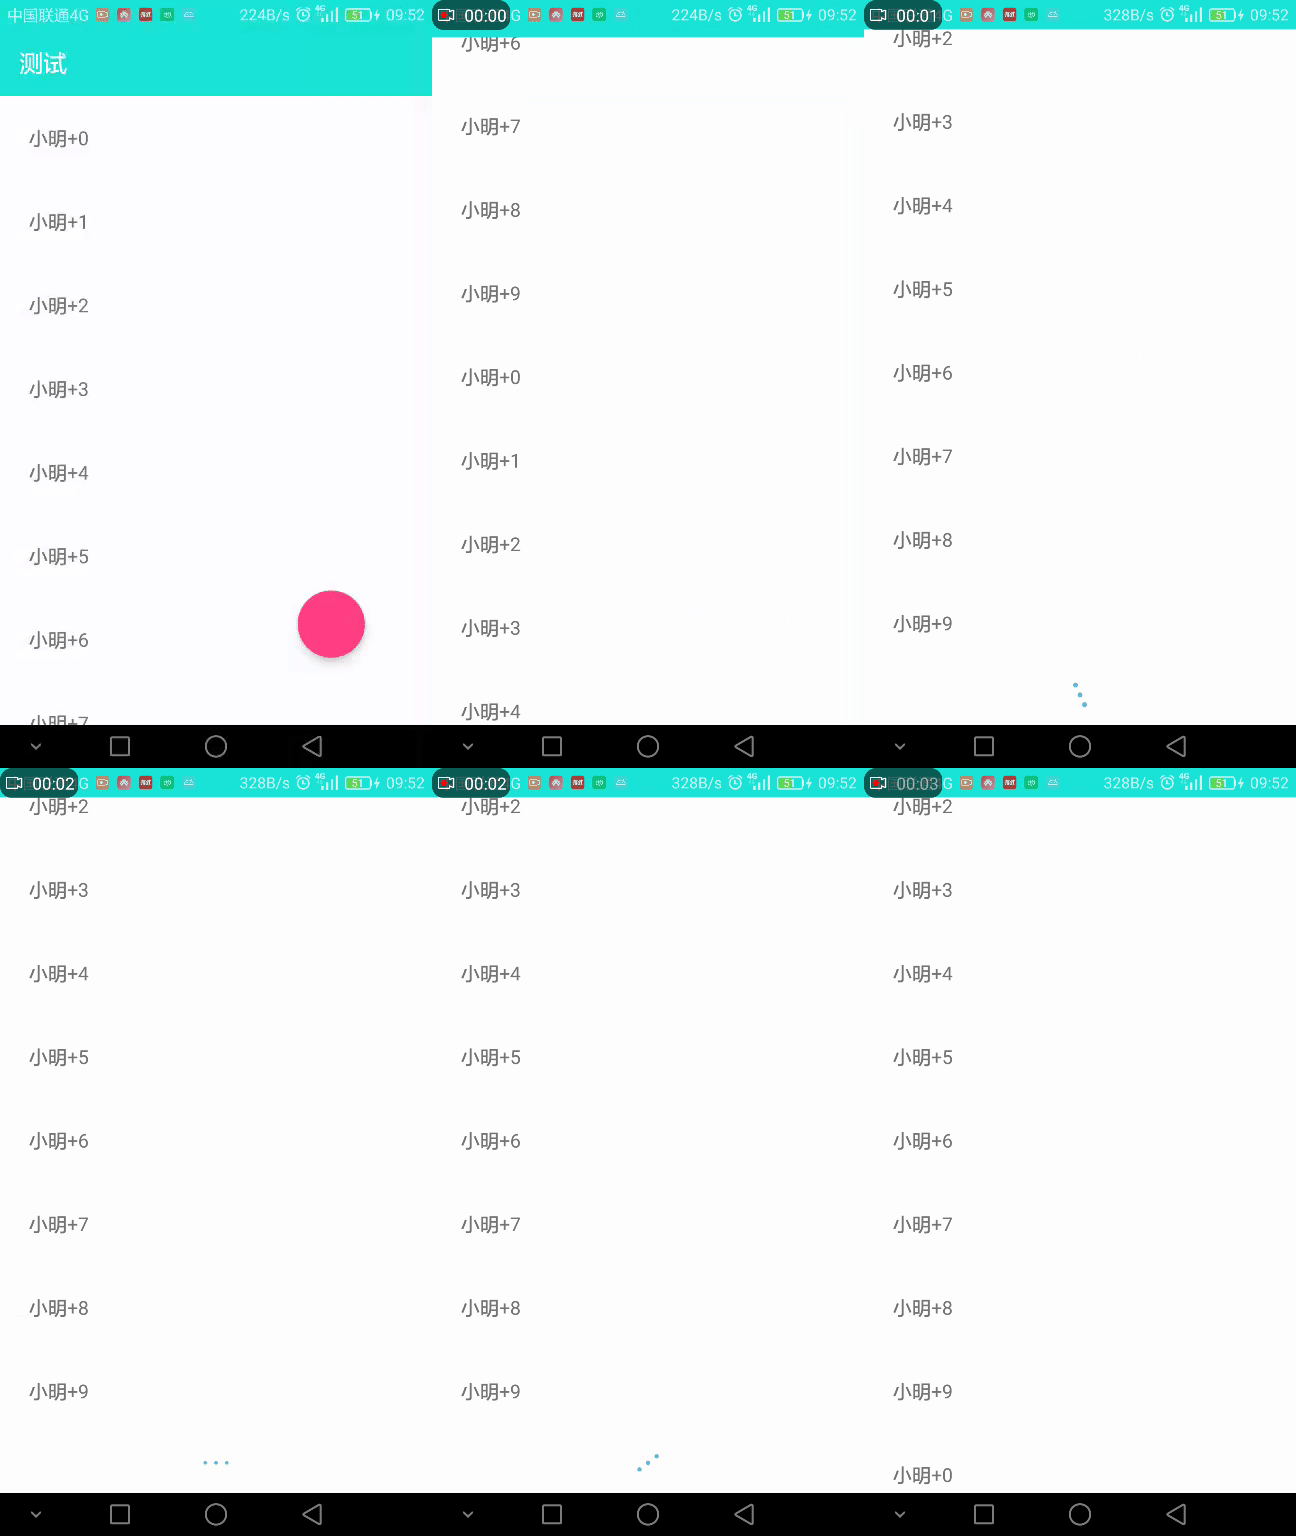
直接上效果圖:


一、設定ToolBar及偽沉浸式上一篇就說過,這裡不再講解了。
這個demo必須的依賴:
    compile 'com.github.fangx:haorefresh:1.0'
    compile 'com.wang.avi:library:1.0.1'
    compile 'com.android.support:design:24.1.0'
二、佈局檔案:
<?xml version="1.0" encoding="utf-8"?>
<FrameLayout
xmlns:android="http://schemas.android.com/apk/res/android" 其中注意這兩句話:
clipToPadding就是說控制元件的繪製區域是否在padding裡面的,true的情況下如果你設定了padding那麼繪製的區域就往裡 縮,clipChildren是指子控制元件是否超過padding區域,這兩個屬性預設是true的,所以在設定了padding情況下,預設滾動是在 padding內部的,要達到上面的效果主要把這兩個屬性設定了false那麼這樣子控制元件就能畫到padding的區域了。
  android:clipChildren="false"
  android:clipToPadding="false"
  android:paddingTop="?attr/actionBarSize"
item的簡單佈局為了測試:
<?xml version="1.0" encoding="utf-8"?>
<LinearLayout xmlns:android="http://schemas.android.com/apk/res/android"
              android:layout_width="match_parent"
              android:layout_height="wrap_content"
              android:orientation="vertical">

    <TextView
        android:text="小明"
        android:padding="24dp"
        android:id="@+id/ce_shi_text"
        android:layout_width="wrap_content"
        android:layout_height="wrap_content"/>

</LinearLayout>
三、監聽RecyclerView的addOnScrollListener 中new一個自定義的OnScrollListener來判斷移動到某個位置執行隱藏或者顯示的方法。
public abstract class HidingScrollListener extends RecyclerView.OnScrollListener {

    private static final int SCROLL_DISTANCE = 50;
    private int totalScrollDistance;
    private boolean isShow = true;

    @Override
    public void onScrollStateChanged(RecyclerView recyclerView, int newState) {
        super.onScrollStateChanged(recyclerView, newState);
    }

    @Override
    public void onScrolled(RecyclerView recyclerView, int dx, int dy) {
        super.onScrolled(recyclerView, dx, dy);

        int firstVisableItem = ((LinearLayoutManager) recyclerView.getLayoutManager()).findFirstVisibleItemPosition();
        //當第一個item存在介面上時就不觸發隱藏、顯示操作
        if (firstVisableItem == 0) {
            return;
        }
        if ((dy > 0 && isShow) || (dy < 0 && !isShow)) {
            totalScrollDistance += dy;
        }
        if (totalScrollDistance > SCROLL_DISTANCE && isShow) {
            hide();
            isShow = false;
            totalScrollDistance = 0;
        } else if (totalScrollDistance < -SCROLL_DISTANCE && !isShow) {
            show();
            isShow = true;
            totalScrollDistance = 0;
        }
    }

    public abstract void hide();

    public abstract void show();

}
把隱藏或顯示寫在下面兩個方法裡面
 mRecyclerView.addOnScrollListener(new HidingScrollListener() {
            @Override
            public void hide() {

     //如果想向下隱藏可以採用這種                       //button.animate().translationY(button.getHeight()+getMarginBottom(button)).setInterpolator(new FastOutSlowInInterpolator());

                button.hide();
                mToolBar.animate().translationY(-mToolBar.getHeight()).setInterpolator(new AccelerateDecelerateInterpolator());
            }

            @Override
            public void show() {
       //如果想向下隱藏可以採用這種                 //button.animate().translationY(0).setInterpolator(new FastOutSlowInInterpolator());

                button.show();
                mToolBar.animate().translationY(0).setInterpolator(new AccelerateDecelerateInterpolator());
            }
        });


    /*
     *獲取控制元件在佈局中的高度
     */
    private int getMarginBottom(View v) {
        int marginBottom = 0;
        final ViewGroup.LayoutParams layoutParams = v.getLayoutParams();
        if (layoutParams instanceof ViewGroup.MarginLayoutParams) {
            marginBottom = ((ViewGroup.MarginLayoutParams) layoutParams).bottomMargin;
        }
        return marginBottom;
    }
這裡注意一下,看佈局檔案我們的SwipeRefreshLayout直接頂著狀態列,下拉重新整理話,預設的小圓圈高度的位置正好會被這個ToolBar遮擋住,效果就不好了,這裡我們可以調節一下小圓圈的高度,這樣就不會被ToolBar遮擋住了,400是根據情況設定的。
refresh.setProgressViewEndTarget(false,400);上拉載入,我們也看到了,借用github上。上拉載入動畫借用上邊的,一句話就可以改變他的樣式,上邊搜搜這個wang.avi,很多樣式。
 mRecyclerView= (HaoRecyclerView) findViewById(R.id.ce_shi_lv);
        LinearLayoutManager line=new LinearLayoutManager(this);
        line.setOrientation(LinearLayoutManager.VERTICAL);
        mRecyclerView.setLayoutManager(line);

        ProgressView progressView=new ProgressView(this);
       //下面這一句話就可以改變他的樣式,大夥可以試一試。 progressView.setIndicatorId(ProgressView.BallRotate);
        progressView.setIndicatorColor(0xff69b3e0);
        mRecyclerView.setFootLoadingView(progressView);

//載入完後顯示的文字
        TextView textView=new TextView(this);
        textView.setText("已經到底了");
        mRecyclerView.setFootEndView(textView);
        mRecyclerView.setLoadMoreListener(new LoadMoreListener() {
            @Override
            public void onLoadMore() {
                new Handler().postDelayed(new Runnable() {
                    @Override
                    public void run() {

                        if (mList.size()>=30){
                            mRecyclerView.loadMoreEnd();
                            return;
                        }else {
                            getData();
                        }
                        mAdapter.notifyDataSetChanged();
                        mRecyclerView.loadMoreComplete();
                    }
                },2000);
            }
        });
另外,RecyclerView本事沒有Item的點選事件,這個HaoRecyclerView也已經幫我們封裝好了。
//已經封裝好的點選事件
        mRecyclerView.setOnItemClickListener(new AdapterView.OnItemClickListener() {
            @Override
            public void onItemClick(AdapterView<?> adapterView, View view, int i, long l) {
                Toast.makeText(MainActivity.this, "click-----position" + i, Toast.LENGTH_SHORT).show();
            }
        });
