
OpenCV學習筆記(十二)旋轉文字矯正
旋轉文字矯正:
影象文字旋轉通常在仿射變換時獲取影象的傾斜角度,利用傅立葉變換中的時域與頻域的變換關係,實現旋轉文字的校正。
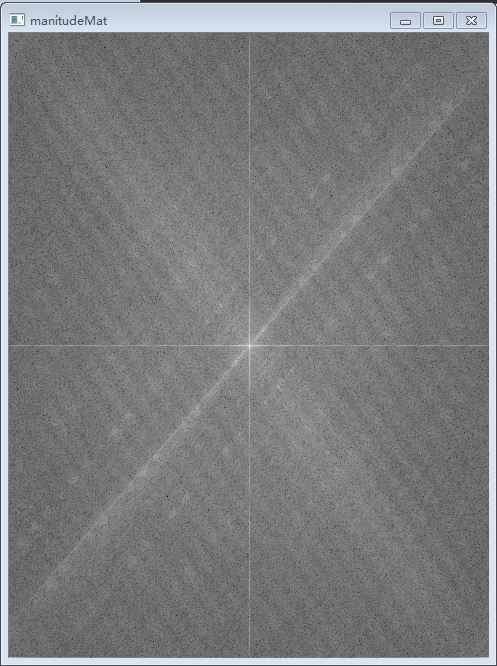
旋轉文字的特徵明顯就是存在分行間隔,當文字影象旋轉時,其頻域中的頻譜也會隨之旋轉。根據這一特徵來計算文字影象的DFT變換,DFT變換的結果是低頻位於邊界四角,高頻集中在中心區域,將低頻和高頻互換,實現中心的移動,進而可以看到文字影象的頻譜有明顯的傾斜直線,再通過計算傾斜直線的傾斜角度,利用仿射變換就可以完成旋轉文字的影象矯正。
(1)錄入一張影象:
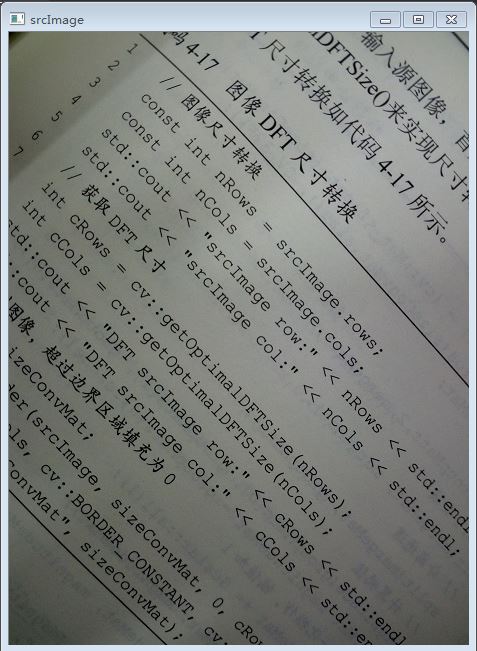
前幾步的處理和傅立葉變化一致,就是生成傅立葉頻譜圖。
(2)頻域中心移動,傅立葉變化得到的低頻部分在邊緣角中,高頻部分在影象中心,對於傾斜文字影象,我們關心的是影象中的低頻部分,因此需要將其與高頻部分互換中心。通常的做法是四等分,繞後進行互調。
(3)傾斜度檢測。
只要檢測出影象直線的傾斜角,就可以進行旋轉文字,方法很多,採用Hough變化線檢測方法進行直線傾斜角計算。首先進行二值化,然後根據huogh變換檢測直線的步驟來完成影象中的直線檢測,計算得到影象直線的角度;最後判斷角度是否符合要求,對符合要求的線角度進行影象的角度轉換。
Hough變換檢測線:
HoughLines(InputArray image, OutputArray lines, double rho, double theta, int threshold,double srn=0,doublestn=0 )
lines:輸出檢測到的線的數量。theta=CV_PI/180;theshold:是閾值,只有大於這個閾值的線,才會被檢測到。
rho:畫素中的距離解析度。
根據檢測的線,繪製出線。
所用函式:
void line(Mat& img, Point pt1,
Point pt2, const Scalar& color, int thickness=1, int lineType=8, int shift=0)
- img – Image.
- pt1 – First point of the line segment.
- pt2 – Second point of the line segment.
- color – Line color.
- thickness – Line thickness.
- lineType –
Type of the line
:- 8 (or omitted) - 8-connected line.
- 4 - 4-connected line.
- CV_AA - antialiased line.
- shift – Number of fractional bits in the point coordinates.

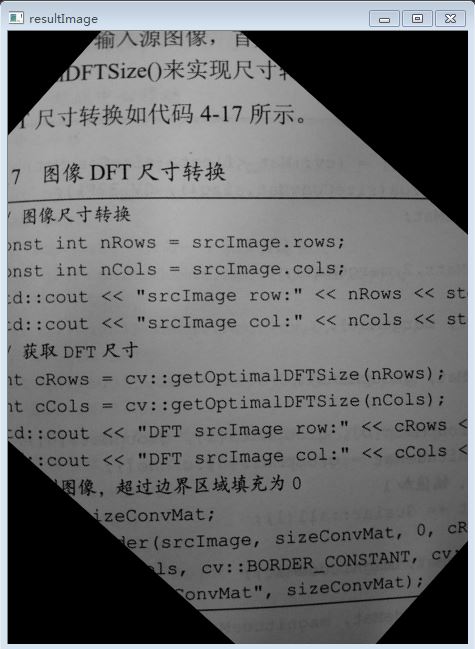
(4)仿射變換矯正
Mat getRotationMatrix2D(Point2f center,
double angle, double scale)
- center – Center of the rotation in the source image.
- angle – Rotation angle in degrees. Positive values mean counter-clockwise rotation (the coordinate origin is assumed to be the top-left corner).
- scale – Isotropic scale factor.
最終結果:
源程式:
#include <opencv2/core/core.hpp>
#include <opencv2/highgui/highgui.hpp>
#include <opencv2/imgproc/imgproc.hpp>
#include <iostream>
using namespace cv;
using namespace std;
Mat XUANZHUAN(Mat srcImage)
{
	Mat srcGray;
	cvtColor(srcImage, srcGray, CV_RGB2GRAY);
	const int nRows = srcGray.rows;
	const int nCols = srcGray.cols;
	//計算傅立葉變換尺寸
	int cRows = getOptimalDFTSize(nRows);
	int cCols = getOptimalDFTSize(nCols);
	Mat sizeConvMat;
	copyMakeBorder(srcGray, sizeConvMat, 0, cRows - nRows, 0, cCols - nCols, BORDER_CONSTANT, Scalar::all(0));

	//影象DFT變換
	//通道組建立
	Mat groupMats[] = { Mat_<float>(sizeConvMat), Mat::zeros(sizeConvMat.size(), CV_32F) };
	Mat mergeMat;
	//把兩頁合成一個2通道的mat
	merge(groupMats, 2, mergeMat);
	//對上面合成的mat進行離散傅立葉變換,支援原地操作,傅立葉變換結果為複數,通道1存的是實部,通道2存的是虛部。
	dft(mergeMat, mergeMat);
	//把變換的結果分割到各個陣列的兩頁中,方便後續操作
	split(mergeMat, groupMats);
	//求傅立葉變化各頻率的幅值,幅值放在第一頁中
	magnitude(groupMats[0], groupMats[1], groupMats[0]);
	Mat magnitudeMat = groupMats[0].clone();
	//歸一化操作,幅值加1
	magnitudeMat += Scalar::all(1);
	//傅立葉變換的幅度值範圍大到不適合在螢幕上顯示,高值在螢幕上顯示為白點,而低值為黑點,
	//高低值的變化無法有效分辨,為了在螢幕上凸顯出高低的變化得連續性,我們可以用對數尺度來替換線性尺度
	log(magnitudeMat, magnitudeMat);
	//歸一化
	normalize(magnitudeMat, magnitudeMat, 0,1,CV_MINMAX);
	magnitudeMat.convertTo(magnitudeMat, CV_8UC1, 255, 0);
	//imshow("magnitudeMat2", magnitudeMat);
	//重新分配象限,使(0,0)移動到影象中心,
	//傅立葉變換之前要對源影象乘以(-1)^(x+y),進行中心化
	//這是對傅立葉變換結果進行中心化
	int cx = magnitudeMat.cols / 2;
	int cy = magnitudeMat.rows / 2;
	Mat tmp;
	//Top-Left--為每一個象限建立ROI
	Mat q0(magnitudeMat, Rect(0, 0, cx, cy));
	//Top-Right
	Mat q1(magnitudeMat, Rect(cx, 0, cx, cy));
	//Bottom-Left
	Mat q2(magnitudeMat, Rect(0, cy, cx, cy));
	//Bottom-Right
	Mat q3(magnitudeMat, Rect(cx, cy, cx, cy));
	//交換象限,(Top-Left with Bottom-Right)
	q0.copyTo(tmp);
	q3.copyTo(q0);
	tmp.copyTo(q3);

	//交換象限,(Top-Right with Bottom-Letf)
	q1.copyTo(tmp);
	q2.copyTo(q1);
	tmp.copyTo(q2);

	Mat binaryMagnMat;
	threshold(magnitudeMat, binaryMagnMat, 155, 255, CV_THRESH_BINARY);
	vector<Vec2f> lines;
	binaryMagnMat.convertTo(binaryMagnMat, CV_8UC1, 255, 0);
	HoughLines(binaryMagnMat, lines, 1, CV_PI / 180, 100, 0, 0);
	cout << "lines.size:  " <<  lines.size() << endl;
	Mat houghMat(binaryMagnMat.size(), CV_8UC3);
	//繪製檢測線
	for (size_t i = 0; i < lines.size(); i++)
	{
		float rho = lines[i][0], theta = lines[i][1];
		Point pt1, pt2;
		//座標變換生成線表示式
		double a = cos(theta), b = sin(theta);
		double x0 = a*rho, y0 = b*rho;
		pt1.x = cvRound(x0 + 1000 * (-b));
		pt1.y = cvRound(y0 + 1000 * (a));
		pt2.x = cvRound(x0 - 1000 * (-b));
		pt2.y = cvRound(y0 - 1000 * (a));
		line(houghMat, pt1, pt2, Scalar(0, 0, 255), 1,8,0);
	}
	imshow("houghMat", houghMat);
	float theta = 0;
	//檢測線角度判斷
	for (size_t i = 0; i < lines.size(); i++)
	{
		float thetaTemp = lines[i][1] * 180 / CV_PI;
		if (thetaTemp > 0 && thetaTemp < 90)
		{
			theta = thetaTemp;
			break;
		}
	}
	//角度轉換
	float angelT = nRows*tan(theta / 180 * CV_PI) / nCols;
	theta = atan(angelT) * 180 / CV_PI;
	cout << "theta: " << theta << endl;

	//取影象中心
	Point2f centerPoint = Point2f(nCols / 2, nRows / 2);
	double scale = 1;
	//計算旋轉中心
	Mat warpMat = getRotationMatrix2D(centerPoint, theta, scale);
	//仿射變換
	Mat resultImage(srcGray.size(), srcGray.type());
	warpAffine(srcGray, resultImage, warpMat, resultImage.size());
	return resultImage;
}
int main()
{
	Mat srcImage = imread("D:\\4.jpg");
	if (srcImage.empty())
		return -1;
	imshow("srcImage", srcImage);
	Mat resultImage = XUANZHUAN(srcImage);
	imshow("resultImage", resultImage);
	waitKey(0);
	return 0;

}