
PCL中點雲資料格式之間的轉化
轉自:https://www.cnblogs.com/li-yao7758258/p/6659451.html
(1)關於pcl :: PCLPointCloud2 :: Ptr和pcl :: PointCloud <pcl :: PointXYZ>兩中資料結構的區別
pcl :: PointXYZ :: PointXYZ(float_x,
                  float_y,
                  float_z
                    )
區別:

struct PCLPointCloud2 { PCLPointCloud2():header(),height(0),width(0 ),fields(), is_bigendian(false),point_step(0),row_step(0 ), data(),is_dense(false ) { #if defined(BOOST_BIG_ENDIAN) is_bigendian = true ; #elif defined(BOOST_LITTLE_ENDIAN) is_bigendian = false ; #else #error “無法確定系統位元組序” #endif } :: pcl :: PCLHeader標頭; pcl :: uint32_t height;pcl :: uint32_t width; std :: vector <:: pcl :: PCLPointField> fields; pcl :: uint8_t is_bigendian; pcl :: uint32_t point_step; pcl :: uint32_t row_step; std :: vector <pcl :: uint8_t> 資料; pcl :: uint8_t is_dense; 公眾: typedef boost :: shared_ptr <:: pcl :: PCLPointCloud2>Ptr; typedef boost :: shared_ptr <:: pcl :: PCLPointCloud2 const > ConstPtr; }; // struct PCLPointCloud2
那麼要實現它們之間的資料轉換,
舉個例子
pcl :: PCLPointCloud2 :: Ptr cloud_blob(new pcl :: PCLPointCloud2),cloud_filtered_blob(new pcl :: PCLPointCloud2); // 申明濾波前後的點雲
  pcl :: PointCloud <pcl :: PointXYZ> :: Ptr cloud_filtered(new pcl :: PointCloud <pcl :: PointXYZ>),cloud_p(new pcl :: PointCloud <pcl :: PointXYZ>) ,cloud_f(new pcl :: PointCloud <pcl :: PointXYZ> );

  // 讀取PCD檔案
  pcl :: PCDReader reader;
  reader.read(“ table_scene_lms400.pcd ”,* cloud_blob);
   // 統計濾波前的點雲個數
  std :: cerr << “ 過濾前的PointCloud :” << cloud_blob-> width * cloud_blob-> height << “ 資料點。” << std :: endl;

  // 建立體素柵格下采樣:下采樣的大小為1cm
  pcl :: VoxelGrid <pcl :: PCLPointCloud2> sor;  // 體素柵格下采樣物件
  sor.setInputCloud(cloud_blob);             // 原始點雲
  sor.setLeafSize(0.01f,0.01f,0.01f);    // 設定取樣體素大小
  sor.filter(* cloud_filtered_blob);        // 儲存

  // 轉換為模板點雲
 pcl :: fromPCLPointCloud2(* cloud_filtered_blob,* cloud_filtered);

  std :: cerr << “ 過濾後的PointCloud:” << cloud_filtered-> width * cloud_filtered-> height << “ 資料點。” << std :: endl;

  // 儲存下采樣後的點雲
  pcl :: PCDWriter writer;
  writer.write <pcl :: PointXYZ>(“ table_scene_lms400_downsampled.pcd ”,* cloud_filtered,false);
程式中紅色部分就是一句實現兩者之間的資料轉化的我們可以看出
cloud_filtered_blob宣告的資料格式為pcl :: PCLPointCloud2 :: Ptr cloud_filtered_blob(new pcl :: PCLPointCloud2);
cloud_filtered 申明的資料格式 pcl::PointCloud<pcl::PointXYZ>::Ptr cloud_filtered (new pcl::PointCloud<pcl::PointXYZ>)
那麼依照這種的命名風格我們可以檢視到更多的關於的資料格式之間的轉換的類的成員
(1)
void pcl::fromPCLPointCloud(const pcl:PCLPointCloud2 & msg
pcl::PointCloud<PointT> & cloud
const MsgFieldMap & filed_map
)
函式使用field_map實現將一個pcl::pointcloud2二進位制資料blob到PCL::PointCloud<pointT>物件
使用 PCLPointCloud2 (PCLPointCloud2, PointCloud<T>)生成自己的 MsgFieldMap
MsgFieldMap field_map;
createMapping<PointT> (msg.fields, field_map);
(2)
void pcl::fromPCLPointCloud2(const pcl::PCLPointCloud & msg
pcl::PointCloud<pointT> &cloud
)
把pcl::PCLPointCloud資料格式的點雲轉化為pcl::PointCloud<pointT>格式
(3)
void pcl::fromROSMsg(const pcl:PCLPointCloud2 & msg
pcl::PointCloud<PointT> & cloud
const MsgFieldMap & filed_map
)
(4)
void pcl::fromROSMsg(const pcl:PCLPointCloud2 & msg
pcl::PointCloud<PointT> & cloud
)
在使用fromROSMsg是一種在ROS 下的一種資料轉化的作用,我們舉個例子實現訂閱使用kinect釋出 /camera/depth/points 從程式中我們可以看到如何使用該函式實現資料的轉換。並且我在程式中添加了如果使用PCL的庫實現在ROS下呼叫並且視覺化,
/************************************************
關於如何使用PCL在ROS 中,實現簡單的資料轉化
時間:2017.3.31

****************************************************/


#include <ros/ros.h>
// PCL specific includes
#include <sensor_msgs/PointCloud2.h>
#include <pcl_conversions/pcl_conversions.h>
#include <pcl/point_cloud.h>
#include <pcl/point_types.h>

#include <pcl/visualization/pcl_visualizer.h>
#include <boost/thread/thread.hpp>
#include <pcl/visualization/cloud_viewer.h>

ros::Publisher pub;


  pcl::visualization::CloudViewer viewer("Cloud Viewer");

void
cloud_cb (const sensor_msgs::PointCloud2ConstPtr& input)
{
 // 建立一個輸出的資料格式
  sensor_msgs::PointCloud2 output;  //ROS中點雲的資料格式
  //對資料進行處理
pcl::PointCloud<pcl::PointXYZRGB>::Ptr cloud (new pcl::PointCloud<pcl::PointXYZRGB>);

  output = *input;

    pcl::fromROSMsg(output,*cloud);


     //blocks until the cloud is actually rendered
    viewer.showCloud(cloud);


  pub.publish (output);
}


int
main (int argc, char** argv)
{


  // Initialize ROS
  ros::init (argc, argv, "my_pcl_tutorial");
  ros::NodeHandle nh;

  // Create a ROS subscriber for the input point cloud
  ros::Subscriber sub = nh.subscribe ("input", 1, cloud_cb);
   ros::Rate loop_rate(100);
  // Create a ROS publisher for the output point cloud
  pub = nh.advertise<sensor_msgs::PointCloud2> ("output", 1);


  // Spin
  ros::spin ();
/*
while (!viewer.wasStopped ())
    {

    }
*/


}
那麼對於這一段小程式實現了從釋出的節點中轉化為可以使用PCL的視覺化函式實現視覺化,並不一定要用RVIZ來實現,所以我們分析以下其中的步驟,在訂閱話題的回撥函式中,
void cloud_cb (const sensor_msgs::PointCloud2ConstPtr& input) //這裡面設定了一個數據型別為sensor_msgs::PointCloud2ConstPtr& input形參
{
sensor_msgs::PointCloud2 output; //ROS中點雲的資料格式(或者說是釋出話題點雲的資料型別)
pcl::PointCloud<pcl::PointXYZRGB>::Ptr cloud (new pcl::PointCloud<pcl::PointXYZRGB>); //對資料轉換後儲存的型別
output = *input;
pcl::fromROSMsg(output,*cloud); //最重要的一步驟實現從ROS到PCL中的資料的轉化,同時也可以直接使用PCL庫實現視覺化
viewer.showCloud(cloud); //PCL庫的視覺化
pub.publish (output); //那麼原來的output的型別仍然是sensor_msgs::PointCloud2,可以通過RVIZ來視覺化
}
那麼也可以使用
  pcl::PCDWriter writer;
  writer.write<pcl::PointXYZ> ("ros_to_PCL.pcd", *cloud, false);
這一段程式碼來實現儲存的作用。那麼見到那看一下視覺化的結果
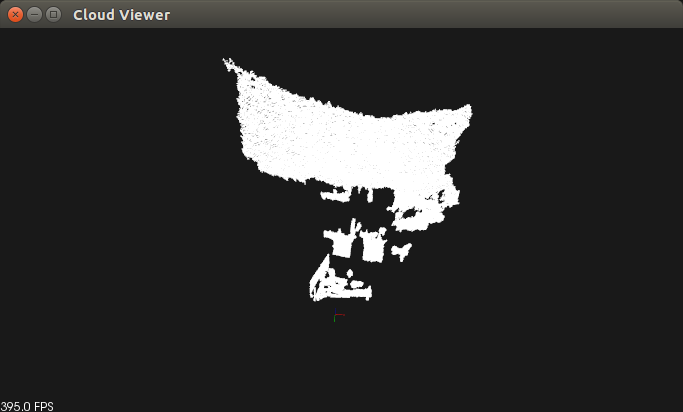
使用pcl_viewer 視覺化儲存的PCD檔案

於2018年5月5號看到再次更新一點小筆記,比如我們在寫程式的過程中經常會遇到定義點雲的資料格式為
typedef pcl::PointXYZRGB PointT;
typedef pcl::PointCloud<PointT> PointCloudT;
PointCloudT::Ptr cloud_;
但是我們在執行一個簡單的例程比如直通濾波器的內容是一般的點雲的定義為
typedef pcl::PointXYZRGB PointT;
typedef pcl::PointCloud<PointT> PointCloudT

PointCloudT::Ptr cloud (new PointCloudT);
PointCloudT::Ptr cloud_filtered (new PointCloudT)

  pcl::PassThrough<PointT> pass;
  pass.setInputCloud (cloud);            //設定輸入點雲
  pass.setFilterFieldName ("z");         //設定過濾時所需要點雲型別的Z欄位
  pass.setFilterLimits (0.0, 1.0);        //設定在過濾欄位的範圍
  //pass.setFilterLimitsNegative (true);   //設定保留範圍內還是過濾掉範圍內
  pass.filter (*cloud_filtered);            //執行濾波,儲存過濾結果在cloud_filtered
對比我們可以看出
這裡兩種定義的方法的不同是不能在直通濾波器直接使用的
PointCloudT::Ptr   cloud_;
PointCloudY::Ptr   cloud_tmp(new PointCloudT)
如何去轉換呢?
如下:
pcl::copyPointCloud (*cloud_tmp, *cloud_);
在構造上的區別:常規變數定義不使用new,定義的物件在定義後就自動可以使用,指標變數定義必須使用new進行物件例項的構造。
使用上的區別:使用新的是一個指標物件,此時對物件成員的訪問需要使用指標操作符“ - >”,而不使用新的是常規物件,使用普通成員操作符“”。