
IOS原生專案整合Unity3D
第1步 unity3D匯出Xcode專案
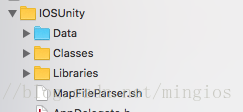
第2步 將專案匯入到ios原生專案
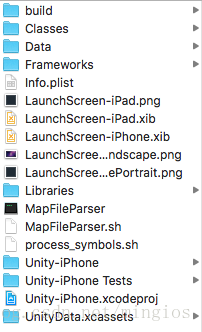
1.將Classes,Libraries,MapFileParser.sh拖入到專案(選中Copy items if needed,選中Create groups)
2.將Data拖入到專案(選中Copy items if needed,選中Create folder references)
*拖入方式
如果選擇了Create groups方式添加了一個檔案,我們會發現被新增進來的檔案,資料夾是黃色的,groups下的cpp檔案是會被編譯的
選擇了 Create folder references方式新增進來的檔案的資料夾是藍色的, 只是將檔案單純的建立了引用,這些檔案不會被編譯,所以在使用的時候需要加入其路徑
3.修改ios原生專案的bit code為NO
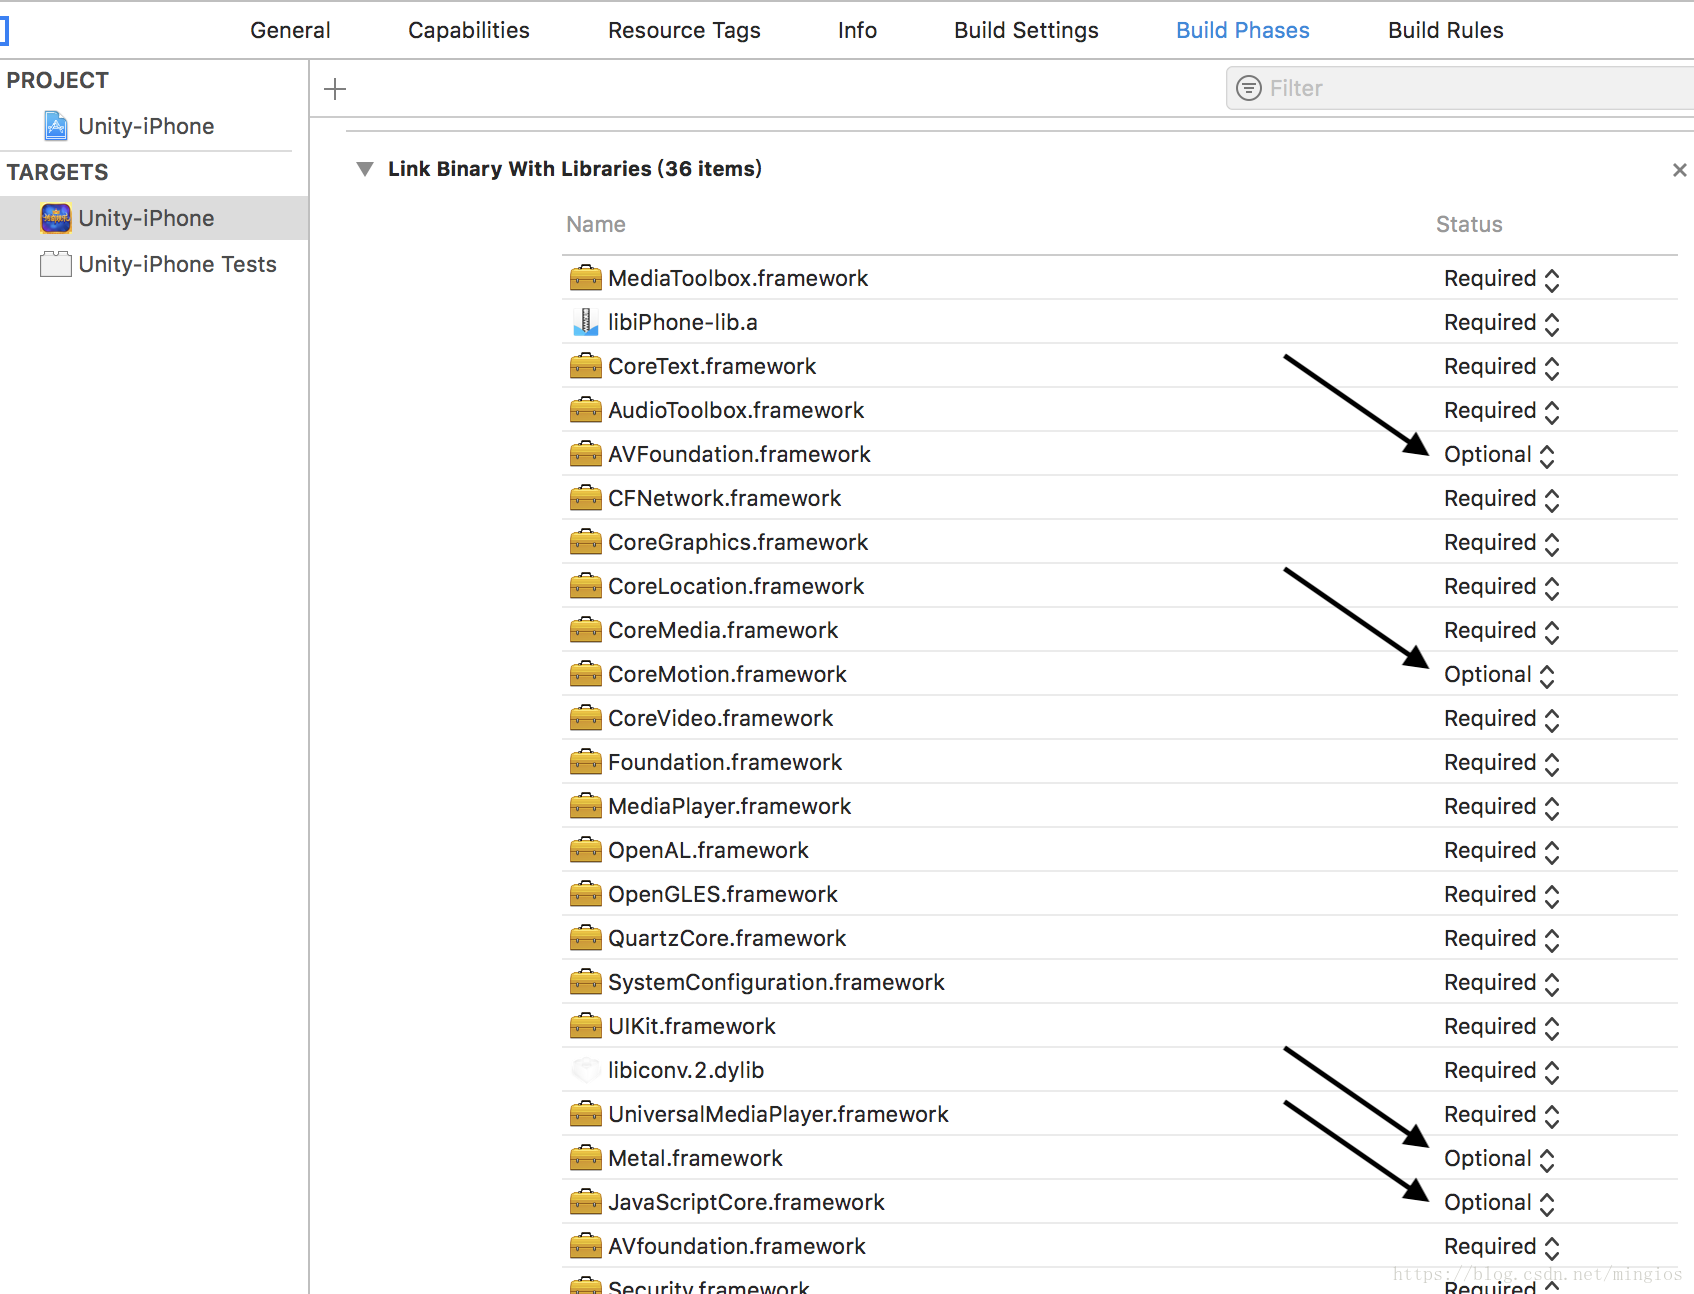
4.新增framework
*由於每個Unity 3D專案不同,導致所需要framework也不同,開啟Unity 3DXcode專案,把所有的framework在原生專案中新增,如果有第三方的庫,把庫從Unity 3DXcode專案中匯出到原生專案,並且在Framework Search Paths新增路徑
*Unity 3DXcode專案中有個別庫的Status 選擇的Optional,如圖
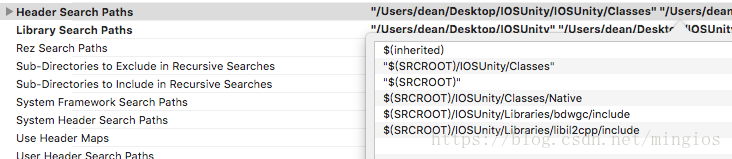
5.在Header Search Paths和Library Search Paths 新增Unity3D 資料夾 Classes、Native、include 路徑(根據自己專案實際檔案路徑配置)
*$(SRCROOT) 代表的是專案根目錄下 $(PROJECT_DIR)代表的是整個專案

6.修改Build Settings 下 other C Flags -> -DINIT_SCRIPTING_BACKEND=1

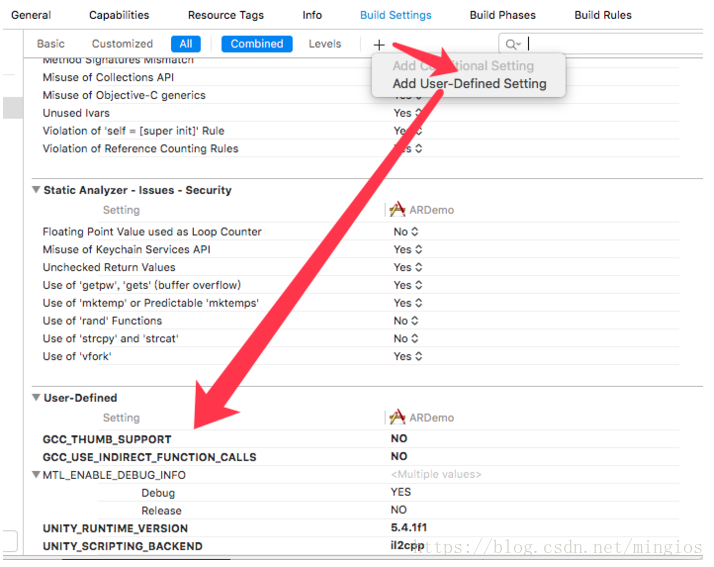
7.新增User-Defined 將Unity 3D專案中的User-Defined裡的配置項新增到原生專案中
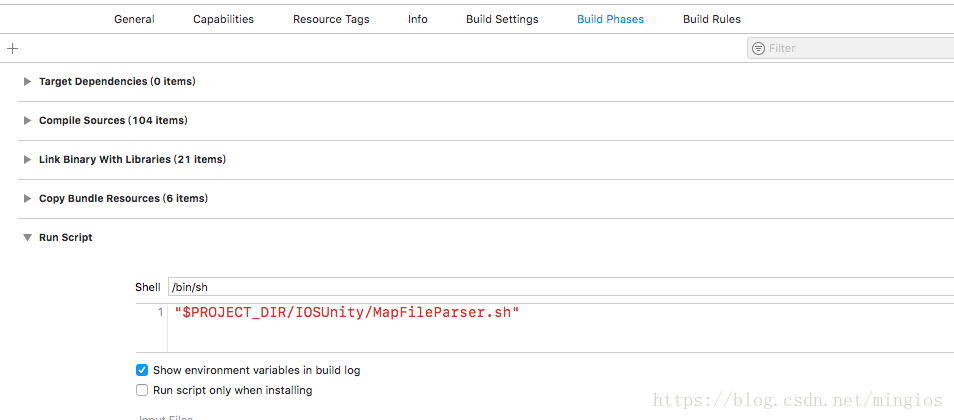
8.新增Run Script
*MapFileParser.sh 路徑根據實際專案路徑新增
第3步 修改原生程式碼
1.將Classes/main.mm內容複製到main.m 並把副檔名改為.mm,刪除Unity3D Class 資料夾下main.mm 檔案,刪除操作選擇Remove Reference
#import <UIKit/UIKit.h>
#import "AppDelegate.h"
#include "RegisterFeatures.h"
#include "RegisterMonoModules.h"
#include <csignal>

static const int constsection = 0;

void UnityInitTrampoline();

const char* AppControllerClassName = "AppDelegate";

int main(int argc, char * argv[]) {

    @autoreleasepool {
        UnityInitTrampoline();
        UnityInitRuntime(argc, argv);
        RegisterMonoModules();
        NSLog(@"-> registered mono modules %p\n", &constsection);
        RegisterFeatures();

        std::signal(SIGPIPE, SIG_IGN);

        return UIApplicationMain(argc, argv, nil, NSStringFromClass([AppDelegate class]));
    }
}

#if TARGET_IPHONE_SIMULATOR && TARGET_TVOS_SIMULATOR

#include <pthread.h>

extern "C" int pthread_cond_init$UNIX2003(pthread_cond_t *cond, const pthread_condattr_t *attr)
{ return pthread_cond_init(cond, attr); }
extern "C" int pthread_cond_destroy$UNIX2003(pthread_cond_t *cond)
{ return pthread_cond_destroy(cond); }
extern "C" int pthread_cond_wait$UNIX2003(pthread_cond_t *cond, pthread_mutex_t *mutex)
{ return pthread_cond_wait(cond, mutex); }
extern "C" int pthread_cond_timedwait$UNIX2003(pthread_cond_t *cond, pthread_mutex_t *mutex,
                                               const struct timespec *abstime)
{ return pthread_cond_timedwait(cond, mutex, abstime); }

#endif // TARGET_IPHONE_SIMULATOR && TARGET_TVOS_SIMULATOR
2 修改AppDelegate.h
#import <UIKit/UIKit.h>

@class UnityAppController;

@interface AppDelegate : UIResponder <UIApplicationDelegate>

@property (nonatomic, strong) UnityAppController * unityController;

@property (strong, nonatomic) UIWindow *window;

@property (strong, nonatomic) UIWindow *unityWindow;

-(void)showUnityWindow;

-(void)hideUnityWindow;

@end
3 修改AppDelegate.m 新增如下程式碼
*核心就是切換window
#import "UnityAppController.h"

@implementation AppDelegate

-(UIWindow *)unityWindow{
    return UnityGetMainWindow();
}

-(void)showUnityWindow{
    UIButton *button = [UIButton buttonWithType:UIButtonTypeSystem];
    button.frame = CGRectMake(0, 0, 44, 44);
    button.backgroundColor = [UIColor redColor];
    [button setTitle:@"返回" forState:UIControlStateNormal];
    [button addTarget:self action:@selector(hideUnityWindow) forControlEvents:UIControlEventTouchUpInside];
    [self.unityWindow addSubview:button];
    [[UIApplication sharedApplication] setStatusBarHidden:YES];
    [self.unityWindow makeKeyAndVisible];
}

-(void)hideUnityWindow{
    [[UIApplication sharedApplication] setStatusBarHidden:NO];
    [[UIApplication sharedApplication] setStatusBarStyle:UIStatusBarStyleLightContent animated:YES];
    [self.window makeKeyAndVisible];
}

- (BOOL)application:(UIApplication *)application didFinishLaunchingWithOptions:(NSDictionary *)launchOptions {
    // Override point for customization after application launch.
    self.window = [[UIWindow alloc]initWithFrame:[UIScreen mainScreen].bounds];
    self.window.backgroundColor = [UIColor whiteColor];

    ViewController * vc = [[ViewController alloc]init];
    self.window.rootViewController = vc;

    self.unityController = [[UnityAppController alloc]init];
    [self.unityController application:application didFinishLaunchingWithOptions:launchOptions];

    [self.window makeKeyAndVisible];


    return YES;
}

- (void)applicationWillResignActive:(UIApplication *)application {
    [self.unityController applicationWillResignActive:application];
}

- (void)applicationDidEnterBackground:(UIApplication *)application {
    [self.unityController applicationDidEnterBackground:application];
}

- (void)applicationWillEnterForeground:(UIApplication *)application {
    [self.unityController applicationWillEnterForeground:application];
}

- (void)applicationDidBecomeActive:(UIApplication *)application {
    [self.unityController applicationDidBecomeActive:application];
}

- (void)applicationWillTerminate:(UIApplication *)application {
    [self.unityController applicationWillTerminate:application];
}

@end
4 合併 .pch 檔案,如果之前沒有建立一個,刪除Unity/Classes/Prefix.pch,刪除操作選擇Remove Reference
#ifndef PrefixHeader_pch
#define PrefixHeader_pch

// Include any system framework and library headers here that should be included in all compilation units.
// You will also need to set the Prefix Header build setting of one or more of your targets to reference this file.


#ifdef __OBJC__
#import <Foundation/Foundation.h>
#include "UnityAppController.h"
#import <UIKit/UIKit.h>
#endif

#include "Preprocessor.h"

#include "UnityTrampolineConfigure.h"
#include "UnityInterface.h"

#ifndef __OBJC__
#if USE_IL2CPP_PCH
#include "il2cpp_precompiled_header.h"
#endif
#endif

#ifndef TARGET_IPHONE_SIMULATOR
#define TARGET_IPHONE_SIMULATOR 0
#endif

#define printf_console printf


#endif /* PrefixHeader_pch */
5.修改UnityAppController.mm
#import "AppDelegate.h"


inline UnityAppController*  GetAppController()
{
    AppDelegate *delegate = (AppDelegate *)[UIApplication sharedApplication].delegate;
    return delegate.unityController;
//    return (UnityAppController*)[UIApplication sharedApplication].delegate;
//    return (UnityAppController*)[[UIApplication sharedApplication] valueForKeyPath:@"delegate.unityAppController"];
}
第4步 有可能遇到的問題收集來的,也有自己遇到的
1 Unity 3D不支援豎屏,原生專案支援豎屏
#pragma mark    -       橫豎屏處理
- (UIInterfaceOrientationMask)application:(UIApplication *)application supportedInterfaceOrientationsForWindow:(UIWindow *)window{
    //根據自己專案架構獲取當前顯示的ViewController
    UIViewController *currentVC = [NavigationManager getCurrentViewController];
    if (currentVC) {//獲取原生viewController的轉屏方向
        return currentVC.supportedInterfaceOrientations;
    }
    return UIInterfaceOrientationMaskAll;
}
2.Unknown type name 'UnityViewControllerBase'
解決辦法就是把它改成UIViewController
3.iOS本地應用跳轉unity的時候出現黑屏
原因是你的u3d工程集成了EasyAR外掛,而這個外掛下有個Assets/Plugins/iOS/EasyARAppController.mm,
@interface EasyARAppController : UnityAppController,這是整個app啟動時的第一個controller,自己修改合併這個controller就OK了
或者是將EasyARAppController.mm的內容複製到你的自定義的子類中去,然後刪除引用也是OK的

在UnityAppController.mm裡這個方法中寫
