
Android RemoteViews原始碼分析以及擴充套件使用
阿新 • • 發佈:2019-02-19
一,寫在前面
在前面兩篇文章RemoteViews的基本使用(上)之通知欄 ,RemoteViews的基本使用(下)之視窗小部件 中講述了RemoteViews的兩個應用場景,這篇文章主要介紹RemoteViews的內部機制,以及一個小擴充套件,使用RemoteViews實現跨程序操作介面。本篇文章以視窗小部件為例,來分析RemoteViews如何實現跨程序操作介面。我們都知道在將小部件列表中將視窗小部件拖到桌面,會呼叫onUpdate方法,在該方法中會呼叫AppWidgetManager.updateAppWidget(appWidgetIds,remoteViews)來更新視窗小部件,呼叫RemoteViews方法的一些set..方法,修改視窗小部件的介面。對於這些不是很清楚的哥們,可以檢視文章 RemoteViews的基本使用(下)之視窗小部件 ,這篇文章對視窗小部件做了簡單的介紹,本篇文章主要從原始碼角度分析RemoteViews,對視窗小部件的生命週期以及使用不再闡述。
二,以視窗小部件為例
檢視AppWidgetManager$updateAppWidget原始碼:sService是一個代理物件,updateAppWidgetIds方法的真正呼叫在服務裡,IAppWidgetService是一個AIDL介面,需要找到繼承IAppWidgetService.Stub的那個類,這裡直接告訴大家該類是AppWidgetService。 檢視AppWidgetService$updateAppWidgetIds原始碼:public void updateAppWidget(int[] appWidgetIds, RemoteViews views) { try { sService.updateAppWidgetIds(appWidgetIds, views, mContext.getUserId()); } catch (RemoteException e) { throw new RuntimeException("system server dead?", e); } } public static AppWidgetManager getInstance(Context context) { synchronized (sManagerCache) { if (sService == null) { IBinder b = ServiceManager.getService(Context.APPWIDGET_SERVICE); sService = IAppWidgetService.Stub.asInterface(b); } WeakReference<AppWidgetManager> ref = sManagerCache.get(context); AppWidgetManager result = null; if (ref != null) { result = ref.get(); } if (result == null) { result = new AppWidgetManager(context); sManagerCache.put(context, new WeakReference<AppWidgetManager>(result)); } return result; } }
最後會呼叫id.host.callbacks.updateAppWidget(id.appWidgetId, views),需要找到callbacks的例項化位置,上面程式碼已經給出答案,呼叫AppWidgetService$startListening方法會例項化callbacks物件。那麼,誰呼叫了AppWidgetService$startListening方法呢。 檢視類AppWidgetHost$startListening方法,原始碼如下:public void updateAppWidgetIds(int[] appWidgetIds, RemoteViews views) { if (appWidgetIds == null) { return; } if (appWidgetIds.length == 0) { return; } final int N = appWidgetIds.length; synchronized (mAppWidgetIds) { for (int i=0; i<N; i++) { AppWidgetId id = lookupAppWidgetIdLocked(appWidgetIds[i]); updateAppWidgetInstanceLocked(id, views); } } } //進入updateAppWidgetInstanceLocked方法 void updateAppWidgetInstanceLocked(AppWidgetId id, RemoteViews views) { // allow for stale appWidgetIds and other badness // lookup also checks that the calling process can access the appWidgetId // drop unbound appWidgetIds (shouldn't be possible under normal circumstances) if (id != null && id.provider != null && !id.provider.zombie && !id.host.zombie) { id.views = views; // is anyone listening? if (id.host.callbacks != null) { try { // the lock is held, but this is a oneway call id.host.callbacks.updateAppWidget(id.appWidgetId, views); } catch (RemoteException e) { // It failed; remove the callback. No need to prune because // we know that this host is still referenced by this instance. id.host.callbacks = null; } } } } //callbacks例項化的位置 public int[] startListening(IAppWidgetHost callbacks, String packageName, int hostId, List<RemoteViews> updatedViews) { int callingUid = enforceCallingUid(packageName); synchronized (mAppWidgetIds) { Host host = lookupOrAddHostLocked(callingUid, packageName, hostId); host.callbacks = callbacks; updatedViews.clear(); ArrayList<AppWidgetId> instances = host.instances; int N = instances.size(); int[] updatedIds = new int[N]; for (int i=0; i<N; i++) { AppWidgetId id = instances.get(i); updatedIds[i] = id.appWidgetId; updatedViews.add(id.views); } return updatedIds; } }
public void startListening() {
        int[] updatedIds;
        ArrayList<RemoteViews> updatedViews = new ArrayList<RemoteViews>();

        try {
            if (mPackageName == null) {
                mPackageName = mContext.getPackageName();
            }
            updatedIds = sService.startListening(mCallbacks, mPackageName, mHostId, updatedViews);
        }
        catch (RemoteException e) {
            throw new RuntimeException("system server dead?", e);
        }

        final int N = updatedIds.length;
        for (int i=0; i<N; i++) {
            updateAppWidgetView(updatedIds[i], updatedViews.get(i));
        }
}int mHostId;
Callbacks mCallbacks = new Callbacks();
final HashMap<Integer,AppWidgetHostView> mViews = new HashMap<Integer, AppWidgetHostView>();
public AppWidgetHost(Context context, int hostId) {
mContext = context;
mHostId = hostId;
mHandler = new UpdateHandler(context.getMainLooper());
synchronized (sServiceLock) {
if (sService == null) {
IBinder b = ServiceManager.getService(Context.APPWIDGET_SERVICE);
sService = IAppWidgetService.Stub.asInterface(b);
}
}
} class Callbacks extends IAppWidgetHost.Stub {
public void updateAppWidget(int appWidgetId, RemoteViews views) {
Message msg = mHandler.obtainMessage(HANDLE_UPDATE);
msg.arg1 = appWidgetId;
msg.obj = views;
msg.sendToTarget();
}
public void providerChanged(int appWidgetId, AppWidgetProviderInfo info) {
Message msg = mHandler.obtainMessage(HANDLE_PROVIDER_CHANGED);
msg.arg1 = appWidgetId;
msg.obj = info;
msg.sendToTarget();
}
}class UpdateHandler extends Handler {
public UpdateHandler(Looper looper) {
super(looper);
}
public void handleMessage(Message msg) {
switch (msg.what) {
case HANDLE_UPDATE: {
updateAppWidgetView(msg.arg1, (RemoteViews)msg.obj);
break;
}
case HANDLE_PROVIDER_CHANGED: {
onProviderChanged(msg.arg1, (AppWidgetProviderInfo)msg.obj);
break;
}
}
}
}
//繼續檢視方法updateAppWidgetView
void updateAppWidgetView(int appWidgetId, RemoteViews views) {
AppWidgetHostView v;
synchronized (mViews) {
v = mViews.get(appWidgetId);
}
if (v != null) {
v.updateAppWidget(views);
}
}/**
* Process a set of {@link RemoteViews} coming in as an update from the
* AppWidget provider. Will animate into these new views as needed
*/
public void updateAppWidget(RemoteViews remoteViews) {
if (LOGD) Log.d(TAG, "updateAppWidget called mOld=" + mOld);
boolean recycled = false;
View content = null;
Exception exception = null;
// Capture the old view into a bitmap so we can do the crossfade.
if (CROSSFADE) {
if (mFadeStartTime < 0) {
if (mView != null) {
final int width = mView.getWidth();
final int height = mView.getHeight();
try {
mOld = Bitmap.createBitmap(width, height, Bitmap.Config.ARGB_8888);
} catch (OutOfMemoryError e) {
// we just won't do the fade
mOld = null;
}
if (mOld != null) {
//mView.drawIntoBitmap(mOld);
}
}
}
}
if (remoteViews == null) {
if (mViewMode == VIEW_MODE_DEFAULT) {
// We've already done this -- nothing to do.
return;
}
content = getDefaultView();
mLayoutId = -1;
mViewMode = VIEW_MODE_DEFAULT;
} else {
// Prepare a local reference to the remote Context so we're ready to
// inflate any requested LayoutParams.
mRemoteContext = getRemoteContext(remoteViews);
int layoutId = remoteViews.getLayoutId();
// If our stale view has been prepared to match active, and the new
// layout matches, try recycling it
if (content == null && layoutId == mLayoutId) {
try {
remoteViews.reapply(mContext, mView);
content = mView;
recycled = true;
if (LOGD) Log.d(TAG, "was able to recycled existing layout");
} catch (RuntimeException e) {
exception = e;
}
}
// Try normal RemoteView inflation
if (content == null) {
try {
content = remoteViews.apply(mContext, this);
if (LOGD) Log.d(TAG, "had to inflate new layout");
} catch (RuntimeException e) {
exception = e;
}
}
mLayoutId = layoutId;
mViewMode = VIEW_MODE_CONTENT;
}
if (content == null) {
if (mViewMode == VIEW_MODE_ERROR) {
// We've already done this -- nothing to do.
return ;
}
Log.w(TAG, "updateAppWidget couldn't find any view, using error view", exception);
content = getErrorView();
mViewMode = VIEW_MODE_ERROR;
}
if (!recycled) {
prepareView(content);
addView(content);
}
if (mView != content) {
removeView(mView);
mView = content;
}
if (CROSSFADE) {
if (mFadeStartTime < 0) {
// if there is already an animation in progress, don't do anything --
// the new view will pop in on top of the old one during the cross fade,
// and that looks okay.
mFadeStartTime = SystemClock.uptimeMillis();
invalidate();
}
}
}三,小結
開發一個視窗小部件,我們需要在應用中建立AppWidgetProvider的子類,並重寫一些生命週期的方法。在重寫的onUpdate方法中,呼叫appWidgetManager.updateAppWidget(ids,remoteviews)更新視窗小部件,引數remoteViews一般會呼叫一些setXXX方法來確定如何更新介面。這裡的remoteViews是在開發的應用中的,而視窗小部件的介面更新並不是在本應用中的,它的更新操作是放在SystemServer程序中。 所以視窗小部件的實現體現了一個非常重要的需求:跨程序更新介面。從上面的程式碼分析可知,介面具體更新是交給AppWidgetService處理,它是一個系統服務,開機啟動就會執行。系統服務AppWidgetService處理介面的更新,最終會呼叫remoteViews$apply方法更新介面。這個remoteViews從本應用通過Binder機制,跨程序傳遞給了AppWidgetService,我們可以猜測它實現了Parcelable介面,事實也確實如此。 因此可以得出這樣一個結論:若需要實現操作遠端介面,首先需要呼叫apply方法並返回一個View,然後將該View新增到父容器中。四,另外
前面程式碼這樣那樣跟下來,更新介面,最終是呼叫了Remoteviews$apply/reapply方法,那麼apply是如何更新介面的呢?下面的分析才是本篇文章的重點,上面一系列程式碼跟進只是引出這個引子,並沒有多大實際意義。只需要知道最終呼叫AppWidgetHostView$updateAppWidget方法,裡面呼叫RemoteViews的方法apply/reapply更新介面,且AppWidgetHostView是更新介面的父容器。五,RemoteViews原始碼分析
在分析RemoteViews$apply/reapply方法前,先分析RemoteViews的一些setXXX方法,至於為啥子看完就知道啦。5.1,分析RemoteViews$setXXX方法
以RemoteViews$setTextViewText為例進行分析,檢視原始碼如下: public void setTextViewText(int viewId, CharSequence text) {
setCharSequence(viewId, "setText", text);
}
//繼續看setCharSequence
public void setCharSequence(int viewId, String methodName, CharSequence value) {
addAction(new ReflectionAction(viewId, methodName, ReflectionAction.CHAR_SEQUENCE, value));
}
//繼續看addAction
private void addAction(Action a) {
if (hasLandscapeAndPortraitLayouts()) {
throw new RuntimeException("RemoteViews specifying separate landscape and portrait" +
" layouts cannot be modified. Instead, fully configure the landscape and" +
" portrait layouts individually before constructing the combined layout.");
}
if (mActions == null) {
mActions = new ArrayList<Action>();
}
mActions.add(a);
// update the memory usage stats
a.updateMemoryUsageEstimate(mMemoryUsageCounter);
} private abstract static class Action implements Parcelable {
public abstract void apply(View root, ViewGroup rootParent,
OnClickHandler handler) throws ActionException;
//...code
}5.2,分析RemoteViews$apply/reapply方法
通過上面的分析,可以猜測RemoteViews$apply/reapply方法中取出了list集合裡的元素,然後執行更新操作。當然是SystemServer程序中執行的,文章前半部分已經有很詳細的分析了。 檢視RemoteViews$apply原始碼: public View apply(Context context, ViewGroup parent) {
return apply(context, parent, null);
}
/** @hide */
public View apply(Context context, ViewGroup parent, OnClickHandler handler) {
RemoteViews rvToApply = getRemoteViewsToApply(context);
View result;
Context c = prepareContext(context);
LayoutInflater inflater = (LayoutInflater)
c.getSystemService(Context.LAYOUT_INFLATER_SERVICE);
inflater = inflater.cloneInContext(c);
inflater.setFilter(this);
result = inflater.inflate(rvToApply.getLayoutId(), parent, false);
rvToApply.performApply(result, parent, handler);
return result;
}
//繼續看performApply
private void performApply(View v, ViewGroup parent, OnClickHandler handler) {
if (mActions != null) {
handler = handler == null ? DEFAULT_ON_CLICK_HANDLER : handler;
final int count = mActions.size();
for (int i = 0; i < count; i++) {
Action a = mActions.get(i);
a.apply(v, parent, handler);
}
}
}
5.3,分析Action$apply方法
前面以RemoteViews$setTextViewText為例,封裝更新介面資料的Action是ReflectionAction,以其為例。 原始碼如下:private class ReflectionAction extends Action {
ReflectionAction(int viewId, String methodName, int type, Object value) {
this.viewId = viewId;
this.methodName = methodName;
this.type = type;
this.value = value;
}
//...code
@Override
public void apply(View root, ViewGroup rootParent, OnClickHandler handler) {
final View view = root.findViewById(viewId);
if (view == null) return;
Class param = getParameterType();
if (param == null) {
throw new ActionException("bad type: " + this.type);
}
Class klass = view.getClass();
Method method;
try {
method = klass.getMethod(this.methodName, getParameterType());
}
catch (NoSuchMethodException ex) {
throw new ActionException("view: " + klass.getName() + " doesn't have method: "
+ this.methodName + "(" + param.getName() + ")");
}
if (!method.isAnnotationPresent(RemotableViewMethod.class)) {
throw new ActionException("view: " + klass.getName()
+ " can't use method with RemoteViews: "
+ this.methodName + "(" + param.getName() + ")");
}
try {
//noinspection ConstantIfStatement
if (false) {
Log.d(LOG_TAG, "view: " + klass.getName() + " calling method: "
+ this.methodName + "(" + param.getName() + ") with "
+ (this.value == null ? "null" : this.value.getClass().getName()));
}
method.invoke(view, this.value);
}
catch (Exception ex) {
throw new ActionException(ex);
}
}
}六,RemoteViews的擴充套件使用
上面通過Binder機制傳遞RemoteViews,這裡不想這麼複雜去處理,嘗試使用廣播去完成程序間傳遞RemoteViews的工作。在應用RvSender中傳送廣播,並將RemoteViews物件放入intent的extra中;在應用RvReceiver中接受廣播,取出intent中的資料,並在該應用中完成介面更新。 應用RvSender:public class MainActivity extends Activity {
@Override
protected void onCreate(Bundle savedInstanceState) {
super.onCreate(savedInstanceState);
setContentView(R.layout.activity_main);
}
public void clickButton(View v) {
//傳送廣播
Intent intent = new Intent();
intent.setAction("com.example.remoteview");
RemoteViews rv = new RemoteViews(getPackageName(), R.layout.rv_layout);
rv.setTextViewText(R.id.tv, "hello, from Sender");
intent.putExtra("remoteview", rv);
sendBroadcast(intent);
}
}<?xml version="1.0" encoding="utf-8"?>
<RelativeLayout xmlns:android="http://schemas.android.com/apk/res/android"
android:layout_width="match_parent"
android:layout_height="match_parent"
android:gravity="center_horizontal">
<ImageView
android:id="@+id/iv"
android:layout_width="wrap_content"
android:layout_height="wrap_content"
android:layout_marginTop="10dp"
android:src="@drawable/ic_launcher"/>
<TextView
android:id="@+id/tv"
android:layout_width="wrap_content"
android:layout_height="wrap_content"
android:layout_below="@id/iv"
android:layout_marginTop="20dp"
android:textSize="24sp"
android:textColor="#f00"
android:background="@android:color/darker_gray"
android:text="remoteview"/>
</RelativeLayout>應用RvReceiver:
public class MainActivity extends Activity {

	private RelativeLayout rl;

	@Override
	protected void onCreate(Bundle savedInstanceState) {
		super.onCreate(savedInstanceState);
		setContentView(R.layout.activity_main);
		init();
	}

	public void init() {
		IntentFilter filter = new IntentFilter();
		filter.addAction("com.example.remoteview");
		MyReceiver receiver = new MyReceiver();
		registerReceiver(receiver, filter);

		rl = (RelativeLayout) findViewById(R.id.rl);
	}

	private class MyReceiver extends BroadcastReceiver {

		@Override
		public void onReceive(Context context, Intent intent) {
			if ("com.example.remoteview".equals(intent.getAction())) {
				RemoteViews remoteViews = intent.getParcelableExtra("remoteview");
				View view = remoteViews.apply(context, rl);
				rl.addView(view);
			}
		}
	}
}<RelativeLayout xmlns:android="http://schemas.android.com/apk/res/android"
xmlns:tools="http://schemas.android.com/tools"
android:layout_width="match_parent"
android:layout_height="match_parent"
tools:context=".MainActivity" >
<TextView
android:layout_width="wrap_content"
android:layout_height="wrap_content"
android:textSize="24sp"
android:text="RvReceiver" />
<RelativeLayout
android:id="@+id/rl"
android:layout_marginTop="120dp"
android:layout_width="match_parent"
android:layout_height="wrap_content"></RelativeLayout>
</RelativeLayout>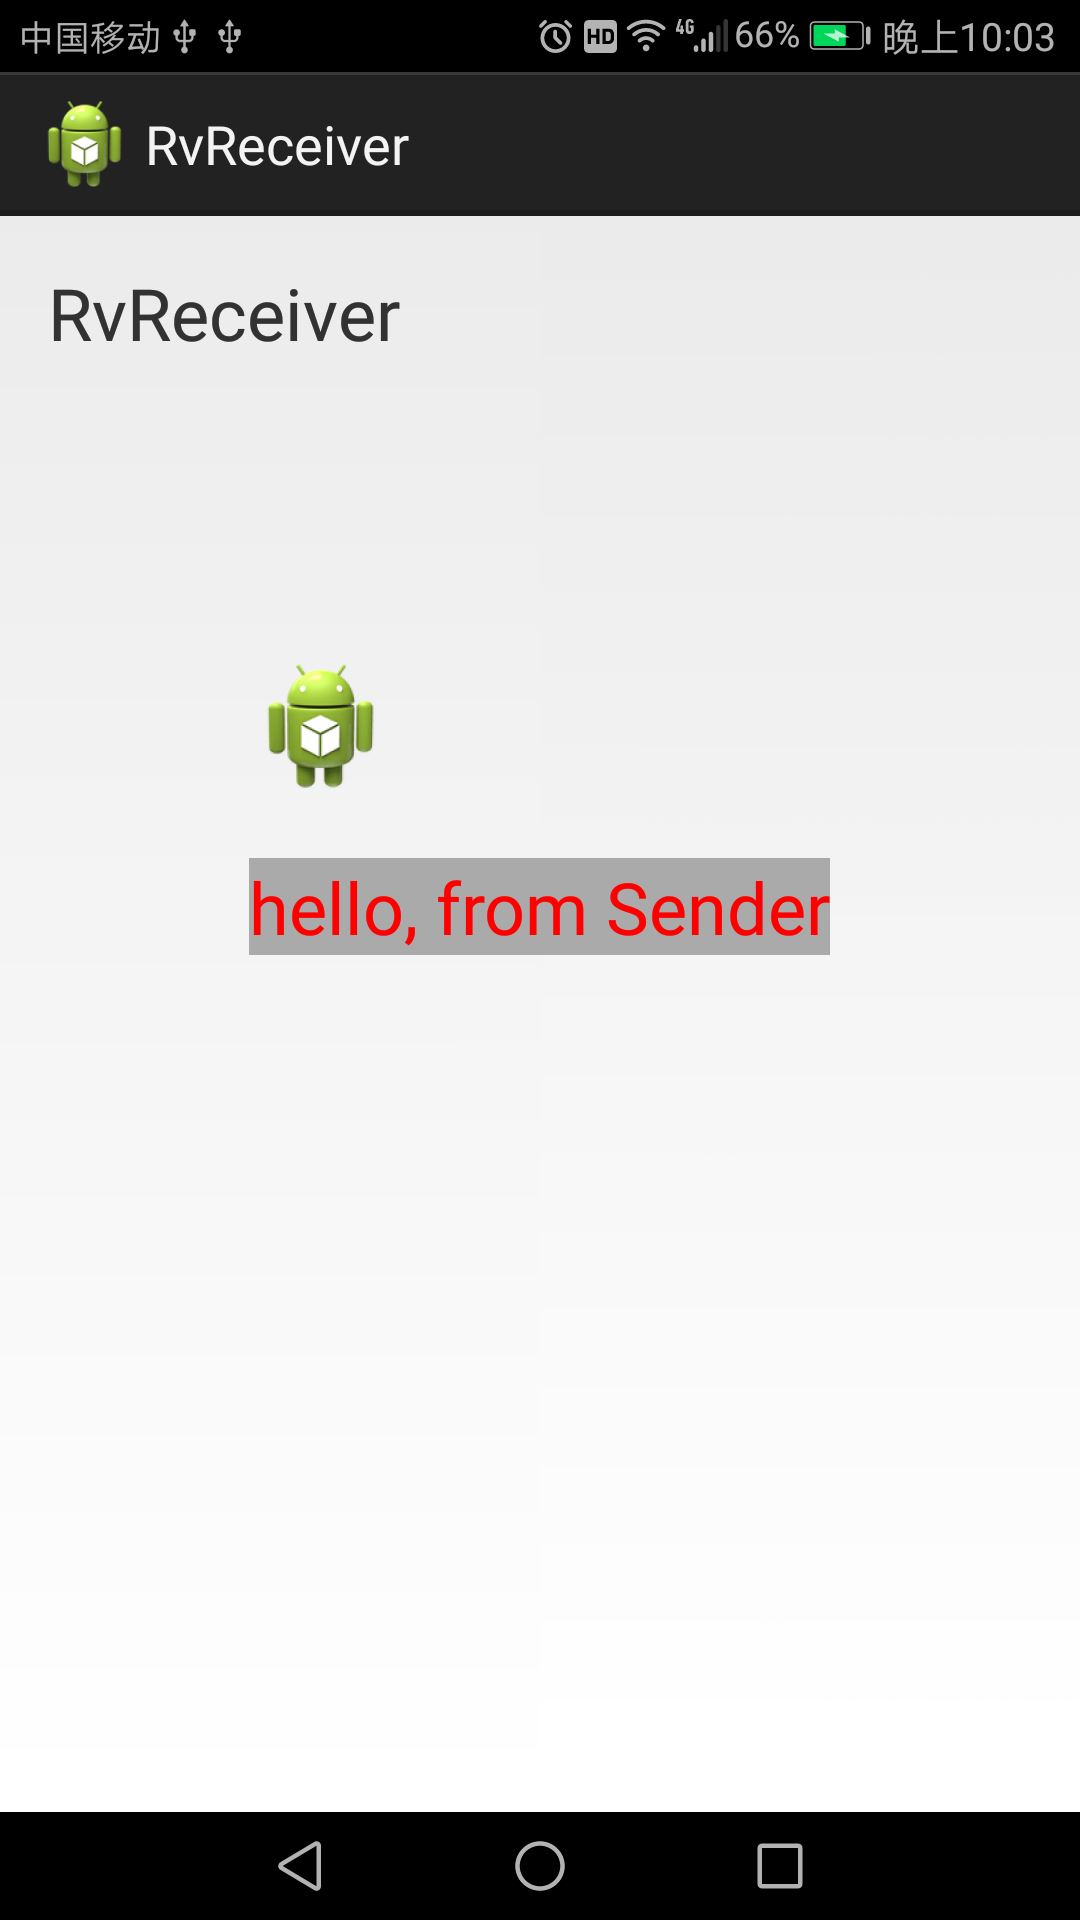
這篇文章就分享到這裡啦,有疑問可以留言,亦可糾錯,亦可補充,互相學習...^_^