
Spring Cloud Alibaba | Sentinel:分散式系統的流量防衛兵基礎實戰
Spring Cloud Alibaba | Sentinel:分散式系統的流量防衛兵基礎實戰
Springboot: 2.1.8.RELEASE
SpringCloud: Greenwich.SR2
1. Sentinel控制檯概述
在介紹入門實戰之前,先來介紹一下Sentinel。Sentinel控制檯提供一個輕量級的開源控制檯,它提供機器發現以及健康情況管理、監控(單機和叢集),規則管理和推送的功能。
Sentinel控制檯主要功能:
- 檢視機器列表以及健康情況:收集 Sentinel 客戶端傳送的心跳包,用於判斷機器是否線上。
- 監控 (單機和叢集聚合):通過 Sentinel 客戶端暴露的監控 API,定期拉取並且聚合應用監控資訊,最終可以實現秒級的實時監控。
- 規則管理和推送:統一管理推送規則。
- 鑑權:生產環境中鑑權非常重要,每個使用者都需要相應的許可權可以對控制檯的資訊進行修改。
2. Sentinel控制檯部署:
Sentinel控制檯部署有兩種方案:
2.1 下載
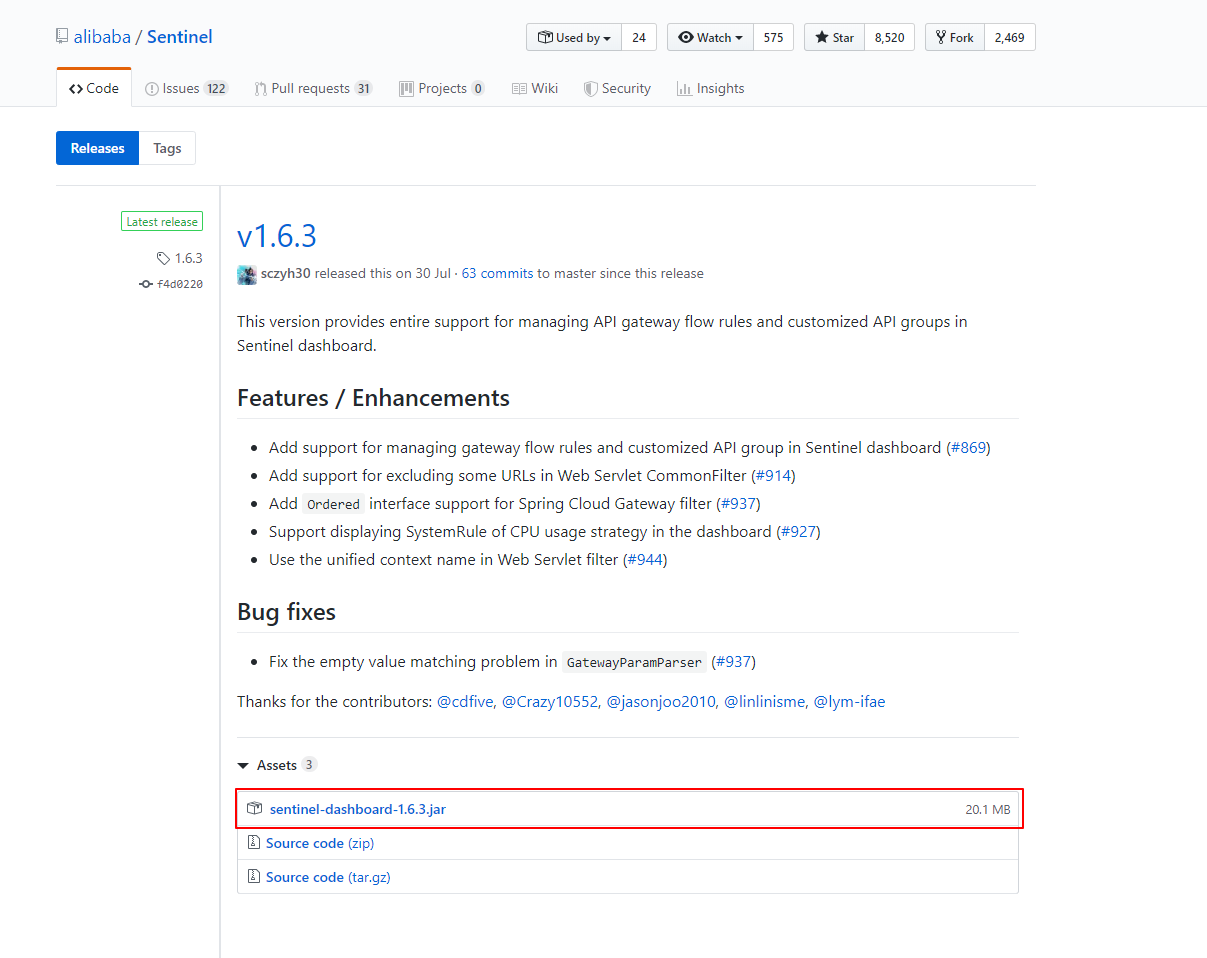
直接使用官方編譯好的Release版本部署啟動,下載地址:https://github.com/alibaba/Sentinel/releases ,目前最新版本是v1.6.3,下載sentinel-dashboard-1.6.3.jar,如圖:
2.2 啟動
可以使用最新版本的原始碼自行構建Sentinel控制檯,首先需要下載控制檯工程,下載路徑:https://github.com/alibaba/Sentinel/tree/master/sentinel-dashboard ,使用命令mvn clean package
在CentOS中使用如下命令啟動Sentinel控制檯工程:
注意:啟動 Sentinel 控制檯需要 JDK 版本為 1.8 及以上版本。
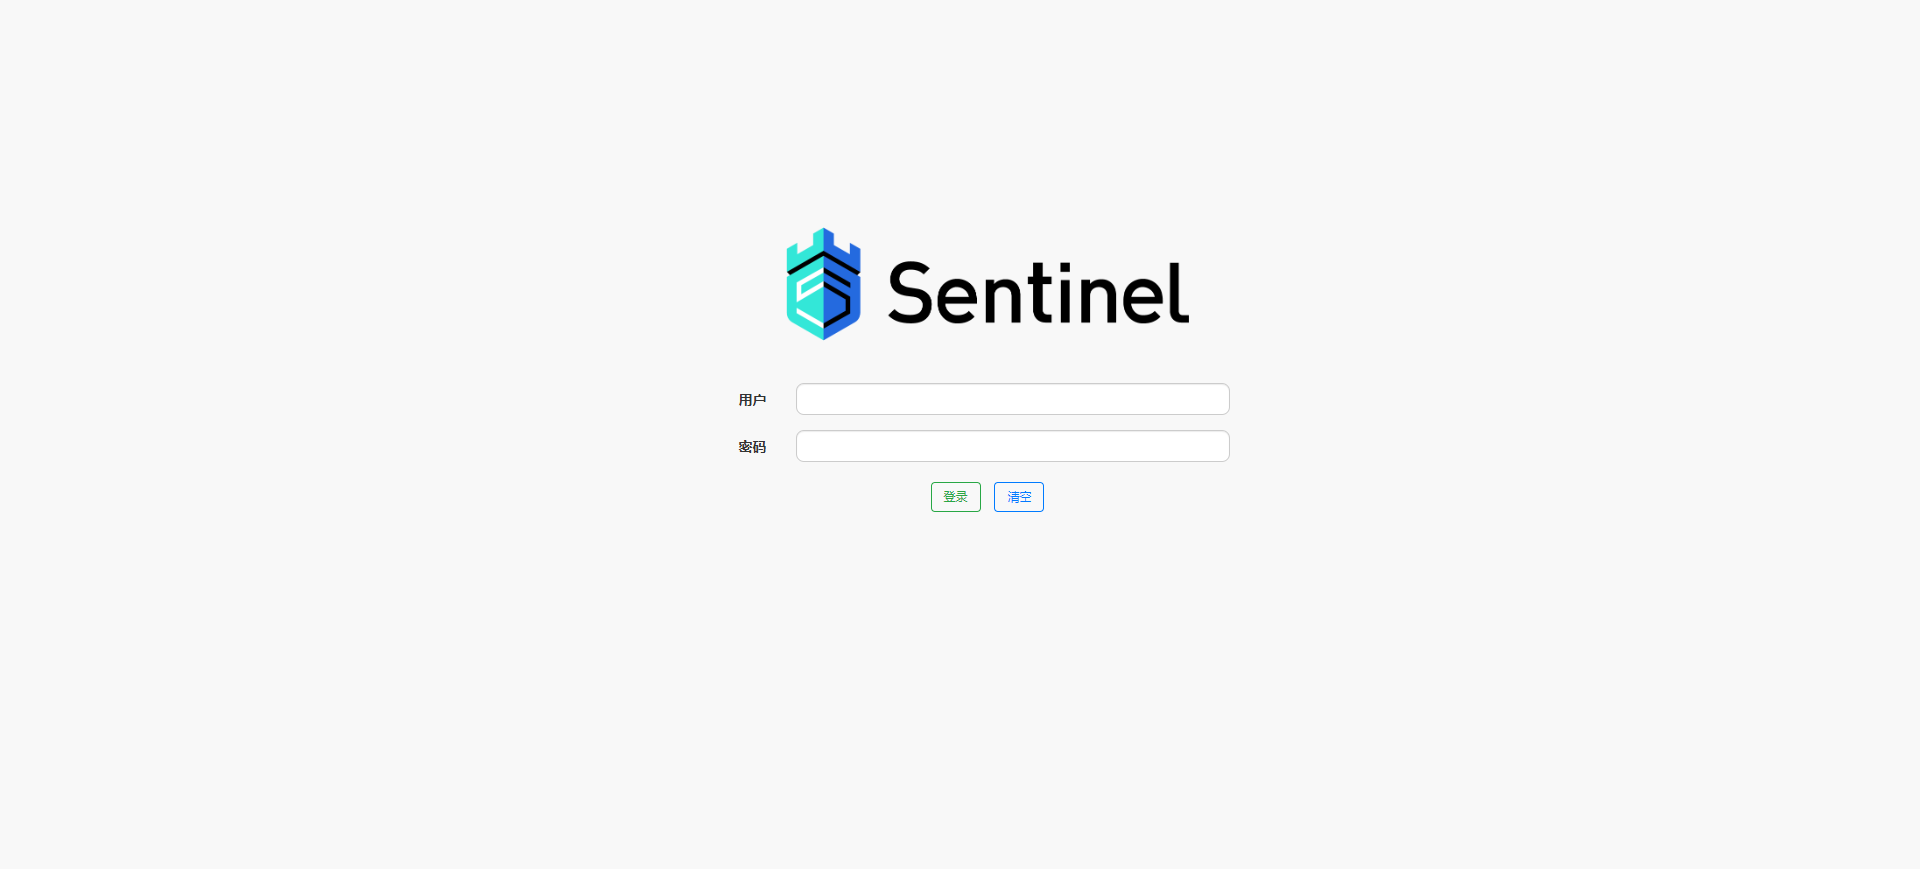
nohup java -Dserver.port=8080 -Dcsp.sentinel.dashboard.server=localhost:8080 -Dproject.name=sentinel-dashboard -jar sentinel-dashboard-1.6.3.jar >sentinel-dashboard.out 2>&1 &-Dserver.port=8080 用於指定 Sentinel 控制檯埠為 8080。啟動完成後,使用瀏覽器訪問:http://ip:8080/ ,這時會進入登入頁面,從 Sentinel 1.6.0 起,Sentinel 控制檯引入基本的登入功能,預設使用者名稱和密碼都是sentinel
Sentinel Dashboard可以通過如下引數進行配置:
- -Dsentinel.dashboard.auth.username=sentinel 用於指定控制檯的登入使用者名稱為 sentinel;
- -Dsentinel.dashboard.auth.password=123456 用於指定控制檯的登入密碼為 123456;如果省略這兩個引數,預設使用者和密碼均為 sentinel;
- -Dserver.servlet.session.timeout=7200 用於指定 Spring Boot 服務端 session 的過期時間,如 7200 表示 7200 秒;60m 表示 60 分鐘,預設為 30 分鐘;
同樣也可以直接在Spring的application.properties檔案中進行配置。
3. Spring Cloud
Sentinel目前已支援Spring Cloud,需要引入spring-boot-starter-web來觸發sentinel-starter中相關的自動配置。
3.1 建立父工程sentinel-springcloud
工程依賴pom.xml如下:
程式碼清單:Alibaba/sentinel-springcloud/pom.xml
***
<dependencyManagement>
    <dependencies>
        <dependency>
            <groupId>org.springframework.cloud</groupId>
            <artifactId>spring-cloud-dependencies</artifactId>
            <version>${spring-cloud.version}</version>
            <type>pom</type>
            <scope>import</scope>
        </dependency>
        <dependency>
            <groupId>com.alibaba.cloud</groupId>
            <artifactId>spring-cloud-alibaba-dependencies</artifactId>
            <version>${spring-cloud-alibaba.version}</version>
            <type>pom</type>
            <scope>import</scope>
        </dependency>
    </dependencies>
</dependencyManagement>

<dependencies>
    <dependency>
        <groupId>org.springframework.boot</groupId>
        <artifactId>spring-boot-starter-actuator</artifactId>
    </dependency>
    <dependency>
        <groupId>com.alibaba.cloud</groupId>
        <artifactId>spring-cloud-starter-alibaba-sentinel</artifactId>
    </dependency>

    <dependency>
        <groupId>org.springframework.boot</groupId>
        <artifactId>spring-boot-starter-test</artifactId>
        <scope>test</scope>
    </dependency>
</dependencies>spring-cloud-alibaba-dependencies引入Spring Cloud Alibaba版本控制。spring-cloud-starter-alibaba-sentinel引入Sentinel元件。
3.2 建立子工程web_mvc:
工程依賴pom.xml如下:
程式碼清單:Alibaba/sentinel-springcloud/web_mvc/pom.xml
***
<dependency>
    <groupId>org.springframework.boot</groupId>
    <artifactId>spring-boot-starter-web</artifactId>
</dependency>
工程配置application.yml如下:
程式碼清單:Alibaba/sentinel-springcloud/web_mvc/src/main/resources/application.yml
***
server:
  port: 8000
spring:
  application:
    name: web-mvc
  cloud:
    sentinel:
      transport:
        dashboard: 192.168.44.129:8080
port: 8719- spring.cloud.sentinel.transport.dashboard:配置Sentinel控制檯的ip和埠
- spring.cloud.sentinel.transport.port:這個埠配置會在應用對應的機器上啟動一個 Http Server,該 Server 會與 Sentinel 控制檯做互動。比如 Sentinel 控制檯添加了1個限流規則,會把規則資料 push 給這個 Http Server 接收,Http Server 再將規則註冊到 Sentinel 中。
建立測試介面HelloController.java如下:
程式碼清單:Alibaba/sentinel-springcloud/web_mvc/src/main/java/com/springcloud/web_mvc/controller/HelloController.java
***
@RestController
public class HelloController {

    @GetMapping(value = "/hello")
    @SentinelResource("hello")
    public String hello() {
        return "Hello Web MVC";
    }
}@SentinelResource註解用來標識資源是否被限流、降級。上述例子上該註解的屬性 'hello' 表示資源名。該註解還有一些其他更精細化的配置,比如忽略某些異常的配置、預設降級函式等等,具體可見如下說明:
- value:資源名稱,必需項(不能為空)
- entryType:entry 型別,可選項(預設為 EntryType.OUT)
- blockHandler / blockHandlerClass: blockHandler 對應處理 BlockException 的函式名稱,可選項。blockHandler 函式訪問範圍需要是 public,返回型別需要與原方法相匹配,引數型別需要和原方法相匹配並且最後加一個額外的引數,型別為 BlockException。blockHandler 函式預設需要和原方法在同一個類中。若希望使用其他類的函式,則可以指定 blockHandlerClass 為對應的類的 Class 物件,注意對應的函式必需為 static 函式,否則無法解析。
- fallback:fallback 函式名稱,可選項,用於在丟擲異常的時候提供 fallback 處理邏輯。fallback 函式可以針對所有型別的異常(除了 exceptionsToIgnore 裡面排除掉的異常型別)進行處理。fallback 函式簽名和位置要求:
- 返回值型別必須與原函式返回值型別一致;
- 方法引數列表需要和原函式一致,或者可以額外多一個 Throwable 型別的引數用於接收對應的異常。
- fallback 函式預設需要和原方法在同一個類中。若希望使用其他類的函式,則可以指定 fallbackClass 為對應的類的 Class 物件,注意對應的函式必需為 static 函式,否則無法解析。
- defaultFallback(since 1.6.0):預設的 fallback 函式名稱,可選項,通常用於通用的 fallback 邏輯(即可以用於很多服務或方法)。預設 fallback 函式可以針對所有型別的異常(除了 exceptionsToIgnore 裡面排除掉的異常型別)進行處理。若同時配置了 fallback 和 defaultFallback,則只有 fallback 會生效。defaultFallback 函式簽名要求:
- 返回值型別必須與原函式返回值型別一致;
- 方法引數列表需要為空,或者可以額外多一個 Throwable 型別的引數用於接收對應的異常。
- defaultFallback 函式預設需要和原方法在同一個類中。若希望使用其他類的函式,則可以指定 fallbackClass 為對應的類的 Class 物件,注意對應的函式必需為 static 函式,否則無法解析。
- exceptionsToIgnore(since 1.6.0):用於指定哪些異常被排除掉,不會計入異常統計中,也不會進入 fallback 邏輯中,而是會原樣丟擲。
注:1.6.0 之前的版本 fallback 函式只針對降級異常(DegradeException)進行處理,不能針對業務異常進行處理。
特別地,若 blockHandler 和 fallback 都進行了配置,則被限流降級而丟擲 BlockException 時只會進入 blockHandler 處理邏輯。若未配置 blockHandler、fallback 和 defaultFallback,則被限流降級時會將 BlockException 直接丟擲。
3.3 測試
啟動子工程web_mvc,啟動成功後開啟瀏覽器訪問:http://localhost:8000/hello ,可以看到頁面正常顯示Hello Web MVC,多次重新整理後開啟Sentinel Dashboard,在Sentinel控制檯上已經可以看到我們的web-mvc應用了,如圖:

- 注意:請確保客戶端有訪問量,Sentinel 會在客戶端首次呼叫的時候進行初始化,開始向控制檯傳送心跳包。
4. Spring WebFlux
Sentinel目前已經支援WebFlux,需要配合spring-boot-starter-webflux依賴觸發 sentinel-starter中WebFlux相關的自動化配置。具體接入方式如下:
4.1 建立子工程web_flux
工程依賴pom.xml如下:
程式碼清單:Alibaba/sentinel-springcloud/web_flux/pom.xml
***
<dependency>
    <groupId>org.springframework.boot</groupId>
    <artifactId>spring-boot-starter-webflux</artifactId>
</dependency>spring-boot-starter-webflux引入WebFlux的相關依賴,Sentinel的依賴已在父工程引入。
4.2 配置檔案application.yml如下:
程式碼清單:Alibaba/sentinel-springcloud/web_flux/src/main/resources/application.yml
server:
  port: 9000
spring:
  application:
    name: web-flux
  cloud:
    sentinel:
      transport:
        dashboard: 192.168.44.129:8080
        port: 8720
4.3 測試介面HelloController.java
程式碼清單:Alibaba/sentinel-springcloud/web_flux/src/main/java/com/springcloud/web_flux/controller/HelloController.java
***
@RestController
public class HelloController {

    @GetMapping("/hello")
    @SentinelResource("hello")
    public Mono<String> mono() {
        return Mono.just("Hello Web Flux")
                .transform(new SentinelReactorTransformer<>("resourceName"));
    }
}
4.4 測試
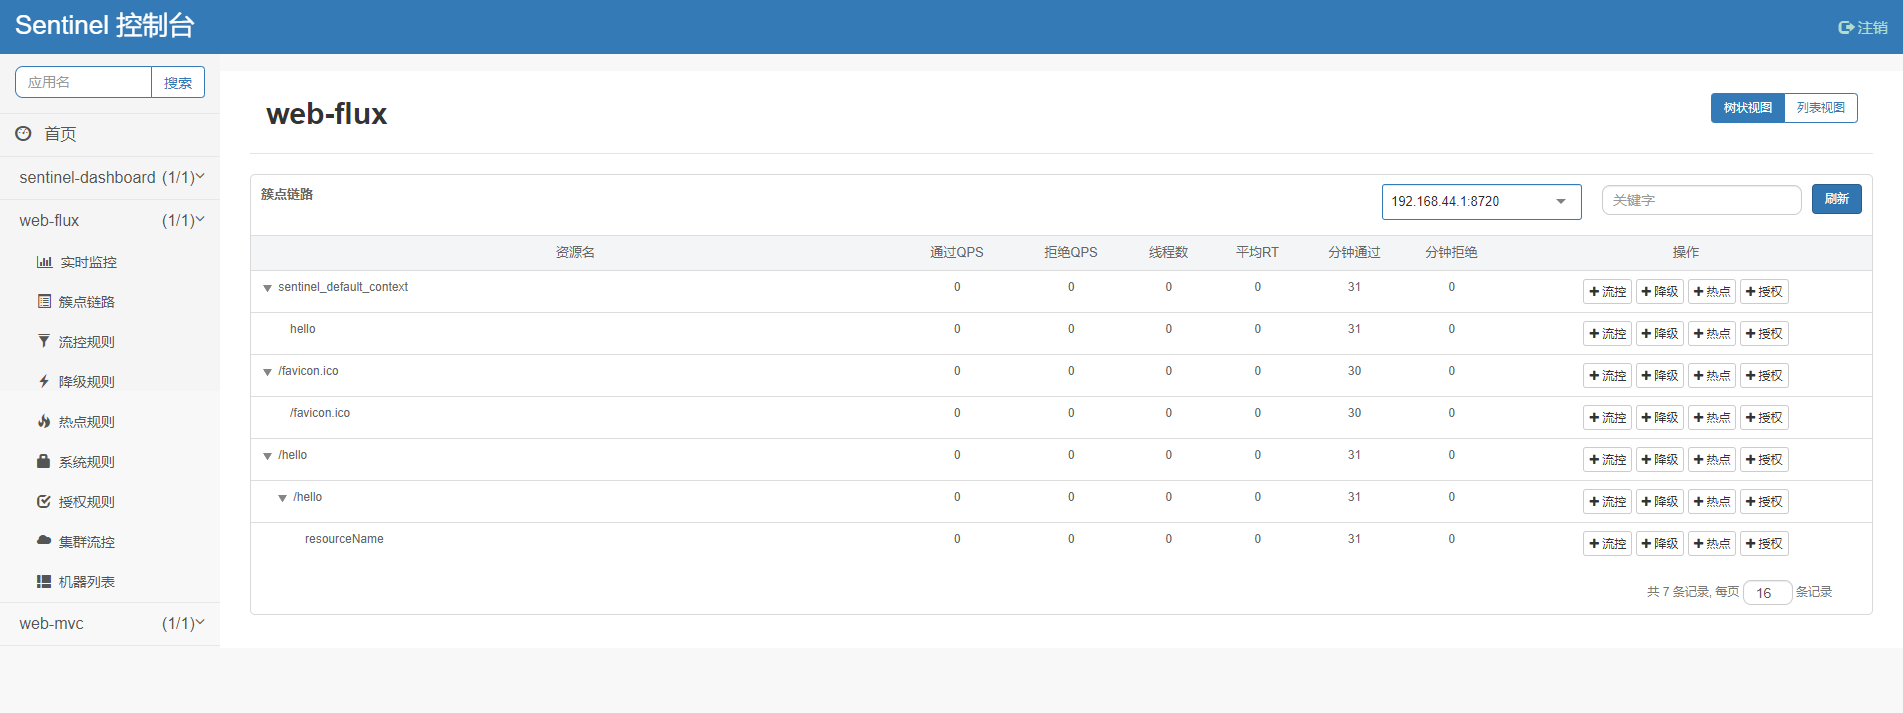
啟動子工程web_flux,開啟瀏覽器訪問:http://localhost:9000/hello ,頁面正常顯示Hello Web Flux,多次重新整理頁面後開啟Sentinel控制檯,可以看到web_flux工程正常註冊,測試成功,如圖:
5. 示例程式碼
Github-示例程式碼
Gitee-示例代