SpringCloud系列之分散式配置中心極速入門與實踐
阿新 • • 發佈:2020-09-09
[toc]
### 1、分散式配置中心簡介
在實際的專案開發中,配置檔案是使用比較多的,很多專案有測試環境(TEST)、開發環境(DEV)、規範的專案還有整合環境(UAT)、生產環境(PROD),每個環境就一個配置檔案。
CSDN連結:[SpringCloud系列之分散式配置中心極速入門與實踐](https://smilenicky.blog.csdn.net/article/details/108491861)

這個在單體應用的專案裡是沒什麼問題,如果是分散式微服務專案,就會有很多的模組,比如微服務A、微服務B等等,每個工程都有一套配置檔案,隨著業務增長,肯定會有很多配置,分散管理,不能實現統一的管理,所以就有了微服務的配置檔案統一管理元件,比如spring cloud官方的spring cloud config、攜程的 Apollo,還有最近比較火的阿里 nacos,每款產品各有自己的特點,不過本部落格只介紹spring cloud config
作為一款分散式的配置中心,其基本的功能應該有統一的配置檔案管理,至於怎麼儲存可以自行設計,客戶端可以從配置中心下拉配置資料,還有一個重要功能就是推送,有了推送功能,才能做到將資料統一發給客戶端及時更新,總不能讓客戶端自己pull,如果在客戶端很多的情況,這種肯定是不合理的,簡單畫圖表示:

### 2、什麼是SpringCloud Config?
ok,前面簡單介紹了分散式配置中心的基本概念,現在看看spring cloud提供的這塊分散式配置中心spring cloud config是怎麼設計?簡單歸納其特點:
* 檔案儲存:預設Git倉庫(github、gitlab等等)
* 版本關聯:預設Git
* 許可權控制:需要Git支援
* 多環境(profile):配置檔案指定
* 動態更新:需要基於Springcloud config bus
* 定時更新:需要自行拓展
* 管理後臺:預設不帶
所以有一個明顯的特點,springcloud config預設就是基於git倉庫來實現配置檔案統一管理的,所以很明顯其有如下角色:
* 配置倉庫:git倉庫
* 配置服務端:config server,負責從git倉庫下拉配置檔案到本地,然後可以統一推送給客戶端
* 配置客戶端:各微服務業務客戶端,可以從配置服務端pull配置資料
ok,簡單畫圖表示其架構,如圖所示:

### 3、例子實驗環境準備
環境準備:
* JDK 1.8
* SpringBoot2.2.3
* SpringCloud(Hoxton.SR7)
* Maven 3.2+
* 開發工具
* IntelliJ IDEA
* smartGit
github遠端倉庫建立,可以在github上建立一個springCloudExamples專案,然後新建一個資料夾,命名為config-repository
### 4、Config Server程式碼實現
建立一個SpringBoot Initialize專案,詳情可以參考我之前部落格:[SpringBoot系列之快速建立專案教程](https://blog.csdn.net/u014427391/article/details/102870300)
如圖:選擇config Server

也可以自行在maven引入如下配置:
```xml
org.springframework.cloud
spring-cloud-config-server
```
使用註解`@EnableConfigServer`表示這個config服務端工程
```java
package com.example.springcloud.server;
import org.springframework.boot.SpringApplication;
import org.springframework.boot.autoconfigure.SpringBootApplication;
import org.springframework.cloud.config.server.EnableConfigServer;
@SpringBootApplication
@EnableConfigServer
public class SpringcloudConfigServerApplication {
public static void main(String[] args) {
SpringApplication.run(SpringcloudConfigServerApplication.class, args);
}
}
```
新建bootstrap.yml配置檔案,指定github倉庫的地址:
```yaml
server:
port: 8761
spring:
application:
name: springcloud-config-server
cloud:
config:
server:
git:
uri: https://github.com/your_github_account/springCloudExamples
username: your_github_account
password: your_github_password
search-paths: config-repository
```
### 5、Config Client程式碼實現
同樣新建SpringBoot Initialize專案,快速建立

pom配置檔案:
```xml
org.springframework.boot
org.springframework.cloud
spring-cloud-starter-config
```
yaml配置,uri指定為config server的地址,profile是環境變數,可以指定為dev(開發環境),label表示分支,master是指github的主幹分支
```yaml
server:
port: 8082
spring:
application:
name: springcloud-config-client
cloud:
config:
uri: http://127.0.0.1:8761/
profile: dev
label: master
```
然後,我們要在github倉庫新建配置檔案:命名規範必須是客戶端的spring. application.name加上profile

在配置檔案,隨便寫點:
```
config.client.profile=springcloud-config-client-dev
```
測試:要先啟動config server,然後再啟動config client,寫個例子測試,要加上`@RefreshScope`實現重新整理功能
```java
@RestController
@RefreshScope
public class ConnfigClientController {
@Value("${config.client.profile}")
private String profile;
@GetMapping(value = "/test")
public String test() {
return this.profile;
}
}
```
啟動SpringBoot專案,測試:

在config server啟動過程,可以看到config server從github下拉配置檔案到本地快取,具體是C盤AppData目錄

### 6、客戶端pull重新整理實現
客戶端要實現下拉配置資料,怎麼實現?可以整合spring-boot-starter-actuator來實現:
pom配置:
```xml
org.springframework.boot
```
spring-boot-starter-actuator配置:include加上rehresh配置
```yaml
management:
endpoints:
web:
# 字首名,預設也是actuator
base-path: /actuator
# 預設只開放info,health的方式訪問,加上refresh
exposure:
include: info,health,refresh
endpoint:
health:
show-details: always
refresh:
enabled: true
```
訪問客戶端的連結,注意要用post方式,[http://localhost:8082/actuator/refresh](http://localhost:8082/actuator/refresh)
github配置檔案沒更新的情況:

修改配置檔案,commit和push到github

呼叫介面時候,可以看到config client從config server獲取資料:

### 7、訊息匯流排Spring Cloud Bus
* 什麼是匯流排?
在微服務架構的系統中,通常會使用輕量級的訊息代理來構建一個共用的訊息主題,並讓系統中所有微服務例項都連結上來。由於該主題中產生的訊息會被所有例項監聽和消費,所以稱它為訊息匯流排。
* 什麼是Spring Cloud Bus?
>
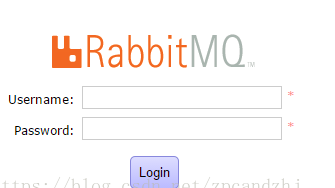
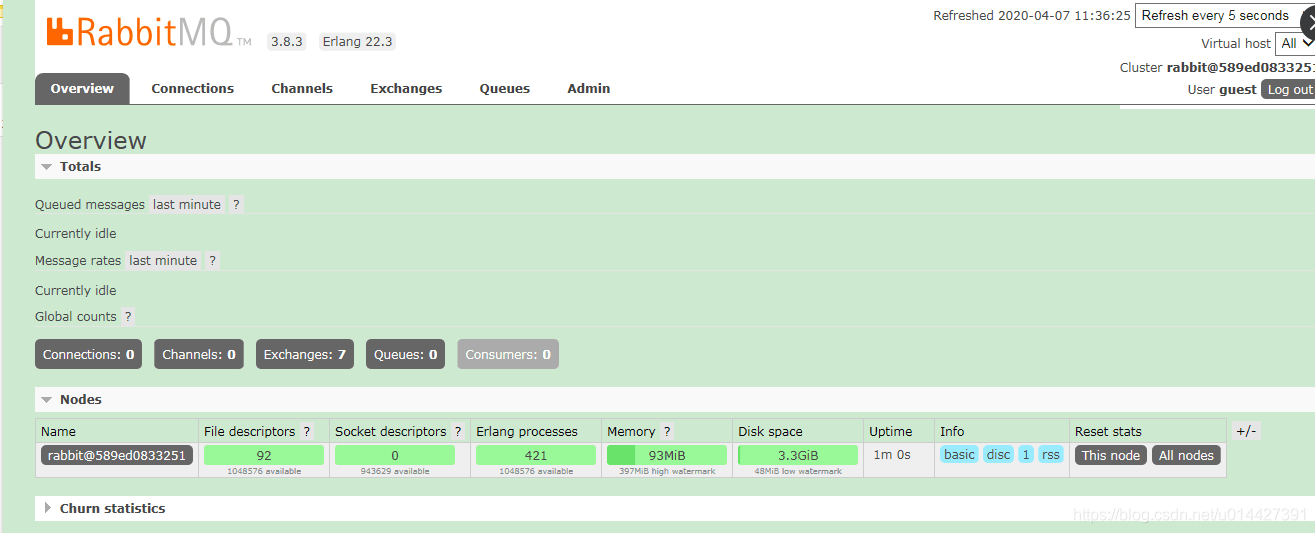
>Spring Cloud Bus能管理和傳播分散式訊息間的訊息,就像一個分散式執行器,可用於廣播狀態更改、事件推送等,也可以當作微服務間的通訊通道 看了理論,貌似不理解?所以還是從前面學習說起,前面介紹說明作為一個分散式的配置中心,至少應該有推送訊息的功能,所以這個配置中心的角色可以由config server充當,實現的效果是config server(配置中心)一重新整理資料,客戶端都能同步更新,畫圖進行說明:  * 1、配置中心(config server)執行bus-refresh,spring cloud bus提供的重新整理介面,配置中心就從git倉庫下拉資料到本地git倉庫 * 2、執行bus-refresh之後,將訊息發給spring cloud bus(訊息匯流排),訊息匯流排將訊息寫到訊息佇列(rabbitMQ)的topic中 * 3、只要訂閱這個訊息佇列topic的都能監聽到spring cloud bus的訊息(基於rabbitmq) * 4、監聽到之後,config client從config server pull更新配置資料 其實簡而言之,Config Client例項都監聽RabbitMQ中同一個topic,當一個服務重新整理資料的時候,它會把這個資訊放入到Topic中,這樣其它監聽同一Topic的服務就能得到通知,然後去更新自身的配置,當然這個重新整理操作不一定要放在config server,也可以放在某個客戶端觸發,只要將訊息傳送給訊息匯流排就可以 ### 8、Docker安裝部署RabbitMQ 主要介紹一下Docker版本,常用的docker映象操作:  查詢rabbitMQ映象: management版本,不指定預設為最新版本latest ```shell docker search rabbitmq:management ```  拉取映象: ```shell docker pull rabbitmq:management ``` 檢視docker映象列表: ```shell docker images ``` Docker容器操作: ok,上面命令執行後,映象就已經拉取到本地倉庫了,然後可以進行容器操作,啟動rabbitMQ 簡單版 ```shell docker run -d -p 5672:5672 -p 15672:15672 --name rabbitmq rabbitmq:management ``` * -d 後臺執行 * -p 隱射埠 * --name 指定rabbitMQ名稱 複雜版(設定賬戶密碼,hostname) ```powershell docker run -d -p 15672:15672 -p 5672:5672 -e RABBITMQ_DEFAULT_USER=admin -e RABBITMQ_DEFAULT_PASS=admin --name rabbitmq --hostname=rabbitmqhostone rabbitmq:management ``` * -d 後臺執行 * -p 隱射埠 * --name 指定rabbitMQ名稱 * RABBITMQ_DEFAULT_USER 指定使用者賬號 * RABBITMQ_DEFAULT_PASS 指定賬號密碼 執行如上命令後訪問:http://ip:15672/ 預設賬號密碼:guest/guest   其它常用容器命令: 檢視執行中的容器 ```shell # 檢視所有的容器用命令docker ps -a docker ps ``` 啟動容器 ``` # eg: docker start 9781cb2e64bd docker start CONTAINERID[容器ID] ``` stop容器 ```shell docker stop CONTAINERID[容器ID] ``` 刪除一個容器 ```shell docker rm CONTAINERID[容器ID] ``` 檢視Docker容器日誌 ``` # eg:docker logs 9781cb2e64bd docker logs container‐name[容器名]/container‐id[容器ID] ``` ### 9、Spring Cloud Bus動態重新整理 有了前面的學習,接著進行程式碼例子實踐,config server pom配置: ```xml
org.springframework.boot
spring-boot-starter-actuator
org.springframework.cloud
spring-cloud-starter-bus-amqp
```
yaml配置:開放bus-refresh
```yaml
management:
endpoints:
web:
base-path: /actuator
exposure:
include: info,health,refresh,bus-refresh
endpoint:
health:
show-details: always
refresh:
enabled: true
```
加上rabbitmq配置
```yaml
# RabbitMQ配置
rabbitmq:
host: 192.168.6.155
port: 5672
username: guest
password: guest
virtual-host: /
```
Config Client程式碼例子改造,pom配置:
```xml
org.springframework.cloud
spring-cloud-starter-bus-amqp
```
也要加上rabbitMQ配置,這樣才能訂閱更新:
```yaml
# RabbitMQ配置
rabbitmq:
host: 192.168.6.155
port: 5672
username: guest
password: guest
virtual-host: /
```
客戶端必須修改,refresh、enabled都要改為true,trace是進行跟蹤的,可以根據需要開啟
```yaml
spring:
cloud:
bus:
enabled: true
refresh:
enabled: true
trace:
enabled: true
```
注意點:為了實時更新,必須加上`@RefreshScope`
配置中心進行bus refresh

訂閱的客戶端都進行實時更新:

程式碼例子下載:[github程式碼例子下載](https://github.com/u014427391/springCloudExamples)
[Springboot系列部落格專欄](https://blog.csdn.net/u014427391/category_9195353.html)
[Springcloud系列部落格專欄](https://blog.csdn.net/u014427391/category_10205863.html)
### 10、官方參考手冊和其它資料
* SpringCloud 2.0系列的官方參考手冊:
[https://docs.spring.io/spring-cloud-config/docs/2.2.x/reference/html/](https://docs.spring.io/spring-cloud-config/docs/2.2.x/reference/html/)
* SpringCloud Config的官方參考手冊:
[https://github.com/spring-cloud/spring-cloud-config/blob/master/docs/src/main/asciidoc/spring-cloud-config.adoc#discovery-first-bootstrap](https://github.com/spring-cloud/spring-cloud-config/blob/master/docs/src/main/asciidoc/spring-cloud-config.adoc#discovery-first-bootstrap)
* 方誌鵬大佬系列Spring Cloud部落格:[https://www.fangzhipeng.com/spring-cloud.html](https://www.fangzhipeng.com/spring-cloud.html)
* 使用Spring Cloud與Docker實戰微服務:[https://eacdy.gitbooks.io/spring-cloud-book/content/](https://eacdy.gitbooks.io/spring-cloud-book/content/)
* 程式設計師DD大佬系列Spring Cloud部落格:[http://blog.didispace.com/spring-cloud-learning/](http://blog.didispace.com/spring-cloud-lea
>Spring Cloud Bus能管理和傳播分散式訊息間的訊息,就像一個分散式執行器,可用於廣播狀態更改、事件推送等,也可以當作微服務間的通訊通道 看了理論,貌似不理解?所以還是從前面學習說起,前面介紹說明作為一個分散式的配置中心,至少應該有推送訊息的功能,所以這個配置中心的角色可以由config server充當,實現的效果是config server(配置中心)一重新整理資料,客戶端都能同步更新,畫圖進行說明:  * 1、配置中心(config server)執行bus-refresh,spring cloud bus提供的重新整理介面,配置中心就從git倉庫下拉資料到本地git倉庫 * 2、執行bus-refresh之後,將訊息發給spring cloud bus(訊息匯流排),訊息匯流排將訊息寫到訊息佇列(rabbitMQ)的topic中 * 3、只要訂閱這個訊息佇列topic的都能監聽到spring cloud bus的訊息(基於rabbitmq) * 4、監聽到之後,config client從config server pull更新配置資料 其實簡而言之,Config Client例項都監聽RabbitMQ中同一個topic,當一個服務重新整理資料的時候,它會把這個資訊放入到Topic中,這樣其它監聽同一Topic的服務就能得到通知,然後去更新自身的配置,當然這個重新整理操作不一定要放在config server,也可以放在某個客戶端觸發,只要將訊息傳送給訊息匯流排就可以 ### 8、Docker安裝部署RabbitMQ 主要介紹一下Docker版本,常用的docker映象操作:  查詢rabbitMQ映象: management版本,不指定預設為最新版本latest ```shell docker search rabbitmq:management ```  拉取映象: ```shell docker pull rabbitmq:management ``` 檢視docker映象列表: ```shell docker images ``` Docker容器操作: ok,上面命令執行後,映象就已經拉取到本地倉庫了,然後可以進行容器操作,啟動rabbitMQ 簡單版 ```shell docker run -d -p 5672:5672 -p 15672:15672 --name rabbitmq rabbitmq:management ``` * -d 後臺執行 * -p 隱射埠 * --name 指定rabbitMQ名稱 複雜版(設定賬戶密碼,hostname) ```powershell docker run -d -p 15672:15672 -p 5672:5672 -e RABBITMQ_DEFAULT_USER=admin -e RABBITMQ_DEFAULT_PASS=admin --name rabbitmq --hostname=rabbitmqhostone rabbitmq:management ``` * -d 後臺執行 * -p 隱射埠 * --name 指定rabbitMQ名稱 * RABBITMQ_DEFAULT_USER 指定使用者賬號 * RABBITMQ_DEFAULT_PASS 指定賬號密碼 執行如上命令後訪問:http://ip:15672/ 預設賬號密碼:guest/guest   其它常用容器命令: 檢視執行中的容器 ```shell # 檢視所有的容器用命令docker ps -a docker ps ``` 啟動容器 ``` # eg: docker start 9781cb2e64bd docker start CONTAINERID[容器ID] ``` stop容器 ```shell docker stop CONTAINERID[容器ID] ``` 刪除一個容器 ```shell docker rm CONTAINERID[容器ID] ``` 檢視Docker容器日誌 ``` # eg:docker logs 9781cb2e64bd docker logs container‐name[容器名]/container‐id[容器ID] ``` ### 9、Spring Cloud Bus動態重新整理 有了前面的學習,接著進行程式碼例子實踐,config server pom配置: ```xml
