OpenCV3.4呼叫攝像頭+CANNY運算元提取輪廓
這份程式碼算上網上的程式碼,修改後可以跑通。注意,如果視窗命名為中文的可能會造成問題,建議用英文的、
#include <opencv2/highgui/highgui.hpp> #include <opencv2/imgproc/imgproc.hpp> #include <opencv2/core/core.hpp> using namespace cv; int main() { VideoCapture cap(0); if (!cap.isOpened()) { return -1; } Mat frame; Mat edges; bool stop = false; while (!stop) { cap >> frame; cvtColor(frame, edges, CV_BGR2GRAY); GaussianBlur(edges, edges, Size(7, 7), 1.5, 1.5); Canny(edges, edges, 0, 30, 3); imshow("1", edges); if (waitKey(30) >= 0) stop = true; } return 0; }
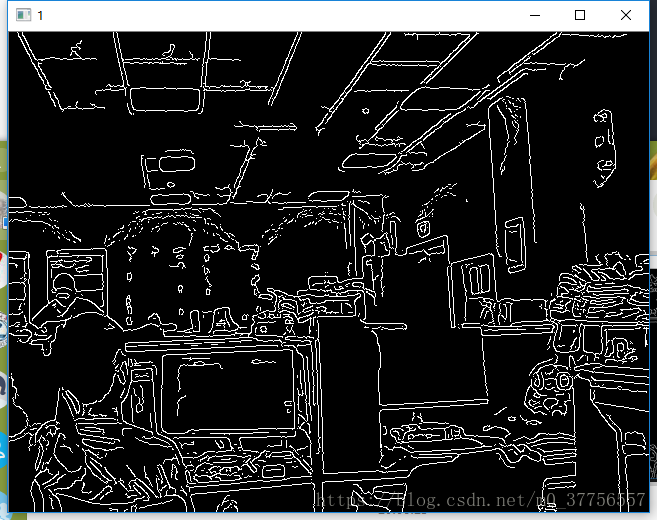
效果圖:
相關推薦
OpenCV3.4呼叫攝像頭+CANNY運算元提取輪廓
這份程式碼算上網上的程式碼,修改後可以跑通。注意,如果視窗命名為中文的可能會造成問題,建議用英文的、 #include <opencv2/highgui/highgui.hpp> #include <opencv2/imgproc/imgproc.hpp> #inc
Java+opencv3.2.0之canny運算元
Canny邊緣檢測運算元是John F.Canny於1986年開發出來的一個多級邊緣檢測演算法。 Canny邊緣檢測的步驟: (1)消除噪聲,一般使用高斯平滑濾波器卷積降噪 (2)計算梯度幅值和方向,此處按照sobel濾波器步驟來操作 (3)非極大值抑制
Python2.7 + OpenCV3.4 縮放、高斯模糊、Canny邊緣提取
摘要 因學習OpenCV需求,進行縮放、高斯模糊、Canny邊緣提取測試。 配置 系統:Windows7 x64 Python:2.7.14 PyCharm:2017.1.1 OpenCV:3.4.4 函式 影象縮放 輸入的影象存在大小不一定適配的問題,該函式通過設定
5.4.3 邊緣檢測-canny運算元
Canny運算元是John Canny於20世紀80年代提出的一種多級邊緣檢測演算法。John Canny研究了最優邊緣的特性,即檢測到的邊緣要儘可能跟實際的邊緣接近並儘可能的多,同時,要儘量降低噪聲對邊緣檢測的干擾。其計算步驟如下 1)對源影象進行高斯平滑以消除影象中噪聲 2)採用差分法近似計
OpenCV3邊緣檢測:Canny運算元/Sobel運算元/Laplace運算元/Scharr濾波器
邊緣檢測的一般步驟 1)濾波:邊緣檢測的演算法主要是基於影象強度的一階和二階導數,但導數通常對噪聲很敏感,因此必須採用濾波器來改善與噪聲有關的邊緣檢測器的效能。常見的濾波方法主要有高斯濾波,即採用離散化的高斯函式產生一組歸一化的高斯核(具體見“高斯濾波原理及其程式設計離散化實現方法”
IDE相關(六)Ubuntu18.04+Python2/3.6.5+OpenCV3.4.3實現開啟攝像頭
必要的環境配置見:IDE相關(五)基於ubuntu 18.04 配置opencv 並在Qt上應用(全過程) 一、Ubuntu下執行Python指令碼 新建檔案: touch test.py 或 vim test.py (前提是安裝了vim) vim t
“毛星雲OpenCV3程式設計入門之python實現”第三篇讀取視訊+呼叫攝像頭
1.6.1讀取視訊+呼叫攝像頭 # -*- coding: gbk -*- __author__ = 'sunzhilong' import cv2 #讀取視訊,以幀顯示 cap = cv2.VideoCapture("E:/Study/python/Open
Opencv3.4.3呼叫SSD caffe模型進行物體檢測
原始碼 #include <opencv2/opencv.hpp> #include <opencv2/dnn.hpp> #include <iostream> using namespace cv; using namespace cv::dnn;
Canny運算元,Houng變換檢測影象輪廓,直線等影象元素
主要內容: 1. 通過Canny運算元檢測影象輪廓 2. Hough變換檢測影象中的直線 3.通過一系列點擬合直線 4.檢測元件的輪廓 5. 元件輪廓的描述 一、引言 為了能執行對圖形基
canny運算元及邊緣提取原理
在理解的過程中需要注意以下兩點:1.中非最大抑制是回答這樣一個問題:“當前的梯度值在梯度方向上是一個區域性最大值嗎?”所以,要把當前位置的梯度值與梯度方向上兩側的梯度值進行比較。2.梯度方向垂直於邊緣方向。但實際上,我們只能得到C點鄰域的8個點的值,而dTmp1和dTmp2並不在其中,要得到這兩個值就需要對d
VS2017+OpenCV3.4.0 折騰(5)
build cnblogs strong 序號 tro alt+ 壓縮 gpo 忘記 Windows的本子經過返廠修理後重新回到了手裏 然後打算在win的本子上繼續學習使用opencv (於是序號我就不管了~) 不過換了平臺以後似乎又要一頓配置環境了。。真是有點麻煩 還是記
VS2017+OpenCV3.4.0 折騰(6)
a* gen open one tab times 鏈接 beta har 今天使用的是調節對比度和亮度 p.s. 似乎發現之前bilibili那個鏈接的教程順序大概是來源於最開始自己編譯出來的那份html教程。所以可以自己看了 0 0 原理: $$ g(i,j) = \a
OpenCV開發(1)——OpenCV3.4+Python3.5+Windows10安裝問題解決
opencv3.4 Python3.5 opencv-python ImportError DLL load failed OpenCV近幾年功能不斷增強,目標檢測、跟蹤等方面出現了不少新算法。自3.3版開始,火熱的深度神經網絡的功能也加入其中。早期的OpenCV僅支持簡單的視頻播放功能,
VS2010+OpenCV3.4.1開發環境配置(轉載)
計算 irf -i 方法 .org file word -s 系統環境 原文轉載:http://blog.sina.com.cn/s/blog_7e4965150102xl0y.html 工具: OpenCV3.4.1 VS2010 Win7 x64 下載安裝Open
Opencv3.4:顯示一張圖片
name edwin main show comm href code waitkey codec Github https://github.com/gongluck/Opencv3.4-study.git #include "opencv2/opencv.hpp" us
ubuntu14配置opencv3.4.1
enc 圖片 cocoa details csdn nbsp blog inf ima 網站:https://blog.csdn.net/a1429331875/article/details/31539129 測試程序網站:https://blog.csdn.net
在python3下使用OpenCV 抓取攝像頭圖像提取藍色
bit back str num https mage windows www. splay 工作中需要對攝像頭進行調試, Python平臺大大提高調試效率. 從網找到段代碼, 可以從攝像頭圖像中摳出藍色. import cv2 import numpy as np cap
【深度學習】ubuntu16.04下安裝opencv3.4.0
form 線程 ubunt con sudo ive tbb 依賴包 復制代碼 1、首先安裝一些編譯工具 # 安裝編譯工具 sudo apt-get install build-essential # 安裝依賴包 sudo apt-get install cmake
vs2015 + opencv3.4.0 + qt msvc2015_64-5.7.1 視屏顯示
nec adc paint 初始 color 參考 point tin his 1、qt application 2、qtvideoread.cpp中代碼為: #include "qtvideoread.h"#include <opencv2/core/core.hp
計算機視覺 || Canny運算元實現邊緣分割並進一步處理
Ex2:用 CImg 重寫、封裝給定的 Canny 程式碼,並測試 C++封裝要求: (1)所有的影象讀寫、資料處理只能用 CImg 庫(整個工程檔案不允許 使用 Opencv 之類的第三方庫); (2)程式碼封裝要求函式介面簡潔清晰,可參考 Code2 的方式封裝。 在原來的程式碼