
Android自定義佈局
阿新 • • 發佈:2018-12-22
TextView居中:
android:layout_gravity="center"
android:gravity="center"
添加布局:
<?xml version="1.0" encoding="utf-8"?>
<LinearLayout xmlns:android="http://schemas.android.com/apk/res/android"
xmlns:app="http://schemas.android.com/apk/res-auto"
android:layout_width="match_parent"
android:layout_height 可以在任意Activaty將自定義佈局新增進來:
    <com.example.admin.testproj.TitleLayout
        android:layout_width="match_parent"
        android:layout_height="wrap_content"
        android:id="@+id/title">
    </com.example.admin.testproj.TitleLayout>
在程式碼TitleLayout中,繼承自LinearLayout並實現按鈕點選之後的回撥:
package com.example.admin.testproj;
import android.app.Activity;
import android.content.Context;
import android.util.AttributeSet;
import android.view.LayoutInflater;
import android.view.View;
import android.widget.LinearLayout;
import android.widget.Toast;
public class TitleLayout extends LinearLayout {
public TitleLayout(Context context, AttributeSet attrs){
super(context,attrs);
LayoutInflater.from(context).inflate(R.layout.title,this);
findViewById(R.id.btnRet).setOnClickListener(new OnClickListener() {
@Override
public void onClick(View view) {
((Activity)getContext()).finish();
}
});
findViewById(R.id.btnEdt).setOnClickListener(new OnClickListener() {
@Override
public void onClick(View view) {
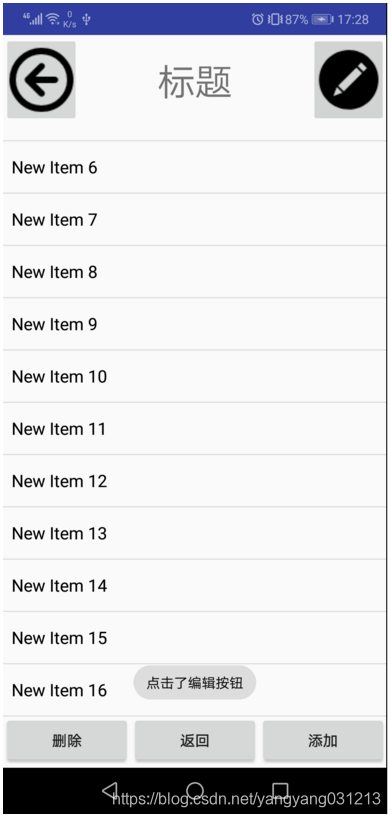
Toast.makeText(getContext(),"點選了編輯按鈕",Toast.LENGTH_SHORT).show();
}
});
}
}
介面:
如果只是介面的顯示的話,layout做好後可在別的layout中使用include新增進來:
<include layout="@layout/login"/>