
視訊目標檢測識別
阿新 • • 發佈:2018-12-31
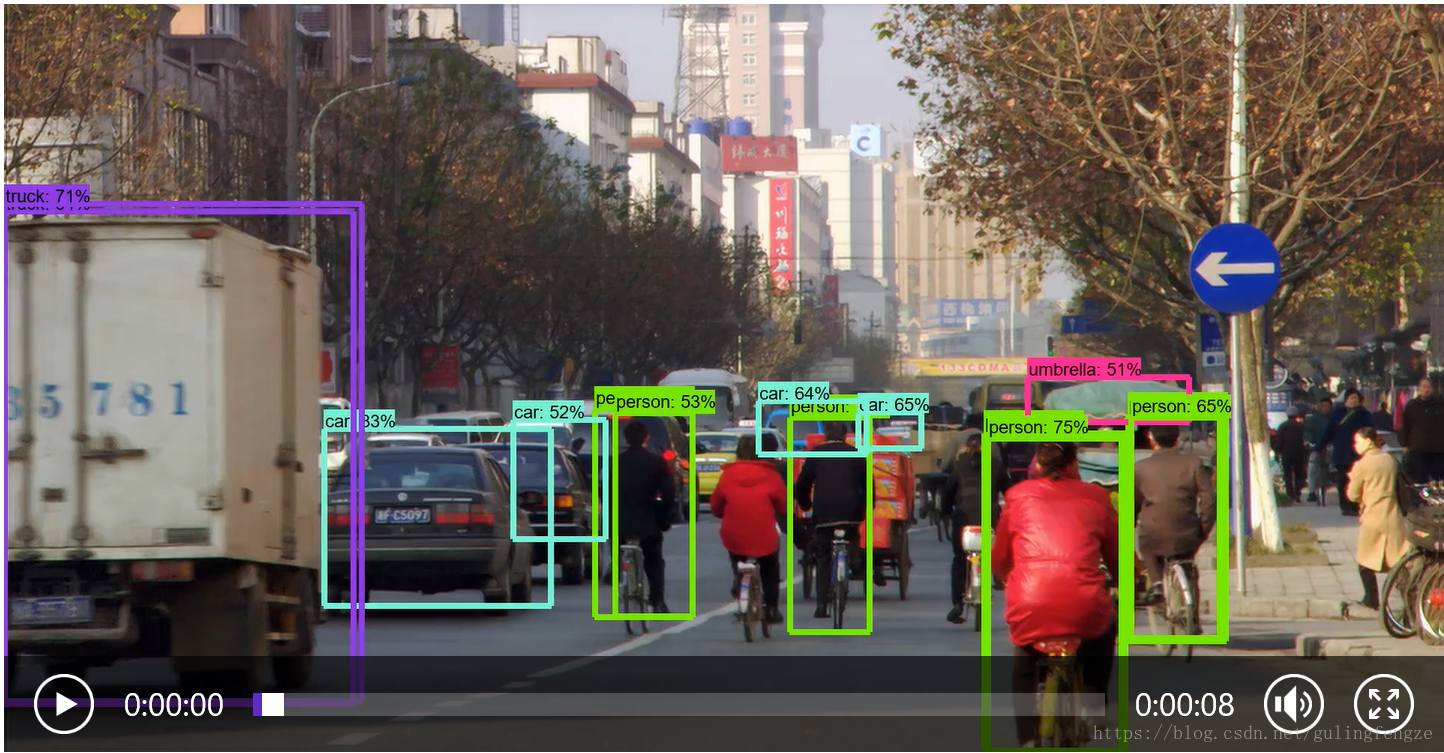
之前文章目標檢測API 已經介紹過API的基本使用,這裡就不贅述了,直接上本次內容的程式碼了,新增的內容並不多。將測試的test.mp4原檔案放到models-master\research\object_detection路徑下,並建立一個detect_video.py檔案,程式碼內容如下:
import os
import cv2
import time
import argparse
import multiprocessing
import numpy as np
import tensorflow as tf
from matplotlib import pyplot as plt
import 檢測結果:
上面的對現有的視訊中目標進行檢測的,那麼怎樣實時的對現實生活中的目標進行檢測呢?這個其實也很簡單,我們來建立一個object_detection_tutorial_video.py 檔案,具體的程式碼如下:
import numpy as np
import os
import six.moves.urllib as urllib
import sys
import tarfile
import tensorflow as tf
import zipfile
import matplotlib
import cv2
# Matplotlib chooses Xwindows backend by default.
matplotlib.use('Agg')

from collections import defaultdict
from io import StringIO
from matplotlib import pyplot as plt
from PIL import Image
from utils import label_map_util
from utils import visualization_utils as vis_util

'''
    檢測視訊中的目標
'''

cap = cv2.VideoCapture(0)  #開啟攝像頭

##################### Download Model
# What model to download.
MODEL_NAME = 'ssd_mobilenet_v1_coco_2017_11_17'
MODEL_FILE = MODEL_NAME + '.tar.gz'
DOWNLOAD_BASE = 'http://download.tensorflow.org/models/object_detection/'

# Path to frozen detection graph. This is the actual model that is used for the object detection.
PATH_TO_CKPT = MODEL_NAME + '/frozen_inference_graph.pb'

# List of the strings that is used to add correct label for each box.
PATH_TO_LABELS = os.path.join('data', 'mscoco_label_map.pbtxt')

NUM_CLASSES = 90

# Download model if not already downloaded
if not os.path.exists(PATH_TO_CKPT):
    print('Downloading model... (This may take over 5 minutes)')
    opener = urllib.request.URLopener()
    opener.retrieve(DOWNLOAD_BASE + MODEL_FILE, MODEL_FILE)
    print('Extracting...')
    tar_file = tarfile.open(MODEL_FILE)
    for file in tar_file.getmembers():
        file_name = os.path.basename(file.name)
        if 'frozen_inference_graph.pb' in file_name:
            tar_file.extract(file, os.getcwd())
else:
    print('Model already downloaded.')

##################### Load a (frozen) Tensorflow model into memory.
print('Loading model...')
detection_graph = tf.Graph()

with detection_graph.as_default():
    od_graph_def = tf.GraphDef()
    with tf.gfile.GFile(PATH_TO_CKPT, 'rb') as fid:
        serialized_graph = fid.read()
        od_graph_def.ParseFromString(serialized_graph)
        tf.import_graph_def(od_graph_def, name='')

##################### Loading label map
print('Loading label map...')
label_map = label_map_util.load_labelmap(PATH_TO_LABELS)
categories = label_map_util.convert_label_map_to_categories(label_map, max_num_classes=NUM_CLASSES, use_display_name=True)
category_index = label_map_util.create_category_index(categories)

##################### Helper code
def load_image_into_numpy_array(image):
  (im_width, im_height) = image.size
  return np.array(image.getdata()).reshape(
      (im_height, im_width, 3)).astype(np.uint8)

##################### Detection ###########

print('Detecting...')
with detection_graph.as_default():
    with tf.Session(graph=detection_graph) as sess:

        # print(TEST_IMAGE_PATH)
        # image = Image.open(TEST_IMAGE_PATH)
        # image_np = load_image_into_numpy_array(image)
        while True:
            ret, image_np = cap.read()           #從攝像頭中獲取每一幀影象
            image_np_expanded = np.expand_dims(image_np, axis=0)
            image_tensor = detection_graph.get_tensor_by_name('image_tensor:0')
            boxes = detection_graph.get_tensor_by_name('detection_boxes:0')
            scores = detection_graph.get_tensor_by_name('detection_scores:0')
            classes = detection_graph.get_tensor_by_name('detection_classes:0')
            num_detections = detection_graph.get_tensor_by_name('num_detections:0')
            # Actual detection.
            (boxes, scores, classes, num_detections) = sess.run(
            [boxes, scores, classes, num_detections],
                feed_dict={image_tensor: image_np_expanded})
             # Print the results of a detection.
            print(scores)
            print(classes)
            print(category_index)
            vis_util.visualize_boxes_and_labels_on_image_array(
                image_np,
                np.squeeze(boxes),
                np.squeeze(classes).astype(np.int32),
                np.squeeze(scores),
                category_index,
                use_normalized_coordinates=True,
                line_thickness=8)

            cv2.imshow('object detection', cv2.resize(image_np, (800, 600)))
            #cv2.waitKey(0)
            if cv2.waitKey(25) & 0xFF == ord('q'):
                cv2.destroyAllWindows()
                break
程式碼中只是添加了攝像頭來獲取每一幀影象,處理方式和靜態的圖片差不多,這裡就不多說了。這裡就不上測試的結果了,大家課可以實際的跑一下程式即可看到結果。