1. 程式人生 > >android約束佈局

android約束佈局

約束佈局是谷歌在

使用:

為什麼要使用約束佈局:

  1. ConstraintLayout還有一個優點,它可以有效地解決佈局巢狀過多的問題。
  2. 實現的佈局效果類似於相對佈局但比相對佈局效能更高。
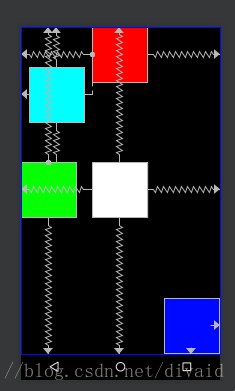
    盜個別人對比的圖:
    這裡寫圖片描述
    從圖中我們可以看出效能上約束佈局比相對佈局效能要好上40%左右,因此有這麼好的佈局方式為什麼不用呢。

使用方式:

1.在專案中新增依賴:

dependencies {
    compile 'com.android.support.constraint:constraint-layout:1.0.0-alpha1'
}

2.佈局中使用:

<?xml version="1.0" encoding="utf-8"?>
<android.support.constraint.ConstraintLayout xmlns:android="http://schemas.android.com/apk/res/android" android:layout_width="match_parent" android:layout_height="match_parent"> <!--子控制元件--> </android.support.constraint.ConstraintLayout>

實現子控制元件完全居中效果:

<?xml version="1.0" encoding="utf-8"?>
<android.support.constraint.ConstraintLayout xmlns:android="http://schemas.android.com/apk/res/android" xmlns:app="http://schemas.android.com/apk/res-auto" android:layout_width="match_parent" android:layout_height="match_parent" android:background="@color/black"> <!--垂直居中View-->
<View android:id="@+id/view1" android:layout_width="100dp" android:layout_height="100dp" android:background="#00ff00" app:layout_constraintBottom_toBottomOf="parent" app:layout_constraintTop_toTopOf="parent" /> <!--水平居中的View--> <View android:id="@+id/view2" android:layout_width="100dp" android:layout_height="100dp" android:background="#ff0000" app:layout_constraintLeft_toLeftOf="parent" app:layout_constraintRight_toRightOf="parent" /> <!--完全居中的view--> <View android:id="@+id/view3" android:layout_width="100dp" android:layout_height="100dp" android:background="@color/white" app:layout_constraintBottom_toBottomOf="parent" app:layout_constraintLeft_toLeftOf="parent" app:layout_constraintRight_toRightOf="parent" app:layout_constraintTop_toTopOf="parent" /> <!--右下角的View--> <View android:id="@+id/view4" android:layout_width="100dp" android:layout_height="100dp" android:background="#0000ff" app:layout_constraintBottom_toBottomOf="parent" app:layout_constraintRight_toRightOf="parent" app:layout_constraintRight_toLeftOf="parent" /> <!--紅色左側部分居中及綠色上部分空白處居中--> <View android:layout_width="100dp" android:layout_height="100dp" android:background="#00ffff" app:layout_constraintRight_toLeftOf="@id/view2" app:layout_constraintLeft_toLeftOf="parent" app:layout_constraintTop_toTopOf="parent" app:layout_constraintBottom_toTopOf="@id/view1" /> </android.support.constraint.ConstraintLayout>

效果圖:
這裡寫圖片描述
約束佈局屬性:

layout_constraintTop_toTopOf       // 將所需檢視的頂部與另一個檢視的頂部對齊。 

layout_constraintTop_toBottomOf    // 將所需檢視的頂部與另一個檢視的底部對齊。 

layout_constraintBottom_toTopOf    // 將所需檢視的底部與另一個檢視的頂部對齊。 

layout_constraintBottom_toBottomOf // 將所需檢視的底部與另一個檢視的底部對齊。 

layout_constraintLeft_toTopOf      // 將所需檢視的左側與另一個檢視的頂部對齊。 

layout_constraintLeft_toBottomOf   // 將所需檢視的左側與另一個檢視的底部對齊。 

layout_constraintLeft_toLeftOf     // 將所需檢視的左邊與另一個檢視的左邊對齊。 

layout_constraintLeft_toRightOf    // 將所需檢視的左邊與另一個檢視的右邊對齊。 

layout_constraintRight_toTopOf     // 將所需檢視的右對齊到另一個檢視的頂部。

layout_constraintRight_toBottomOf  // 將所需檢視的右對齊到另一個的底部。

layout_constraintRight_toLeftOf    // 將所需檢視的右邊與另一個檢視的左邊對齊。

layout_constraintRight_toRightOf   // 將所需檢視的右邊與另一個檢視的右邊對齊。

大概解釋:

  • constraintRight/Left/Top/Bottom
    佈局的哪一邊新增約束

  • toRight/Left/Top/BottomOf
    約束到哪個View的右/左/上/下邊

注意:在新增外邊距時如果沒有在對應方向上新增約束則可能沒有效果,比如一個View在parent左側,且添加了marginLeft=20dp,則需要設定layout_constraintLeft_toLeftOf或者layout_constraintLeft_toRightOf才能使外邊距生效。