iOS雷達和類似水波紋效果的實現
阿新 • • 發佈:2019-01-01
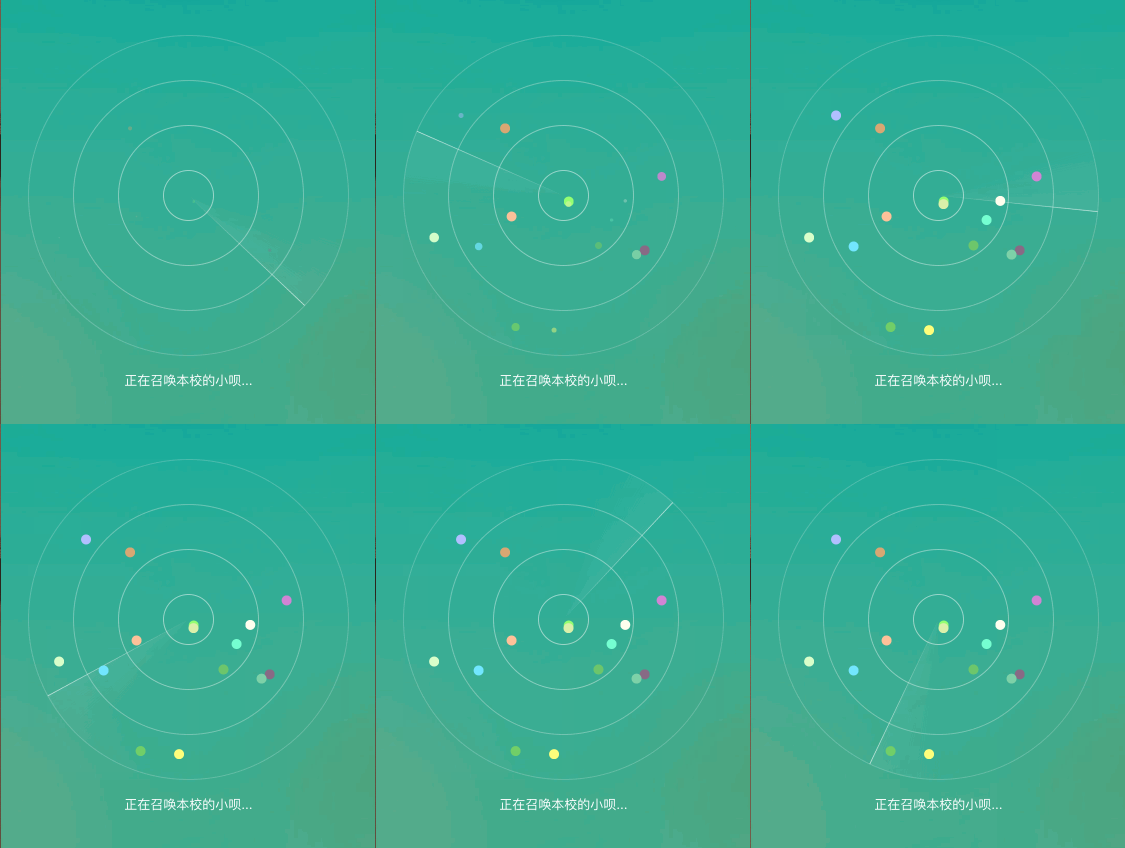
最近專案裡面需要用到雷達掃描和水波紋效果,具體來說就是開啟應用出現水波紋擴散的效果,點選召喚之後出現雷達掃描效果.效果如下:


首先說下第一個水波紋效果,這個比較容易實現,一組組動畫就ok了,上程式碼:
#import “Radar.h”
@implementation Radar
-(void)drawRect:(CGRect)rect {
[super drawRect:rect];
[KColor(22, 163, 130) setFill];
UIRectFill(rect);
NSInteger pulsingCount = 5;
double animationDuration = 3;
CALayer * animationLayer = [CALayer layer];
for (int i = 0; i < pulsingCount; i++) {
    CALayer * pulsingLayer = [CALayer layer];
    pulsingLayer.frame = CGRectMake(0, 0, rect.size.width, rect.size.height);
    pulsingLayer.borderColor = [UIColor whiteColor].CGColor;
    pulsingLayer.borderWidth = 1;
    pulsingLayer.cornerRadius = rect.size.height / 2;

    CAMediaTimingFunction * defaultCurve = [CAMediaTimingFunction functionWithName:kCAMediaTimingFunctionDefault];

    CAAnimationGroup * animationGroup = [CAAnimationGroup animation];
    animationGroup.fillMode = kCAFillModeBackwards;
    animationGroup.beginTime = CACurrentMediaTime() + (double)i * animationDuration / (double)pulsingCount;
    animationGroup.duration = animationDuration;
    animationGroup.repeatCount = HUGE;
    animationGroup.timingFunction = defaultCurve;

    CABasicAnimation * scaleAnimation = [CABasicAnimation animationWithKeyPath:@"transform.scale"];
    scaleAnimation.fromValue = @1.4;
    scaleAnimation.toValue = @2.2;

    CAKeyframeAnimation * opacityAnimation = [CAKeyframeAnimation animationWithKeyPath:@"opacity"];
    opacityAnimation.values = @[@1, @0.9, @0.8, @0.7, @0.6, @0.5, @0.4, @0.3, @0.2, @0.1, @0];
    opacityAnimation.keyTimes = @[@0, @0.1, @0.2, @0.3, @0.4, @0.5, @0.6, @0.7, @0.8, @0.9, @1];

    animationGroup.animations = @[scaleAnimation, opacityAnimation];
    [pulsingLayer addAnimation:animationGroup forKey:@"plulsing"];
    [animationLayer addSublayer:pulsingLayer];
}
[self.layer addSublayer:animationLayer];
}
在對應的controller裡面引用:
    self.centerRadarView = [[Radar alloc] initWithFrame:CGRectMake(0, 0, 135, 135)];
    _centerRadarView.center = _radarView.center;
    [self.view addSubview:_centerRadarView];
至於中間的圓,那就根據需要自定義就好了.
第二個雷達掃描效果就稍微複雜點了,用了一個github上分享的控制元件XHRadarView
感謝作者的開源.
加上了自己很據專案需要改變的動畫效果.
