自定義view(三) 貝塞爾曲線 水波紋效果實現
阿新 • • 發佈:2018-12-21
在上面的部落格中說了path的繪製,path繪製, 介紹了除了貝塞爾曲線的其他情況。 在這裡單獨介紹一下貝塞爾曲線。貝塞爾曲線是應用於二維圖形應用程式的數學曲線。一般的向量圖形軟體通過它來精確畫出曲線,貝塞爾曲線由線段與節點組成,節點是可拖動的支點,線段像可伸縮的皮筋,我們在繪圖工具上看到的鋼筆工具就是來做這種向量曲線的。貝塞爾曲線是計算機圖形學中相當重要的引數曲線。 我們再開發中很多都會用到貝塞爾曲線的情況,比如水波紋效果。貝塞爾曲線掃盲貼這一片部落格很形象的把它的原理解釋了一下。看完這個我們可以比較明白的看出。貝塞爾曲線就是兩個固定點確定的情況下,根據一個或者多個控制點通過計算得到的曲線。
-
api分析

這是貝塞爾曲線的數學解釋,我們再實現對path繪製的時候,的確不需要知道這個。只要知道大致的形式就行,但是對於後期瞭解屬性動畫之後,就有意義了。很多時候都是需要用到這個公式。比如經常出現的直播間花束心形點贊效果,那些心形的移動路線就是按照貝塞爾曲線繪製。
我們通過官方文件來看,關於二次,三次貝塞爾曲線的情況:
 /** 從註釋中可以看出,x1,y1,就是控制點的座標,x2,y2就是最後固定點的座標。

     * Add a quadratic bezier from the last point, approaching control point
     * (x1,y1), and ending at (x2,y2). If no moveTo() call has been made for
     * this contour, the first point is automatically set to (0,0).
     *
     * @param x1 The x-coordinate of the control point on a quadratic curve
     * @param y1 The y-coordinate of the control point on a quadratic curve
     * @param x2 The x-coordinate of the end point on a quadratic curve
     * @param y2 The y-coordinate of the end point on a quadratic curve
     */
    public void quadTo(float x1, float y1, float x2, float y2) {
        isSimplePath = false;
        nQuadTo(mNativePath, x1, y1, x2, y2);
    }


 /**
      x1,y1,x2,y2就是控制點的座標,x3,y3就是末尾固定點的座標
     * Add a cubic bezier from the last point, approaching control points
     * (x1,y1) and (x2,y2), and ending at (x3,y3). If no moveTo() call has been
     * made for this contour, the first point is automatically set to (0,0).
     *
     * @param x1 The x-coordinate of the 1st control point on a cubic curve
     * @param y1 The y-coordinate of the 1st control point on a cubic curve
     * @param x2 The x-coordinate of the 2nd control point on a cubic curve
     * @param y2 The y-coordinate of the 2nd control point on a cubic curve
     * @param x3 The x-coordinate of the end point on a cubic curve
     * @param y3 The y-coordinate of the end point on a cubic curve
     */
    public void cubicTo(float x1, float y1, float x2, float y2,
                        float x3, float y3) {
        isSimplePath = false;
        nCubicTo(mNativePath, x1, y1, x2, y2, x3, y3);
    }
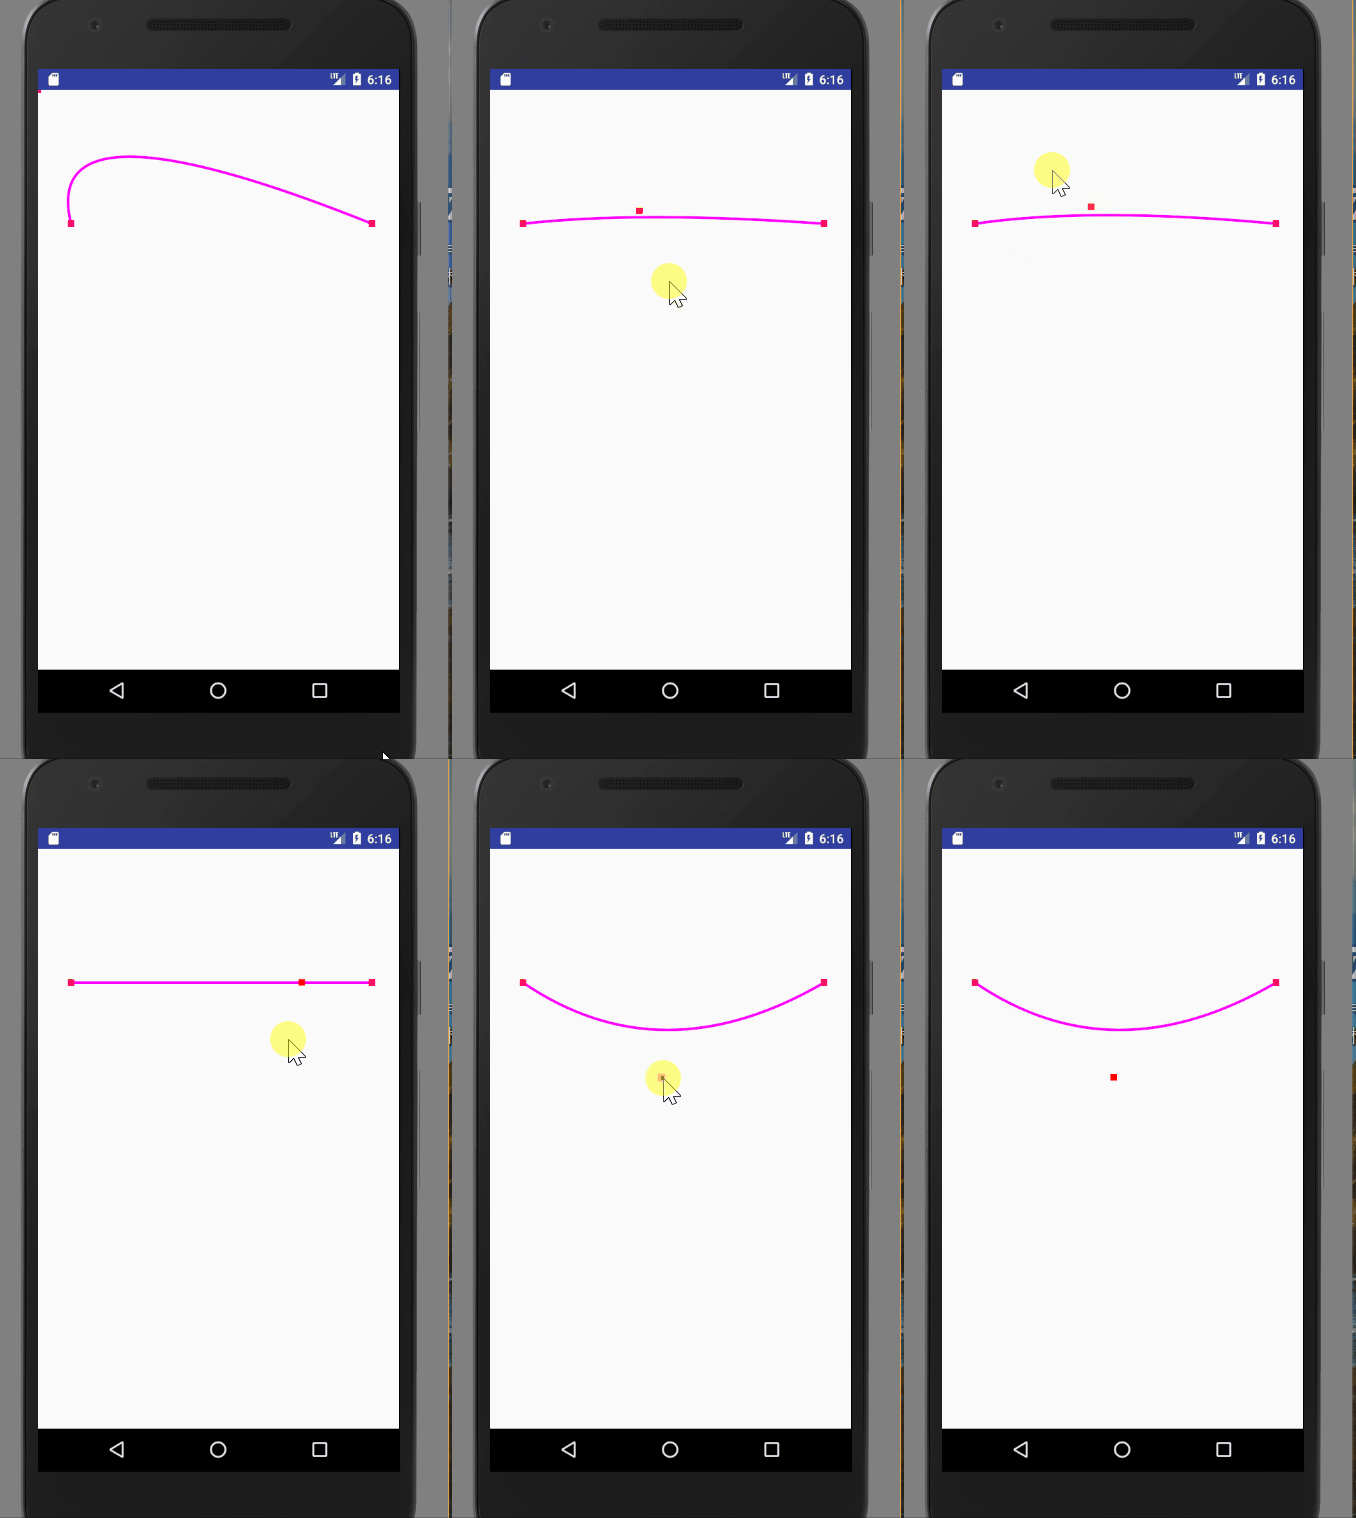
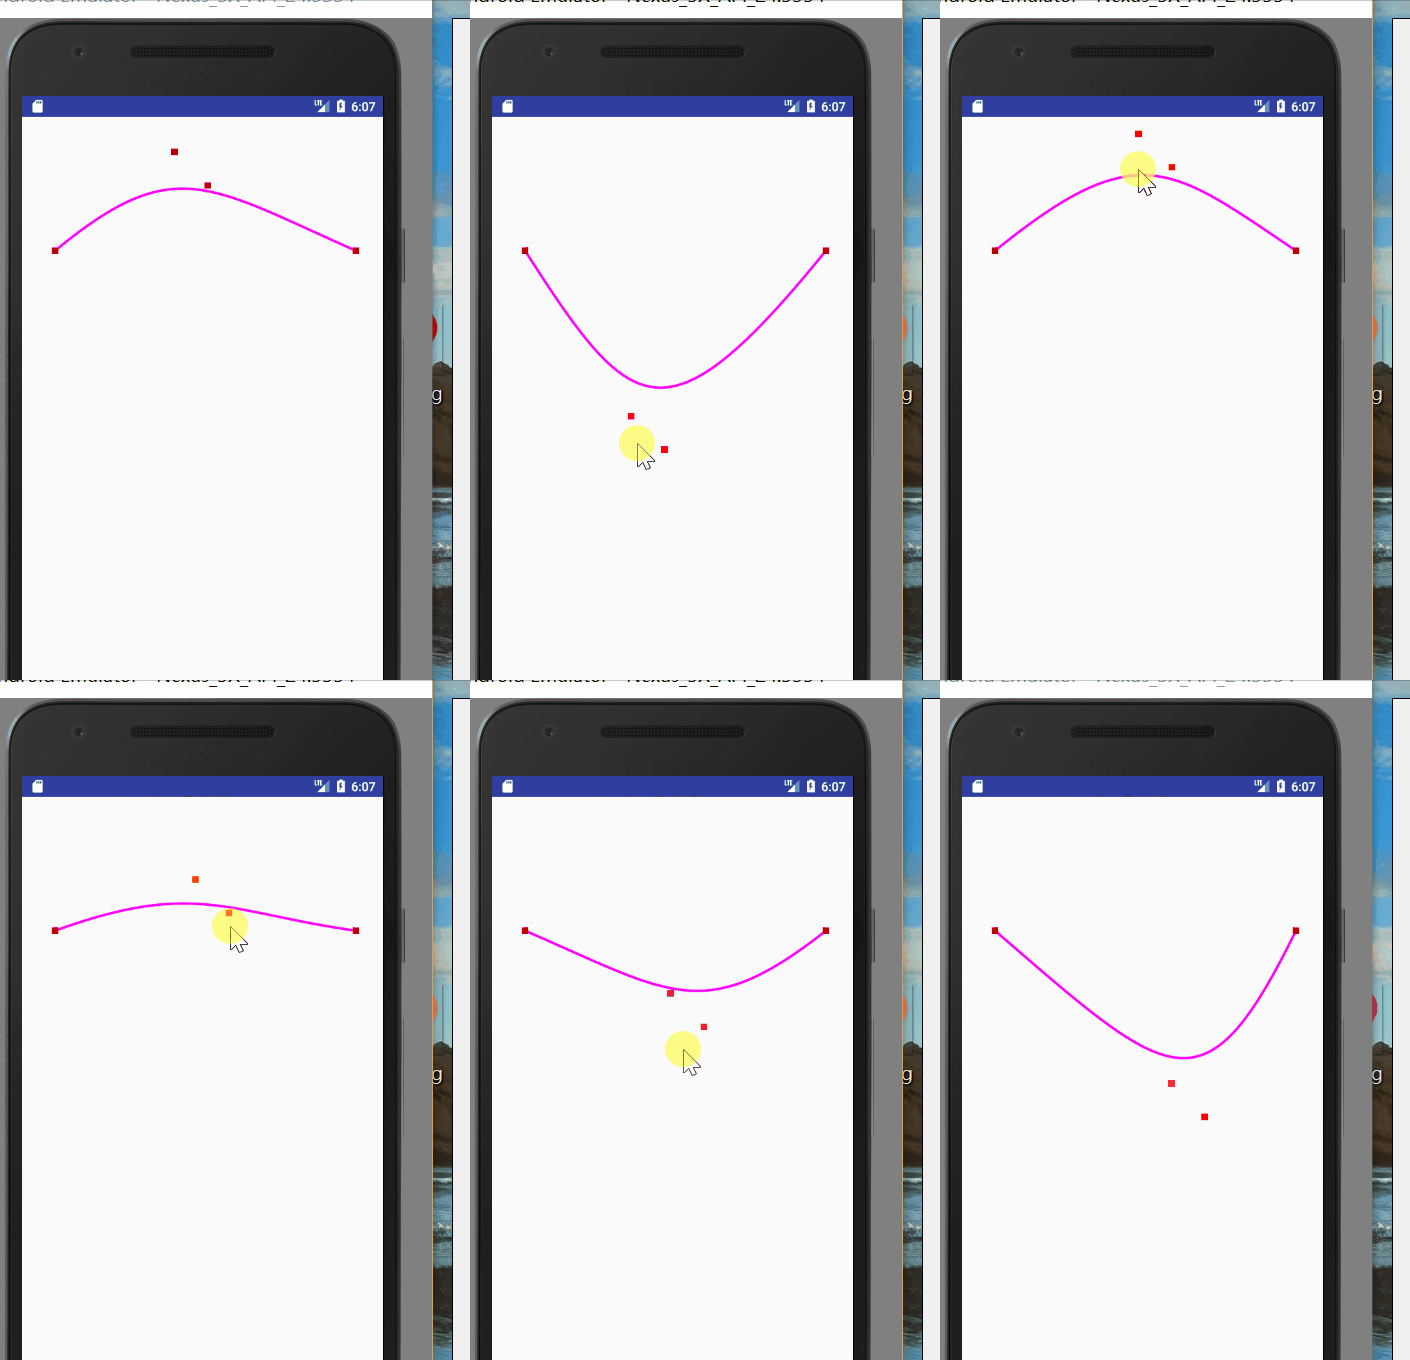
我們可以可以做一個例子,通過控制控制點的座標,來看看貝塞爾曲線的情況 。


圖一就是quadTo的應用,圖二就是cubicTo的應用。我們可以通過改變控制點的座標,來改變曲線的樣式。程式碼如下:
  @Override
    public void onDraw(Canvas canvas) {
        super.onDraw(canvas);
        mPath.reset();
        mPaint.setStrokeWidth(8);
        mPaint.setColor(Color.parseColor("#ff00ff"));
        mPath.moveTo(100,400);
        mPath.quadTo(mControlPoint.x,mControlPoint.y,1000,400);
        canvas.drawPath(mPath,mPaint);
        mPaint.setColor(Color.RED);
        mPaint.setStrokeWidth(20);
        canvas.drawPoint(100,400,mPaint);
        canvas.drawPoint(1000,400,mPaint);
        canvas.drawPoint(mControlPoint.x,mControlPoint.y,mPaint);

    }

    @Override
    public boolean onTouchEvent(MotionEvent event) {

        //通過移動改變控制點的座標,然後重繪,改變貝塞爾曲線的狀態
        mControlPoint.set((int) event.getX(), (int) event.getY());
        invalidate();
        return true;
    }
-
水波紋效果
我們可以想象水波紋其實就可以看做是兩個曲線相互交叉的效果,比如下圖所示:

其實這就相當於一個向左移動和一個向右移動的兩個曲線,然後和一個圓形相交的部分。 其實繪製所需要的特殊view。就是想它一步步分解的過程,分解成最基本的可以直接通過api繪畫的模組。
public class BezierView extends View {

    private static final String TAG = ViewPath.class.getSimpleName();

    private ValueAnimator mAnimator;

    private int currentValue;

    private int xOffset;

    Paint mPaint;
    Point mCenterPoint;
    Path mPath;

    private int windowWidth;

    Path mRightPath;

    Path mDesPath;

    public BezierView(Context context, @Nullable AttributeSet attrs) {
        super(context, attrs);
        init();
    }

    private void init() {
        mPaint = new Paint();
        //抗鋸齒
        mPaint.setAntiAlias(true);
        mPaint.setStrokeWidth(8);
   //     mPaint.setStyle(Paint.Style.STROKE);
        mCenterPoint = new Point();
        mCenterPoint.set(500, 100);
        mPath = new Path();
        mRightPath = new Path();
        mDesPath = new Path();
    }

    @Override
    public void onDraw(Canvas canvas) {
        super.onDraw(canvas);
        //獲取螢幕寬度
        windowWidth = getWidth();
        drawRightWave(canvas);
        drawLeftWave(canvas);
    }

    //從右向左移動的曲線
    private void drawRightWave(Canvas canvas) {
        mRightPath.reset();
        mDesPath.reset();
        mPaint.setStrokeWidth(5);
        mPaint.setColor(Color.parseColor("#7700CDCD"));
        mPaint.setAlpha(200);
        mPaint.setStrokeWidth(5);
        mPaint.setStyle(Paint.Style.FILL);

        //計算真個向左移動的貝塞爾曲線中需要點的個數,
        //因為每個貝塞爾曲線中的兩個固定點之間的間距是300畫素,所以要除以300
        //移動的距離這裡取的是螢幕寬度的7倍,以當前可見螢幕為標準,向左,右各擴充套件到3個螢幕寬度
        //這個具體的一定距離,可以按需設定,我這裡就直接用了一個比較大的值
        int pointNumbers = windowWidth*7/300;

        mRightPath.moveTo(windowWidth*4 - xOffset, 400);
        //從右向左依次把曲線新增到path中,用rQuadTo是因為他總是以path的最後一個點為原點
        for (int i = 0; i < pointNumbers+1; i++) {
            if (i % 2 == 0) {
                mRightPath.rQuadTo(-150, -50, -300, 0);
            } else {
                mRightPath.rQuadTo(-150, 50, -300, 0);
            }

        }

        //因為有一個圓形在裡面所以首先要將path形成一個閉環,因為我們在這裡寫死圓的位置
        //它是一個以400,400為圓心,300為半徑的圓,所以我們的mRightPath形成的閉環Y軸座標應該是
        //700, 以保證和圓的底部相切
        mRightPath.lineTo(-(windowWidth*3)-xOffset - 300*(pointNumbers+1),700);
        mRightPath.lineTo(windowWidth*4 - xOffset,700);
        mRightPath.close();
        mDesPath.addCircle(400,400,300, Path.Direction.CW);

        //將圓形和曲線取交集
        mDesPath.op(mRightPath, Path.Op.INTERSECT);
        canvas.drawPath(mDesPath, mPaint);
        mPaint.setColor(Color.GREEN);
        mPaint.setStyle(Paint.Style.STROKE);
        canvas.drawCircle(400,400,300,mPaint);
    }


    //從左向右移動的曲線,這個與從右向左類似
    private void drawLeftWave(Canvas canvas) {
        mPath.reset();
        mPaint.setStrokeWidth(5);
        mPaint.setColor(Color.parseColor("#7700F5FF"));
        mPaint.setAlpha(200);
        mPaint.setStyle(Paint.Style.FILL);
        mPath.moveTo(-(windowWidth*3) + xOffset, 400);
        int pointNumbers = windowWidth*7/300;

        for (int i = 0; i < pointNumbers+1; i++) {
            if (i % 2 == 0) {
                mPath.rQuadTo(100, -50, 200, 0);
            } else {
                mPath.rQuadTo(100, 50, 200, 0);
            }
        }
        mPath.lineTo(windowWidth*4 + xOffset,700);
        mPath.lineTo(-(windowWidth*3) + xOffset,400);
        mDesPath.addCircle(400,400,300, Path.Direction.CW);
        mDesPath.op(mPath, Path.Op.INTERSECT);
        canvas.drawPath(mDesPath, mPaint);
        mPaint.setColor(Color.GREEN);
        mPaint.setStyle(Paint.Style.STROKE);
        canvas.drawCircle(400,400,300,mPaint);
    }

    //設定移動的動畫,通過valueanimator進行對連個曲線的移動
    private void startAnimator(int start, int end, long animTime) {
        mAnimator = ValueAnimator.ofInt(start, end);
        mAnimator.setDuration(animTime);
        mAnimator.setRepeatCount(ValueAnimator.INFINITE);
        mAnimator.setRepeatMode(ValueAnimator.RESTART);
        mAnimator.setInterpolator(new LinearInterpolator());
        mAnimator.addUpdateListener(new ValueAnimator.AnimatorUpdateListener() {
            @Override
            public void onAnimationUpdate(ValueAnimator animation) {
                int value = (int) animation.getAnimatedValue();
                xOffset = value;
                currentValue = (int) (value * 0.6);
                invalidate();
            }
        });
        mAnimator.start();
    }


    public void setCurrentValue(int value, int offset) {
        startAnimator(0, offset, 1000*2);
    }

}
很多進度條需要這樣實現 ,如果是進度條的話,那麼他的變數就是圓的y軸的位置變化,通過移動兩個曲線y軸的座標來實現這個功能。
