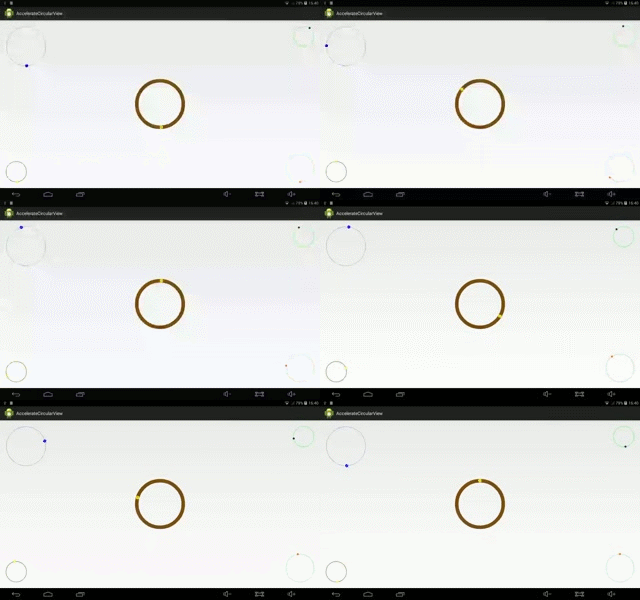
Android自定義控制元件——模擬豎直平面小球繞圓環旋轉效果
阿新 • • 發佈:2019-01-02
本篇通過自定義View模擬一個物理現象——豎直平面內小球在最低點以一定初速度在重力作用下繞圓環做變速圓周運動的效果(從最低點減速到0時上升到最高點再加速到初始速度時回到最低點)。可以用於載入等待等場景,下面按照自定義View的步驟具體說明一下。
1、定義屬性
為了能在佈局檔案中使用我們的自定義控制元件,定製其屬性,我們需要自定義一些控制元件的屬性,以供更靈活的使用此控制元件。
<?xml version="1.0" encoding="utf-8"?>
<resources>
    <attr name="ringColor" format="color"></attr>
    <attr name="ringWidth" format="dimension"></attr>
    <attr name="globuleColor" format="color"></attr>
    <attr name="globuleRadius" format="dimension"></attr>
    <attr name="cycleTime" format="float"></attr>
    <declare-styleable name="AccelerateCircularView">
        <attr name="ringColor" />
        <attr name="ringWidth" />
        <attr name="globuleColor" />
        <attr name="globuleRadius" />
        <attr name="cycleTime" />
    </declare-styleable>
</resources>
這裡定義了圓環顏色、圓環寬度、小球顏色、小球半徑、小球旋轉週期(用來設定小球旋轉一週所用的時間)這些屬性。並定義了屬性的的取值型別(format)。
2、獲取屬性
自定義屬性完成後,我們需要在自定義View的構造方法中逐一獲取這些屬性。這裡要注意通過attrsArray.recycle()及時回收TypedArray ,避免浪費記憶體資源 。public AccelerateCircularView(Context context) { this(context, null); } public AccelerateCircularView(Context context, AttributeSet attrs) { this(context, attrs, 0); } public AccelerateCircularView(Context context, AttributeSet attrs, int defStyle) { super(context, attrs, defStyle); TypedArray attrsArray = context.getTheme().obtainStyledAttributes( attrs, R.styleable.AccelerateCircularView, defStyle, 0); mRingColor = attrsArray.getColor( R.styleable.AccelerateCircularView_ringColor, Color.GRAY); mGlobuleColor = attrsArray.getColor( R.styleable.AccelerateCircularView_globuleColor, Color.BLUE); mRingWidth = attrsArray.getDimension( R.styleable.AccelerateCircularView_ringWidth, TypedValue .applyDimension(TypedValue.COMPLEX_UNIT_DIP, 1, getResources().getDisplayMetrics())); mGlobuleRadius = attrsArray.getDimension( R.styleable.AccelerateCircularView_globuleRadius, TypedValue .applyDimension(TypedValue.COMPLEX_UNIT_DIP, 6, getResources().getDisplayMetrics())); mCycleTime = attrsArray.getFloat( R.styleable.AccelerateCircularView_cycleTime, 3000); attrsArray.recycle(); mPaint = new Paint(); }
2、重寫onMeasure
@Override
    protected void onMeasure(int widthMeasureSpec, int heightMeasureSpec) {
        int mWidth , mHeight ;
        int widthMode = MeasureSpec.getMode(widthMeasureSpec);
        int widthSize = MeasureSpec.getSize(widthMeasureSpec);
        int heightMode = MeasureSpec.getMode(heightMeasureSpec);
        int heightSize = MeasureSpec.getSize(heightMeasureSpec);
        if (widthMode == MeasureSpec.EXACTLY) {
            mWidth = widthSize;
        } else {
            mWidth = 169;
            if (widthMode == MeasureSpec.AT_MOST) {
                mWidth = Math.min(mWidth, widthSize);
            }

        }
        if (heightMode == MeasureSpec.EXACTLY) {
            mHeight = heightSize;
        } else {
            mHeight = 169;
            if (heightMode == MeasureSpec.AT_MOST) {
                mHeight = Math.min(mWidth, heightSize);
            }

        }

        setMeasuredDimension(mWidth, mHeight);

    }
這裡主要是處理當VIew設定為“wrap_content”時需要自己給出測量結果,否則系統預設給我們測量的結果將是"match_parent"的大小。
3、重寫onDraw
 @Override
    protected void onDraw(Canvas canvas) {
        super.onDraw(canvas);

        int central = Math.min(getWidth(), getHeight()) / 2;

        mRingRadius = central - mGlobuleRadius;

        if (mGlobuleRadius < mRingWidth / 2) {// 小球嵌在環裡
            mRingRadius = central - mRingWidth / 2;
        }
        mPaint.setStrokeWidth(mRingWidth);
        mPaint.setStyle(Style.STROKE);
        mPaint.setAntiAlias(true);
        mPaint.setColor(mRingColor);
        canvas.drawCircle(central, central, mRingRadius, mPaint);// 繪製圓環
        mPaint.setStyle(Style.FILL);
        mPaint.setAntiAlias(true);
        mPaint.setColor(mGlobuleColor);

        if (currentAngle == -1) {
            startCirMotion();
        }
        drawGlobule(canvas, central);// 繪製小球
    }
/**
* 繪製小球,起始位置為圓環最低點
*
* @param canvas
* @param central
*/
private void drawGlobule(Canvas canvas, float central) {
float cx = central + (float) (mRingRadius * Math.cos(currentAngle));
float cy = (float) (central + mRingRadius * Math.sin(currentAngle));
canvas.drawCircle(cx, cy, mGlobuleRadius, mPaint);
}
這裡完成對控制元件的繪製,這裡根據圓環半徑、當前旋轉的角度結合三角函式關係來定位小球的當前座標。其中對小球速度的控制是通過屬性動畫獲取當前旋轉角度實現。
4、定義動畫
 /**
     * 旋轉小球
     */
    private void startCirMotion() {
        ValueAnimator animator = ValueAnimator.ofFloat(90f, 450f);//起始位置在最低點
        animator.setDuration((long) mCycleTime).setRepeatCount(
                ValueAnimator.INFINITE);
        animator.addUpdateListener(new AnimatorUpdateListener() {
            @Override
            public void onAnimationUpdate(ValueAnimator animation) {
                Float angle = (Float) animation.getAnimatedValue();
                currentAngle = angle * Math.PI / 180;
                invalidate();
            }
        });
        // animator.setInterpolator(new LinearInterpolator());// 勻速旋轉
        // 自定義開始減速到0後加速到初始值的Interpolator
        animator.setInterpolator(new TimeInterpolator() {

            @Override
            public float getInterpolation(float input) {
                float output;
                if (input < 0.5) {
                    output = (float) Math.sin(input * Math.PI) / 2;// 先加速
                } else {
                    output = 1 - (float) Math.sin(input * Math.PI) / 2;// 後減速,最高點(中間)速度為0
                }
                return output;
            }
        });
        animator.start();
    }
這裡通過自定義Interpolator來實現對動畫進度變化快慢的控制,動畫設定的值為小球的當前角度。初值90°保證小球從最低點開始運動。關於屬性動畫Interpolator的自定義實現可以參考一下 Android 屬性動畫探究(一)——Interpolator解析與自定義。以上便完成了View的定義,效果如下:

下載原始碼
