
Tinker熱修復初探
聽說熱修復已經很久了,但這是第一次嘗試去應用它。所以我對其它各種熱修復也沒什麼瞭解,這裡僅僅記下如何使用Tinker熱修復。
對於Tinker熱修復的介紹和問題這裡也不寫了,因為官方文件已經有了,戳這裡進入這裡只記下如何在自己的專案中使用Tinker熱修復。
步驟一、 通過gradle接入Tinker
在專案的build.gradle裡新增gradle依賴:
buildscript {
    repositories {
        jcenter()
    }
    dependencies {
        ......

        // NOTE: Do not place your application dependencies here; they belong
        // in the individual module build.gradle files
        classpath ('com.tencent.tinker:tinker-patch-gradle-plugin:1.7.7')
    }
}
在app的build.gradle裡新增依賴庫及外掛
dependencies {
    ......

    //可選,用於生成application類
    provided('com.tencent.tinker:tinker-android-anno:1.7.7')
    //tinker的核心庫
    compile('com.tencent.tinker:tinker-android-lib:1.7.7')
}

//apply tinker外掛
apply plugin: 'com.tencent.tinker.patch'
步驟二、 拷貝sample專案中app/build.gradle配置檔案相關內容
sample專案 app/build.gradle配置檔案地址戳這裡
裡面的內容很多,有些內容也許用不上,可以刪去。暫時可以把Tinker相關的配置內容全部拷貝。
這裡有一個問題需要注意:build.gradle檔案中有一個方法
這個方法生成TinkerId,TinkerId用來標識原始包和補丁包,也就是說給原始包打補丁的時候,原始包是通過這個TinkerId來找到補丁包的。所以這個值必須設定。def getTinkerIdValue() { return "TestTinker" + android.defaultConfig.versionName + "_" + android.defaultConfig.versionCode; //return hasProperty("TINKER_ID") ? TINKER_ID : gitSha() }
建議的設值方式是與app的版本號及版本名稱關聯起來。sample中原來的方法是通過git版本號生成,不太建議使用這種方式,因此配置中的getSha()方法也可以刪除。
步驟三、 自定義Application類
自定義一個Application類,讓他繼承DefaultApplicationLike類,如下:別忘了頂部的註解哦
@DefaultLifeCycle(application = "com.fff.xiaoqiang.testtikner.theApplication",
        flags = ShareConstants.TINKER_ENABLE_ALL,
        loadVerifyFlag = false)
public class MyApplication extends DefaultApplicationLike {

    public MyApplication(Application application, int tinkerFlags, boolean tinkerLoadVerifyFlag, long applicationStartElapsedTime, long applicationStartMillisTime, Intent tinkerResultIntent) {
        super(application, tinkerFlags, tinkerLoadVerifyFlag, applicationStartElapsedTime, applicationStartMillisTime, tinkerResultIntent);
    }

    @TargetApi(Build.VERSION_CODES.ICE_CREAM_SANDWICH)
    @Override
    public void onBaseContextAttached(Context base) {
        super.onBaseContextAttached(base);
        //you must install multiDex whatever tinker is installed!
        MultiDex.install(base);

        TinkerInstaller.install(this,
                new DefaultLoadReporter(base),
                new DefaultPatchReporter(base),
                new DefaultPatchListener(base),
                TinkerResultService.class,
                new UpgradePatch());

    }

    @TargetApi(Build.VERSION_CODES.ICE_CREAM_SANDWICH)
    public void registerActivityLifecycleCallbacks(Application.ActivityLifecycleCallbacks callback) {
        getApplication().registerActivityLifecycleCallbacks(callback);
    }

}
其中,TinkerInstaller.install方法為初始化Tinker方法,它有兩個構造方法,如下:
    public static Tinker install(ApplicationLike applicationLike) {
        ......
    }

    public static Tinker install(ApplicationLike applicationLike, LoadReporter loadReporter, PatchReporter patchReporter,
                               PatchListener listener, Class<? extends AbstractResultService> resultServiceClass,
                               AbstractPatch upgradePatchProcessor) {

        ......
    }
最開始的時候我是使用第一個構造方法,只需要傳入ApplicationLike這一個引數就可以了,也可以熱修復成功,但是每次修復成功後app就會被殺掉。這是因為如果使用第一個構造方法,Tinker就會使用預設引數,從第二個構造方法可以看到除了ApplicationLike外初始化的時候還使用了其它五個引數,他們的五個預設類分別是:
DefaultLoadReporter、 DefaultPatchReporter、 DefaultPatchListener 、DefaultTinkerResultService 和 UpgradePatch步驟四、 重寫DefaultTinkerResultService
因為我不希望修復成功後app立馬閃退,所以重寫了這個類,如下:
public class TinkerResultService extends DefaultTinkerResultService {
    private static final String TAG = "TinkerResultService";
    @Override
    public void onPatchResult(PatchResult result) {
//        super.onPatchResult(result);   把這行註釋掉,遮蔽掉父類中的方法
        if (result == null) {
            Log.e(TAG, "TinkerResultService received null result!!!!");
            return;
        }
        Log.e(TAG, "TinkerResultService receive result: %s" + result.toString());
        //first, we want to kill the recover process
//        TinkerServiceInternals.killTinkerPatchServiceProcess(getApplicationContext());

        if(result.isSuccess){    //修復成功
            Log.e(TAG,"修復成功");
            deleteRawPatchFile(new File(result.rawPatchFilePath));  //刪除補丁包
            Log.e(TAG,"刪除補丁");
        }

    }
}
步驟五、 別忽略了Manifest.xml檔案
因為手動添加了Application和Service,所以需要在Manifest.xml檔案中配置上去。注意application的 name別填錯。
<manifest xmlns:android="http://schemas.android.com/apk/res/android"
    package="com.fff.xiaoqiang.testtikner">

    <uses-permission android:name="android.permission.READ_EXTERNAL_STORAGE"/>
    <uses-permission android:name="android.permission.WRITE_EXTERNAL_STORAGE"/>
    <application
        android:name=".theApplication"
        android:allowBackup="true"
        android:icon="@mipmap/ic_launcher"
        android:label="@string/app_name"
        android:supportsRtl="true"
        android:theme="@style/AppTheme">
        <activity android:name=".MainActivity">
            <intent-filter>
                <action android:name="android.intent.action.MAIN" />

                <category android:name="android.intent.category.LAUNCHER" />
            </intent-filter>
        </activity>

        <service android:name=".TinkerResultService"
            android:exported="false"/>
    </application>

</manifest>程式碼配置完成之後,就可以開始打補丁包了
首先打基礎包,也就是和我們平時打包一樣,打包完成之後,會在專案檔案的build資料夾下生成一個bakApk資料夾,裡面有apk、txt等檔案。把這些檔案的全名稱填入build.gradle配置檔案中,如下:
ext {
    //for some reason, you may want to ignore tinkerBuild, such as instant run debug build?
    tinkerEnabled = true

    //for normal build
    //old apk file to build patch apk
    tinkerOldApkPath = "${bakPath}/app-debug.apk"
    //proguard mapping file to build patch apk
    tinkerApplyMappingPath = "${bakPath}/app-debug-mapping.txt"
    //resource R.txt to build patch apk, must input if there is resource changed
    tinkerApplyResourcePath = "${bakPath}/app-debug-R.txt"

    //only use for build all flavor, if not, just ignore this field
    tinkerBuildFlavorDirectory = "${bakPath}/app-0209-19-39-45"
}
tinkerOldApkPath表示原始包路徑,
tinkerApplyMappingPath表示原始包mapping檔案路徑,沒有的話可以不要管
tinkerApplyResourcePath表示原始包資原始檔路徑
tinkerBuildFlavorDirectory表示使用flavor多渠道打包時,原始包資料夾路徑。如果使用了flavor多渠道打包,只需要填這一個路徑就行,上面三個可以不要管。如果沒有使用flavor多渠道打包,這個路徑也可以不要管。
基礎包打完,配置好build.gradle之後。可以試著去修改java檔案中的程式碼,或者修改layout資原始檔等,模擬修復原始包中的bug。修改完之後,便可以使用gradle打補丁包。
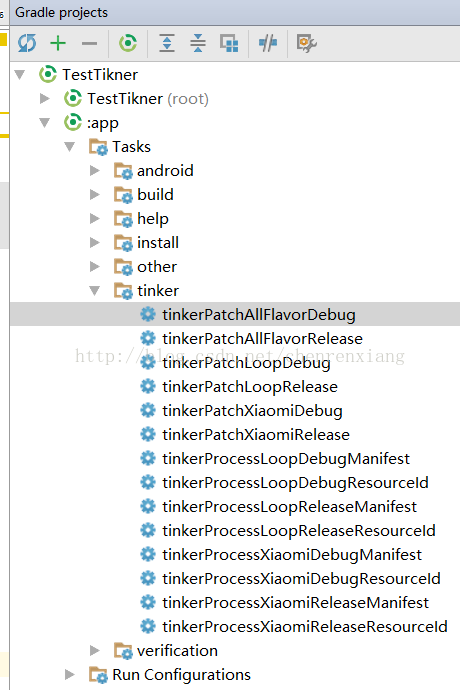
因為我使用了flavor多渠道打包,所以會有這麼多內容。雙擊tinker下你需要的打補丁包版本(注意補丁包要和原始包版本一樣),就會生成補丁包了。補丁包在專案檔案中的路徑為 app\build\outputs\tinkerPatch。 預設生成的補丁包副檔名是.apk,也可以改為其他型別。把補丁包放入手機sd卡下。
然後在app中觸發熱修復程式碼,如下:
TinkerInstaller.onReceiveUpgradePatch(getApplicationContext(), Environment.getExternalStorageDirectory().getAbsolutePath() + "/patch_signed_7zip.apk");一個思考: 在正式環境中,熱修復應該是這樣進行的。 後臺應該提供一個介面,每次app啟動的時候,訪問這個介面看需不需要熱修復,如果需要,後臺要返回補丁包的下載地址。app獲取到補丁包地址後開始下載補丁包到手機中,下載完成之後啟動熱修復,也就是執行上面那句程式碼。 修復完成之後,app需要重新啟動,修復才會生效。
這是第一次使用熱修復,對於Tinker也還有許多東西沒弄清楚。要投入真正的使用也許還會遇到其它許多問題,比如apk混淆等。歡迎一起交流。
幸好官方文件已經算比較詳細了,還有sample專案可以參考。