
Nine-Patch使用方法
阿新 • • 發佈:2019-02-17
開始寫程式: HelloNinePatch
範例HelloNinePatch的實作方式如下。
Step 1. 建立一個新的Android專案,命名為HelloNinePatch。
Step 2. 將arrow.9.png託曳(drag)到HelloNinePatch專案裡的「res/drawable」目錄下。如圖1。
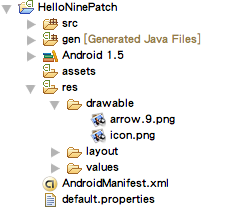
圖1: 將arrow.9.png放進res/drawable資料夾
Step 3. 修改UI(res/layout/main.xml),設計出上一篇教學(#30)裡的圖2畫面。main.xml的內容如下。
<?xml version="1.0" encoding="utf-8"?>
<LinearLayout xmlns:android="http://schemas.android.com/apk/res/android"
    android:orientation="vertical"
    android:layout_width="fill_parent"
    android:layout_height="fill_parent"
    >
<Button
    android:layout_width="wrap_content"
    android:layout_height="wrap_content"
    android:text="small world"
    android:textSize="12sp"
    android:background="@drawable/arrow"
    />
<Button
    android:layout_width="wrap_content"
    android:layout_height="wrap_content"
    android:text="big world"
    android:textSize="24sp"
    android:background="@drawable/arrow"
    />
<Button
    android:layout_width="wrap_content"
    android:layout_height="wrap_content"
    android:text="super world"
    android:textSize="48sp"
    android:background="@drawable/arrow"
    />
</LinearLayout>
這裡的做法是,在UI上擺放Button元件,並設定Button上的文字及大小。透過「android:background」屬性的設定,我們將Button的背景設定為「@drawable/arrow」,即「drawable資源(drawable/目錄下)裡的arrow圖檔」,Android框架會去找到arrow.9.png檔案。
因為arrow.9.png是一張NinePatch圖檔,因此會隨著Button上的文字大小延展。
Step 4: 完成HellNinePatch
程式碼不需要做任何修改,直接執行HelloNinePatch專案即可。