vue+vueRouter+webpack的簡單例項
最近vue更新的2.0版本,唉,我是在2.0版本前學習的,現在更新了又要看一遍了,關鍵是我之前看了3個星期2.0就更新了,vux還沒同步更新,導致我用vux時要將vue的版本降回1.x,vue-router也要降回1.0才能使用~~~所以今天就寫一個單頁的下方tabbar的例項來記錄一下吧,也希望各位在用vue全家桶時少點坑吧,當然不是用vux= =…只是仿造而已
這裡的demo我會使用vue2.0的simple-template作為腳手架,vue-router版本也是2.0的,如果想使用vux作為元件庫的話,大家就降版本吧~哦對了,如果大家正式寫專案的話,記得要用vuex,不是開玩笑,我之前寫了個簡單的單頁應用就沒用vuex也沒用元件庫都是手寫,然後元件之間的通訊各種煩,你能想象一直向上廣播事件$boardCast
$emit的無語嗎……到最後自己都亂了,所以不是自己寫demo而是開始專案的話還是推薦使用vuex了,用過react的同學的話就知道了,vuex跟redux是一樣的~只是一個用於vue,一個用於react而已.
好了,開始構建吧~
Prerequisites: Node.js (>=4.x, 6.x preferred) and Git.
前提當然是裝了node且版本已經升級為6.x,在尤大大的vue-cli的使用教程中有說明的,對這裡我們是採用自動化構建的方式建立配置模板
首先從零開始,開啟打算建立的專案根目錄,再開啟git的命令列吧~
1、全域性安裝vue-cli腳手架
npm install -g vue-cli
2、初始化webpack+vue的腳手架模板,這裡我是用的簡化版模板,不帶單元測試的~因為多出來的很多我看不懂……….簡化版的我大概能看懂,也是我菜的原因= =…
vue init webpack-simple <project-name> 這裡我定個名字就叫test吧 vue init webpack-simple test 3、按照步驟來就好
cd test npm install 這裡會安裝babel、vue的載入器等各類依賴,這裡要等一會,有點慢 npm run dev 這裡跑一下本地檔案,看看是否搭建完成,如果出現vue的頁面就完畢了 4、安裝vue-router與需要的元件庫,這裡我裝一個餓了麼的元件庫ElementUI吧,地址
npm install vue-router npm i element-ui -D 5、記得安裝css的載入器,如果你是用less或者sass的話,自己對應裝了新增到載入器就好
npm install style-loader css-loader 如果沒錯的話,你的載入器現在應該是這樣的,最後在package.json裡面依賴檔案要加上element-ui
//package.json
"dependencies": {
    "element-ui": "^1.0.4",
    "vue": "^2.1.0"
  }
//webpack.config.js
module: {
    rules: [
      {
        test: /\.vue$/,
        loader: 'vue-loader',
        options: {
          // vue-loader options go here
        }
      },
      {
        test: /\.js$/,
        loader: 'babel-loader',
        exclude: /node_modules/
      },
      {
        test: /\.css$/,
        loader: 'style-loader!css-loader'
      },
      {//添上這條規則,這是elementUI要用到的
        test: /\.(eot|svg|ttf|woff|woff2)(\?\S*)?$/,
        loader: 'file-loader'
      },
      {
        test: /\.(png|jpg|gif|svg)$/,
        loader: 'file-loader',
        options: {
          name: '[name].[ext]?[hash]'
        }
      }
    ]
  }
6、分模組,寫元件
下面先展示我的檔案目錄
test
- dist
- build.js
- node_modules
- …
- src
- App.vue
- discovery.vue
- index.vue
- info.vue
- main.js
- setting.vue
- .babelrc
- .gitignore
- index.html
- package.json
- README.md
webpack.config.js
//App.vue(這裡仿製vux的下方tabbar寫了一個元件,所以有點多,程式碼有點爛,請原諒)
<template>
  <div id="app">
    <router-view></router-view>
    <div class="tabbar" @click="select">
      <router-link :class="{'selected':indexPage === 'index'}" to="/index">
        <img src="https://o84lhz5xo.qnssl.com/master/src/assets/demo/icon_nav_button.png" alt="">
        <label>主頁</label>
      </router-link>
      <router-link :class="{'selected':indexPage === 'info'}" to="/info">
        <img src="https://o84lhz5xo.qnssl.com/master/src/assets/demo/icon_nav_msg.png" alt="">
        <label>資訊</label>
      </router-link>
      <router-link :class="{'selected':indexPage === 'discovery'}" to="/discovery">
        <img src="https://o84lhz5xo.qnssl.com/master/src/assets/demo/icon_nav_article.png" alt="">
        <label>發現</label>
      </router-link>
      <router-link :class="{'selected':indexPage === 'setting'}" to="/setting">
        <img src="https://o84lhz5xo.qnssl.com/master/src/assets/demo/icon_nav_cell.png" alt="">
        <label>設定</label>
      </router-link>
    </div>
   </div>
</template>


<script>
  export default {
    name: 'app',
    data () {
      return {
        radio:'1',
        indexPage:'index'
      }
    },
    methods:{
      select(event){
        function findA(target){
          if(target.nodeName != 'A'){
            return findA(target.parentNode)
          }
          return target;
        }

        var modules = findA(event.target).lastElementChild.innerHTML;

        if(modules == '主頁'){
          this.indexPage='index';
        }
        else if(modules == '資訊'){
          this.indexPage='info';
        }
        else if(modules == '發現'){
          this.indexPage='discovery';
        }
        else if(modules == '設定'){
          this.indexPage='setting';
        }
      }
    }
  }
</script>

<style>
  html,body{
    margin:0;
    padding:0;
  }
  #app {
    font-family: 'microsoft yahei', Helvetica, Arial, sans-serif;
    -webkit-font-smoothing: antialiased;
    -moz-osx-font-smoothing: grayscale;
    text-align: center;
    color: #2c3e50;
  }
  .tabbar{
    position: fixed;
    bottom:0;
    display: flex;
    width:100%;
    height:55px;
    flex-direction:row;
    background: rgba(247,247,250,.9);
    font-size:12px;
  }
  .tabbar:before{
    content: " ";
    position: absolute;
    left: 0;
    top: 0;
    width: 100%;
    height: 1px;
    border-top: 1px solid #979797;
    color: #979797;
    -webkit-transform-origin: 0 0;
    transform-origin: 0 0;
    -webkit-transform: scaleY(.5);
    transform: scaleY(.5);
    background-color: white;
  }
  .tabbar a{
    flex:1;
    color: #888;
  }
  .tabbar a img{
    display: block;
    width:24px;
    height:24px;
    margin:3px auto;
    padding-top:5px;
  }

  .selected{
    color: #09bb07 !important;
  }

  h1, h2 {
    font-weight: normal;
  }

  ul {
    list-style-type: none;
    padding: 0;
  }

  li {
    display: inline-block;
    margin: 0 10px;
  }

  a {
    text-decoration: none;
  }
</style>
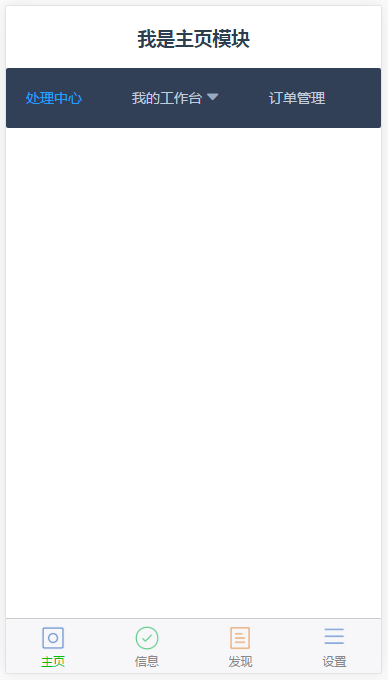
//index.vue(主頁模組,套了一點elementUI,有點東西好看點= =..)
<template>
    <div>
        <h3>我是主頁模組</h3>
        <el-menu theme="dark" default-active="1" class="el-menu-demo" mode="horizontal"   @select="handleSelect">
            <el-menu-item index="1">處理中心</el-menu-item>
            <el-submenu index="2">
                <template slot="title">我的工作臺</template>
                <el-menu-item index="2-1">選項1</el-menu-item>
                <el-menu-item index="2-2">選項2</el-menu-item>
                <el-menu-item index="2-3">選項3</el-menu-item>
            </el-submenu>
            <el-menu-item index="3">訂單管理</el-menu-item>
        </el-menu>
    </div>

</template>

<script>
    export default {
        methods:{
            handleSelect:function(key,keyPath){
                console.log(key,keyPath);
            }
        }
    }
</script>
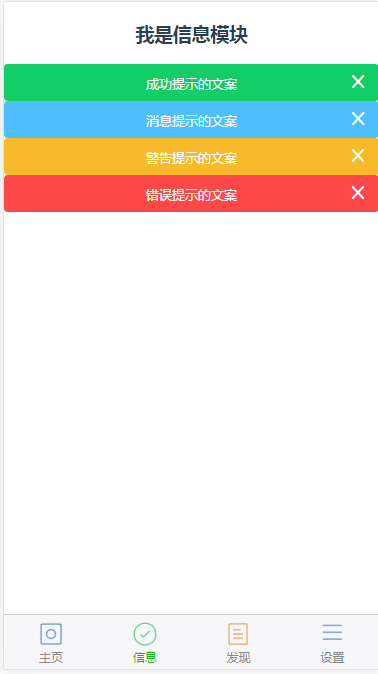
//info.vue(主頁模組,套了一點elementUI,有點東西好看點= =..)
<template> <h3>{{msg}}</h3> <div> <el-alert title="成功提示的文案" type="success"> </el-alert> <el-alert title="訊息提示的文案" type="info"> </el-alert> <el-alert title="警告提示的文案" type="warning"> </el-alert> <el-alert title="錯誤提示的文案" type="error"> </el-alert> </div> </template> <script> export default { data(){ return { msg:'我是資訊模組' } } } </script>- dist
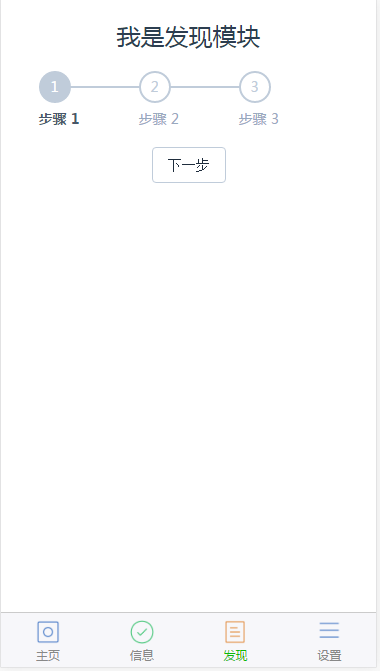
//discovery.vue(發現模組)
<template>
    <div>
        <h2>{{msg}}</h2>
        <el-steps :space="100" :active="active" finish-status="success">
            <el-step title="步驟 1"></el-step>
            <el-step title="步驟 2"></el-step>
            <el-step title="步驟 3"></el-step>
        </el-steps>

        <el-button style="margin-top: 12px;" @click="next">下一步</el-button>
    </div>
</template>

<script>
    export default {
        data(){
            return {
                active:0,
                msg:'我是發現模組'
            }
        },
        methods:{
            next:function(){
                if(this.active++ > 2) this.active = 0
            }
        }
    }
</script>
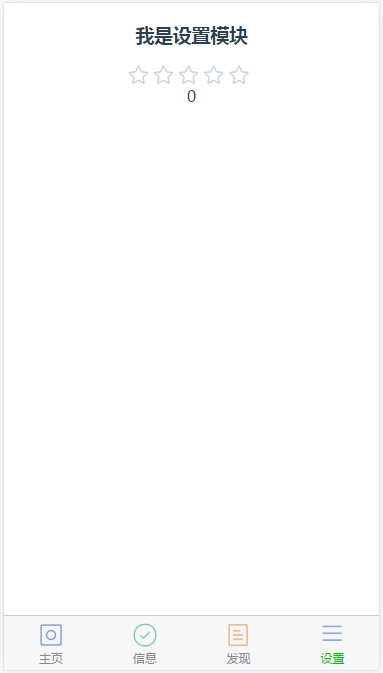
//setting.vue(設定模組)
<template>
    <div class="block">
        <h3>{{msg}}</h3>
        <el-rate
                v-model="value2"
                :colors="['#99A9BF', '#F7BA2A', '#FF9900']"
                :allow-half="true">
        </el-rate>
        <span>{{value2}}</span>
    </div>
</template>

<script>
    export default {
        data() {
            return {
                value2: null,
                msg:'我是設定模組'
            }
        }
    }
</script>
//main.js(主檔案,宣告全域性router)
import Vue from 'vue'
import Router from 'vue-router'
import ElementUI from 'element-ui'
import 'element-ui/lib/theme-default/index.css'
import App from './App.vue'
import index from './index.vue'
import info from './info.vue'
import discovery from './discovery.vue'
import setting from './setting.vue'

Vue.use(Router);
Vue.use(ElementUI);

const router = new Router({
  routes:[
    {
      path:'/',
      component:index
    },
    {
      path:'/index',
      component:index
    },
    {
      path:'/info',
      component:info
    },
    {
      path:'/discovery',
      component:discovery
    },
    {
      path:'/setting',
      component:setting
    }
  ]
});

new Vue({
      el: '#app',
      render: h => h(App),
    router:router
});
最後就是webpack的入口檔案必然是要改成main.js的,出口檔案的資料夾為dist,名字就你自己定了,在index.html里加上就好~具體可以在我的另一篇筆記”初識webpack “中有寫過
最後npm run dev 檢視效果就ok~如果想改繫結的埠號或者主機號,則在package.json中對應改就好
example:
"scripts": {
    "dev": "cross-env NODE_ENV=development webpack-dev-server --port 8181 --open --inline --hot",
    "build": "cross-env NODE_ENV=production webpack --progress --hide-modules"
  }
其中埠號是dev中的 --port <port>,主機號則為--host <hostname/ip>就比如我這裡則繫結的為8181埠。
最後給大家展示一下效果圖吧~沒看過vue-router的同學請自行看文件= =…我這裡只是最基礎的展示了而已

http://localhost:8181/#/index

http://localhost:8181/#/info

http://localhost:8181/#/discovery

http://localhost:8181/#/setting
其實都是一些很簡單的程式碼和元件劃分,大家應該看一看就明白的了,最後vux你快更新2.0吧555~不說了我去看vuex了,88~
