
工作筆記四——vueJS在移動端使用富文字編輯器
本文主要介紹vue移動端使用富文字編輯器的使用及常見問題處理。參考元件vue-html5-editor。
1.專案建立與初始化
建立一個vue-cli專案,建議在安裝的時候不要使用ESLINT做程式碼檢查,練習的專案不需要這種檢查機制,會很浪費時間。還有一些自動化測試的外掛也最好不要裝,影響效率。
在安裝好腳手架的依賴後,要執行 npm install vue-html5-editor -S 來安裝這個富文字外掛,由於這個富文字外掛的圖示是依賴font-awesome.css的,所以要npm install font-awesome.css 安裝這個css然後在main.js中引入這個css import "font-awesome/css/font-awesome.css"
。
2.使用vue-html5-editor富文字編輯器
新建一個common資料夾用於存放我們的工具類js檔案,然後將下面的程式碼copy進去:
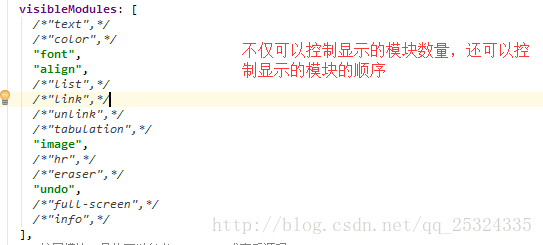
/**
 * author: Joker
 * creationDate: 2018/1/22
 * usage:
 */
import Vue from 'vue'
import VueHtml5Editor from 'vue-html5-editor'
export default function () {
  let opt = {
    // 全域性元件名稱,使用new VueHtml5Editor(options)時該選項無效
    name: "vue-html5-editor",
    // 是否顯示模組名稱,開啟的話會在工具欄的圖示後臺直接顯示名稱
    showModuleName: true,
    // 自定義各個圖示的class,預設使用的是font-awesome提供的圖示
    icons: {
      text: "fa fa-pencil",
      color: "fa fa-paint-brush",
      font: "fa fa-font",
      align: "fa fa-align-justify",
      list: "fa fa-list",
      link: "fa fa-chain",
      unlink: "fa fa-chain-broken",
      tabulation: "fa fa-table",
      image: "fa fa-file-image-o",
      hr: "fa fa-minus",
      eraser: "fa fa-eraser",
      undo: "fa-undo fa",
      "full-screen": "fa fa-arrows-alt",
      info: "fa fa-info",
    },
    // 配置圖片模組
    image: {
      // 檔案最大體積,單位位元組
      sizeLimit: 512 * 1024 * 10,
      // 上傳引數,預設把圖片轉為base64而不上傳
      // upload config,default null and convert image to base64
      upload: {
        url: null,
        headers: {},
        params: {},
        fieldName: {}
      },
      // 壓縮引數,預設使用localResizeIMG進行壓縮,設定為null禁止壓縮
      // width和height是檔案的最大寬高
      compress: {
        width: 600,
        height: 600,
        quality: 80
      },
      // 響應資料處理,最終返回圖片連結
      uploadHandler(responseText){
        //default accept json data like  {ok:false,msg:"unexpected"} or {ok:true,data:"image url"}
        var json = JSON.parse(responseText);
        console.info(json);
        if (!json.ok) {
          alert(json.msg)
        } else {
          return json.data
        }
      }
    },
    // 語言,內建的有英文(en-us)和中文(zh-cn)
    language: "zh-cn",
    // 自定義語言
    i18n: {
      "zh-cn": {
        "align": "對齊方式",
        "image": "圖片",
        "list": "列表",
        "link": "連結",
        "unlink": "去除連結",
        "table": "表格",
        "font": "文字",
        "full screen": "全屏",
        "text": "排版",
        "eraser": "格式清除",
        "info": "關於",
        "color": "顏色",
        "please enter a url": "請輸入地址",
        "create link": "建立連結",
        "bold": "加粗",
        "italic": "傾斜",
        "underline": "下劃線",
        "strike through": "刪除線",
        "subscript": "上標",
        "superscript": "下標",
        "heading": "標題",
        "font name": "字型",
        "font size": "文字大小",
        "left justify": "左對齊",
        "center justify": "居中",
        "right justify": "右對齊",
        "ordered list": "有序列表",
        "unordered list": "無序列表",
        "fore color": "前景色",
        "background color": "背景色",
        "row count": "行數",
        "column count": "列數",
        "save": "確定",
        "upload": "上傳",
        "progress": "進度",
        "unknown": "未知",
        "please wait": "請稍等",
        "error": "錯誤",
        "abort": "中斷",
        "reset": "重置"
      }
    },
    // 隱藏不想要顯示出來的模組
    hiddenModules: [],
    // 自定義要顯示的模組,並控制順序
    visibleModules: [
      "text",
      "color",
      "font",
      "align",
      "list",
      "link",
      "unlink",
      "tabulation",
      "image",
      "hr",
      "eraser",
      "undo",
      "full-screen",
      "info",
    ],
    // 擴充套件模組,具體可以參考examples或檢視原始碼
    // extended modules
    modules: {
      //omit,reference to source code of build-in modules
    }
  };
  Vue.use(VueHtml5Editor, opt);
}
接著在main.js中引入這個初始化的函式:
import initRichText from './common/initHTMLEditor';
initRichText();
準備工作已經完成了,我們可以使用這個元件了:
    <template>
      <div class="content">
        <vue-html5-editor :content="content" :height="400"
                          @change="updateData"></vue-html5-editor>

      </div>
    </template>
    <style scoped>

    </style>
    <script>
      export default {
        data(){
          return {content: '請輸入文章內容'}
        },
        methods: {
          updateData(e = ''){
            this.content = e;
            console.info(e);
          }
        }
      }
    </script>
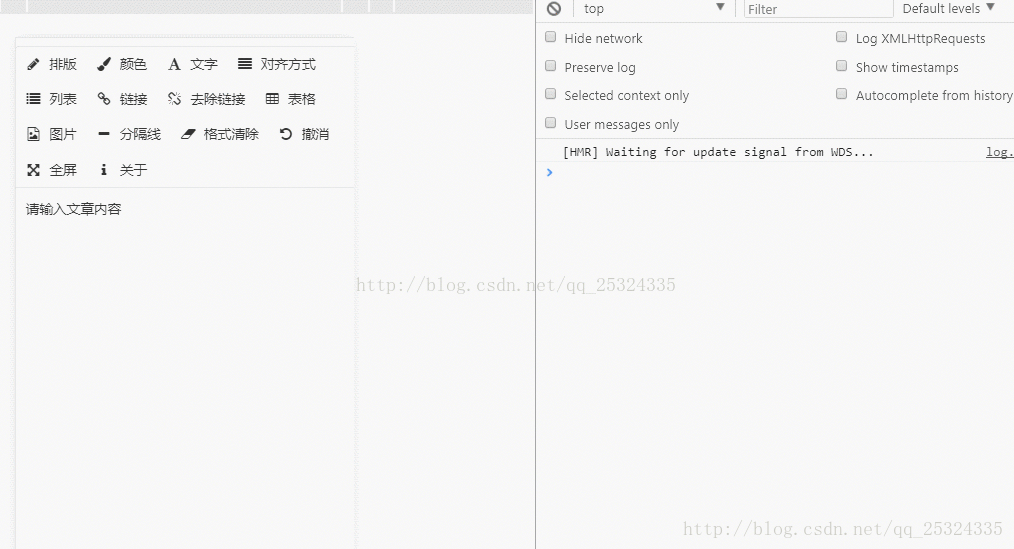
這個height屬性是設定內容區的高度,content是內容區的資料內容,@change事件是內容區的監聽事件,會在發生變化時觸發,該函式接收一個引數,表示當前編輯器中的內容。執行結果如下(這裡對圖片的操作是轉成base64的字串):
3.常見問題解決
a.自定義工具欄的模組
如果不想要顯示這麼多的工具,則只要配置visibleModules即可:
b.工具欄的樣式修改
在移動端我們通常希望工具欄可以固定不動,並且顯示在頁面最下方,這時候我們要修改該元件的核心js裡面的樣式程式碼:
主要是將
var template$9 = "<div class=\"vue-html5-editor\" :class=\"{'full-screen':fullScreen}\".......省略很長的程式碼....) 和
__$styleInject(`.vue-html5-editor,.vue-html5-editor *{box-sizing:border-box}.....省略很長的程式碼......) 分別用下面兩個代替:
1.元件的字串模板
    var  temlate$9=`
     <div class="vue-html5-editor" :class="{'full-screen':fullScreen}" :style="{'z-index':zIndex}">

         <div class="content" ref="content" :style="contentStyle" contenteditable
              @click="toggleDashboard(dashboard)"></div>

         <div class="toolbar" :style="{'z-index':zIndex+1}" ref="toolbar">
           <ul>
             <template v-for="module in modules">
               <li :title="locale[module.i18n]" @click="activeModule(module)"><span class="icon"
                                                                                    :class="module.icon"></span>
                 <template v-if="showModuleName === undefined ? defaultShowModuleName : showModuleName">
                    {{locale[module.i18n]}}
                 </template>
               </li>
             </template>
           </ul>
           <div class="dashboard" v-show="dashboard" ref="dashboard">
             <keep-alive>
               <div v-show="dashboard" :is="dashboard"></div>
             </keep-alive>
           </div>
         </div>

       </div>
     `
和 2.主要的樣式字串
 `
  .vue-html5-editor, .vue-html5-editor * {
    box-sizing: border-box
  }

  .vue-html5-editor {
    font-size: 14px;
    line-height: 1.5;
    background-color: #fff;
    color: #333;
    border: 1px solid #ddd;
    text-align: left;
    border-radius: 5px;
    overflow: hidden
  }

  .vue-html5-editor.full-screen {
    position: fixed !important;
    top: 0 !important;
    left: 0 !important;
    bottom: 0 !important;
    right: 0 !important;
    border-radius: 0
  }

  .vue-html5-editor > .toolbar {
    position: relative;
    background-color: inherit;
    border-top:1px solid #ccc
  }

  .vue-html5-editor > .toolbar > ul {
    list-style: none;
    padding: 0;
    margin: 0;
    border-bottom: 1px solid #ddd
  }

  .vue-html5-editor > .toolbar > ul > li {
    display: inline-block;
    cursor: pointer;
    text-align: center;
    line-height: 36px;
    padding: 0 10px
  }

  .vue-html5-editor > .toolbar > ul > li .icon {
    height: 16px;
    width: 16px;
    display: inline-block;
    vertical-align: middle
  }

  .vue-html5-editor > .toolbar > .dashboard {
    background-color: inherit;
    border-top: 1px solid #ddd;
    padding: 10px;
    position: absolute;
    bottom: 100%;
    left: 0;
    right: 0;
    overflow: auto
  }

  .vue-html5-editor > .toolbar > .dashboard input[type=text], .vue-html5-editor > .toolbar > .dashboard input[type=number], .vue-html5-editor > .toolbar > .dashboard select {
    padding: 6px 12px;
    color: inherit;
    background-color: transparent;
    border: 1px solid #ddd;
    border-radius: 5px
  }

  .vue-html5-editor > .toolbar > .dashboard input[type=text]:hover, .vue-html5-editor > .toolbar > .dashboard input[type=number]:hover, .vue-html5-editor > .toolbar > .dashboard select:hover {
    border-color: #bebebe
  }

  .vue-html5-editor > .toolbar > .dashboard input[type=text][disabled], .vue-html5-editor > .toolbar > .dashboard input[type=text][readonly], .vue-html5-editor > .toolbar > .dashboard input[type=number][disabled], .vue-html5-editor > .toolbar > .dashboard input[type=number][readonly], .vue-html5-editor > .toolbar > .dashboard select[disabled], .vue-html5-editor > .toolbar > .dashboard select[readonly] {
    background-color: #eee;
    opacity: 1
  }

  .vue-html5-editor > .toolbar > .dashboard input[type=text][disabled], .vue-html5-editor > .toolbar > .dashboard input[type=number][disabled], .vue-html5-editor > .toolbar > .dashboard select[disabled] {
    cursor: not-allowed
  }

  .vue-html5-editor > .toolbar > .dashboard button {
    color: inherit;
    background-color: inherit;
    padding: 6px 12px;
    white-space: nowrap;
    vertical-align: middle;
    cursor: pointer;
    -webkit-user-select: none;
    -moz-user-select: none;
    -ms-user-select: none;
    user-select: none;
    border: 1px solid #ddd;
    border-radius: 5px;
    margin-right: 4px;
    margin-bottom: 4px
  }

  .vue-html5-editor > .toolbar > .dashboard button:hover {
    border-color: #bebebe
  }

  .vue-html5-editor > .toolbar > .dashboard button[disabled] {
    cursor: not-allowed;
    opacity: .68
  }

  .vue-html5-editor > .toolbar > .dashboard button:last-child {
    margin-right: 0
  }

  .vue-html5-editor > .toolbar > .dashboard label {
    font-weight: bolder
  }

  .vue-html5-editor > .content {
    overflow: scroll;
    padding: 10px;
    max-height:500px
  }

  .vue-html5-editor > .content:focus {
    outline: 0
  }`
修改的地方不多,請參照具體的樣式自己配置自定義的模板。
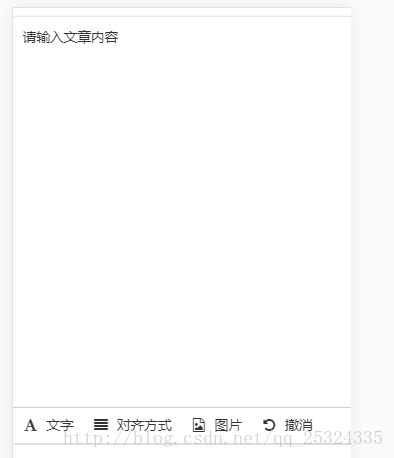
我這個修改完以後顯示如下。而且輸入很長的資料後,只是內容區變成上下滾動的,工具欄不動。
c.移動端圖片上傳的處理
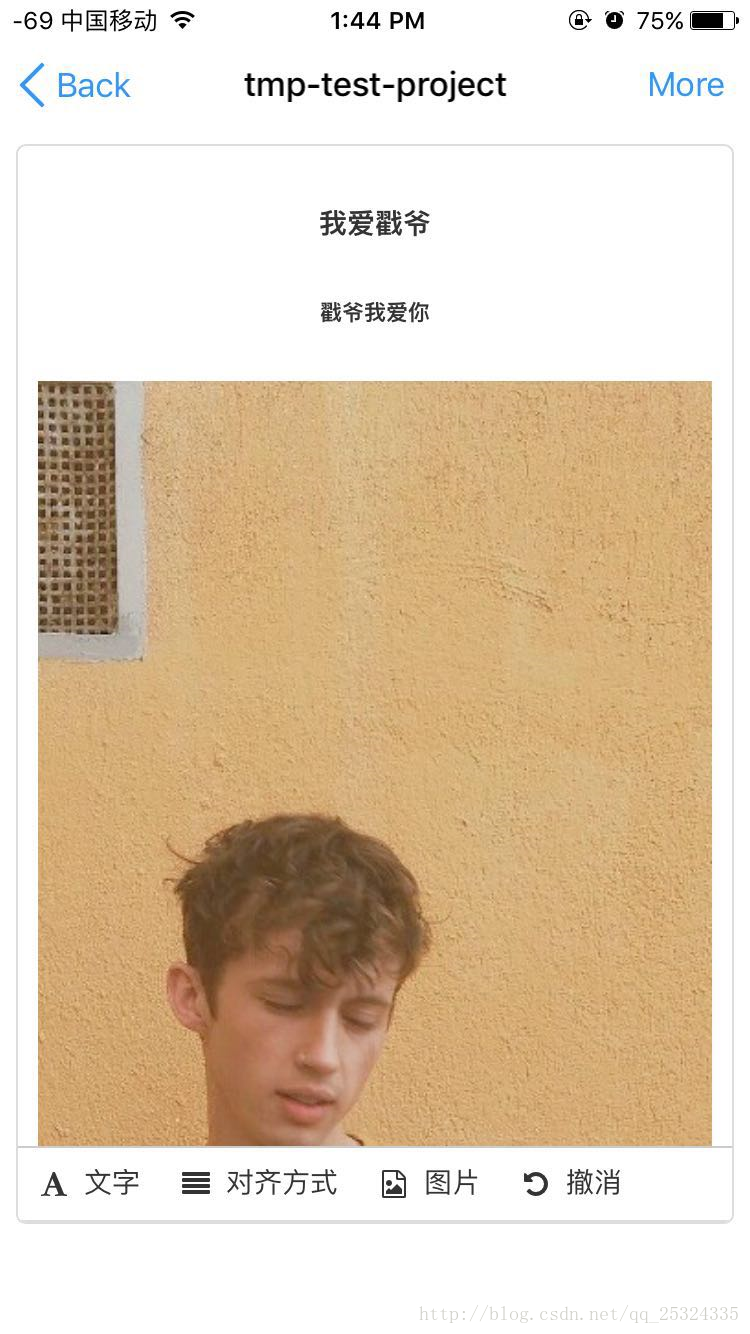
這裡我沒有配置服務端的上傳檔案的介面,所以我就直接將圖片轉成base64的來處理。但是這樣會有問題,在PC端圖片是可以修改大小的,但是在移動端上傳的圖片上是原圖,也就是很大,圖文混排的時候非常不好看,也不好編輯。這時候我做的處理挺投機取巧的,但是也是可行的方法。我們知道change函式是在內容發生變化時觸發的,這時候我們只要將獲取到的內容做一下修改即可,看程式碼:
    updateData(e = ''){
       let c1 = e.replace(/<img width="100%"/g, '<img');
       let c2 = c1.replace(/<img/g, '<img width="100%"');
       this.content = c2;
     }
這樣就OK了。
看移動端的效果圖:圖片是按寬100%自適應縮放的。效果達到。
主要參考 /src/pages/tool/RichTextTest.vue (使用),/src/init-plugins.js(配置)
如果有bug歡迎指正,不勝感激;如果對您有幫助,給個star,謝謝~~